Create Service Configurations
I. Introduction
In the previous sections we have created our application and added our entities along with their managing services.
We then created all the use cases which were identified in the design phase and finally we included one blank page to serve as a placeholder for your custom page to be implemented.
Now, all the business requirements and design specifications have been successfully created using Averos Designer, you might wonder what else is remaining to do so far.
Well, there is one more thing to do so that our application become fully functional.
Remember we spoke about Averos Services ?
Of course, entity managing services we created earlier are one of them.
As explained in the prerequisites section, these services are the bridges that bind our application to the external service backends
These bindings are created using averos service configurations.
In this section, we are going to create averos service configurations for all our averos services.
By the end of this section, your application will be ready to be deployed and executed.
However, before generating our application; we will teach it a new language so that we could target a wider audience. This will be part of the final section in this tutorial.
Now here is the list of the averos services that exist in our application:
- ToDoAreaService (the managing service which we created for
ToDoArea)- ToDoTaskService (the managing service which we created for
ToDoTask)- AuthService (the default averos service for providing
authentication)- UserService (the default averos service for
managing users)
Let’s create one service configuration for each averos service.
II. ToDoAreaService Service Configuration
Go back to Averos Designer and expand the Configurations components set located in the Averos Components panel.
Drag and drop one Service Configuration component into the canvas as shown in the picture below:
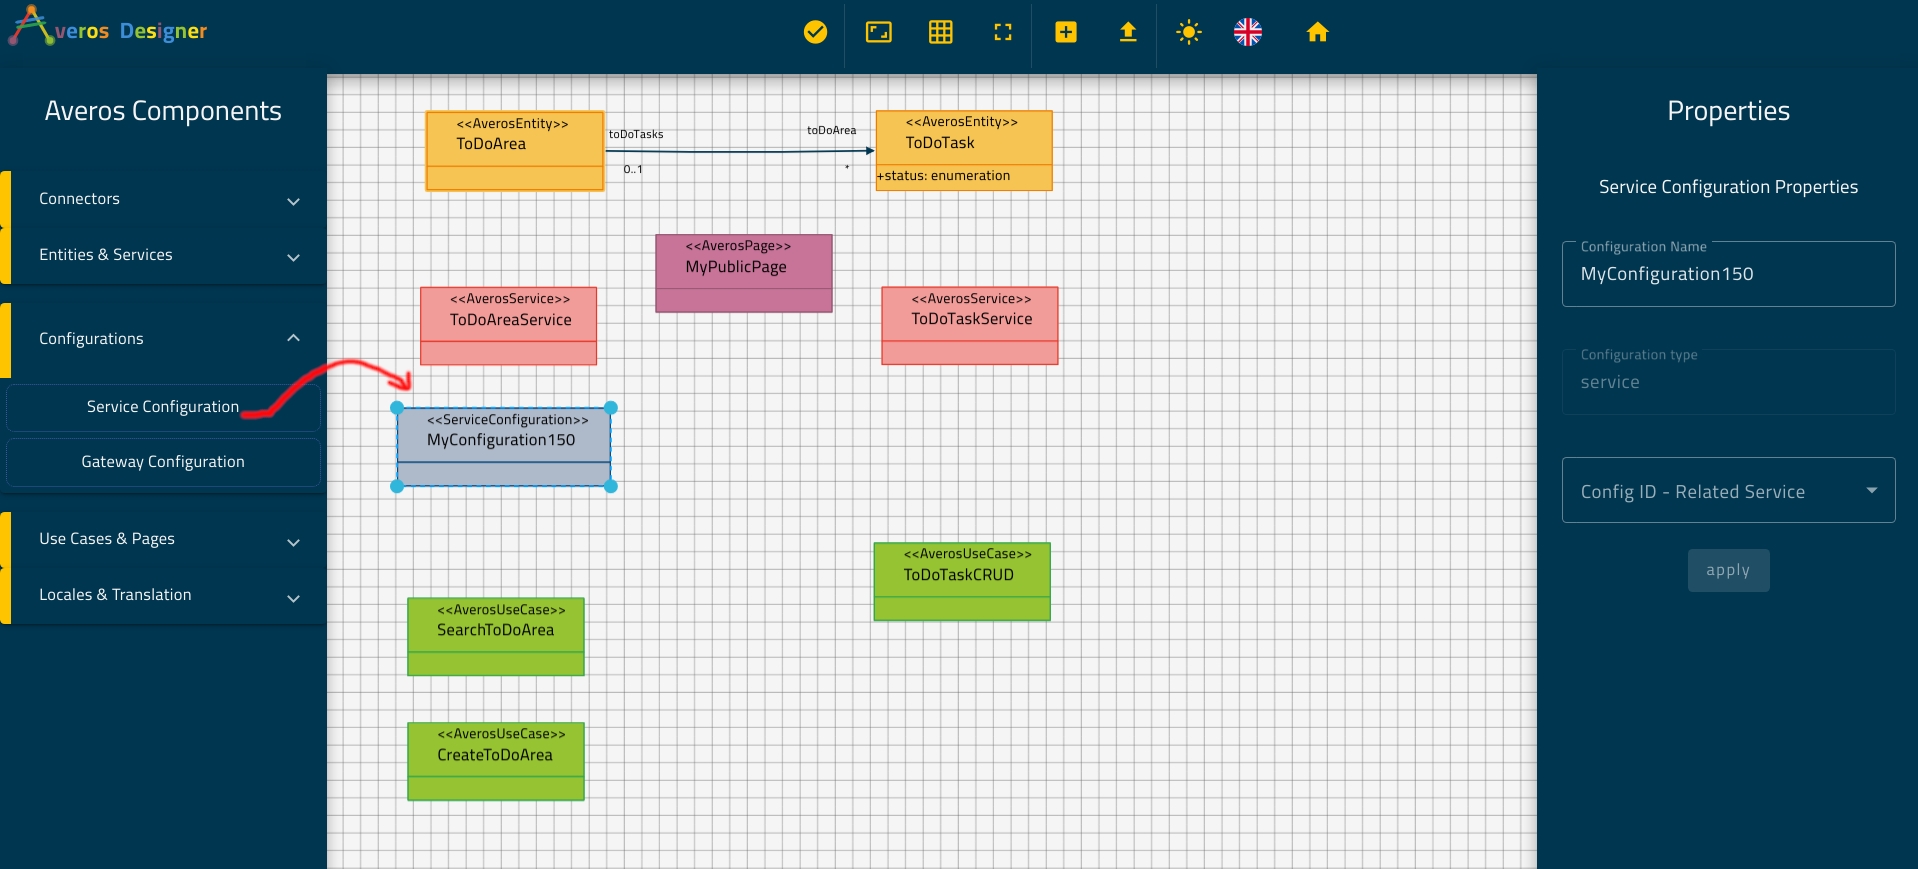
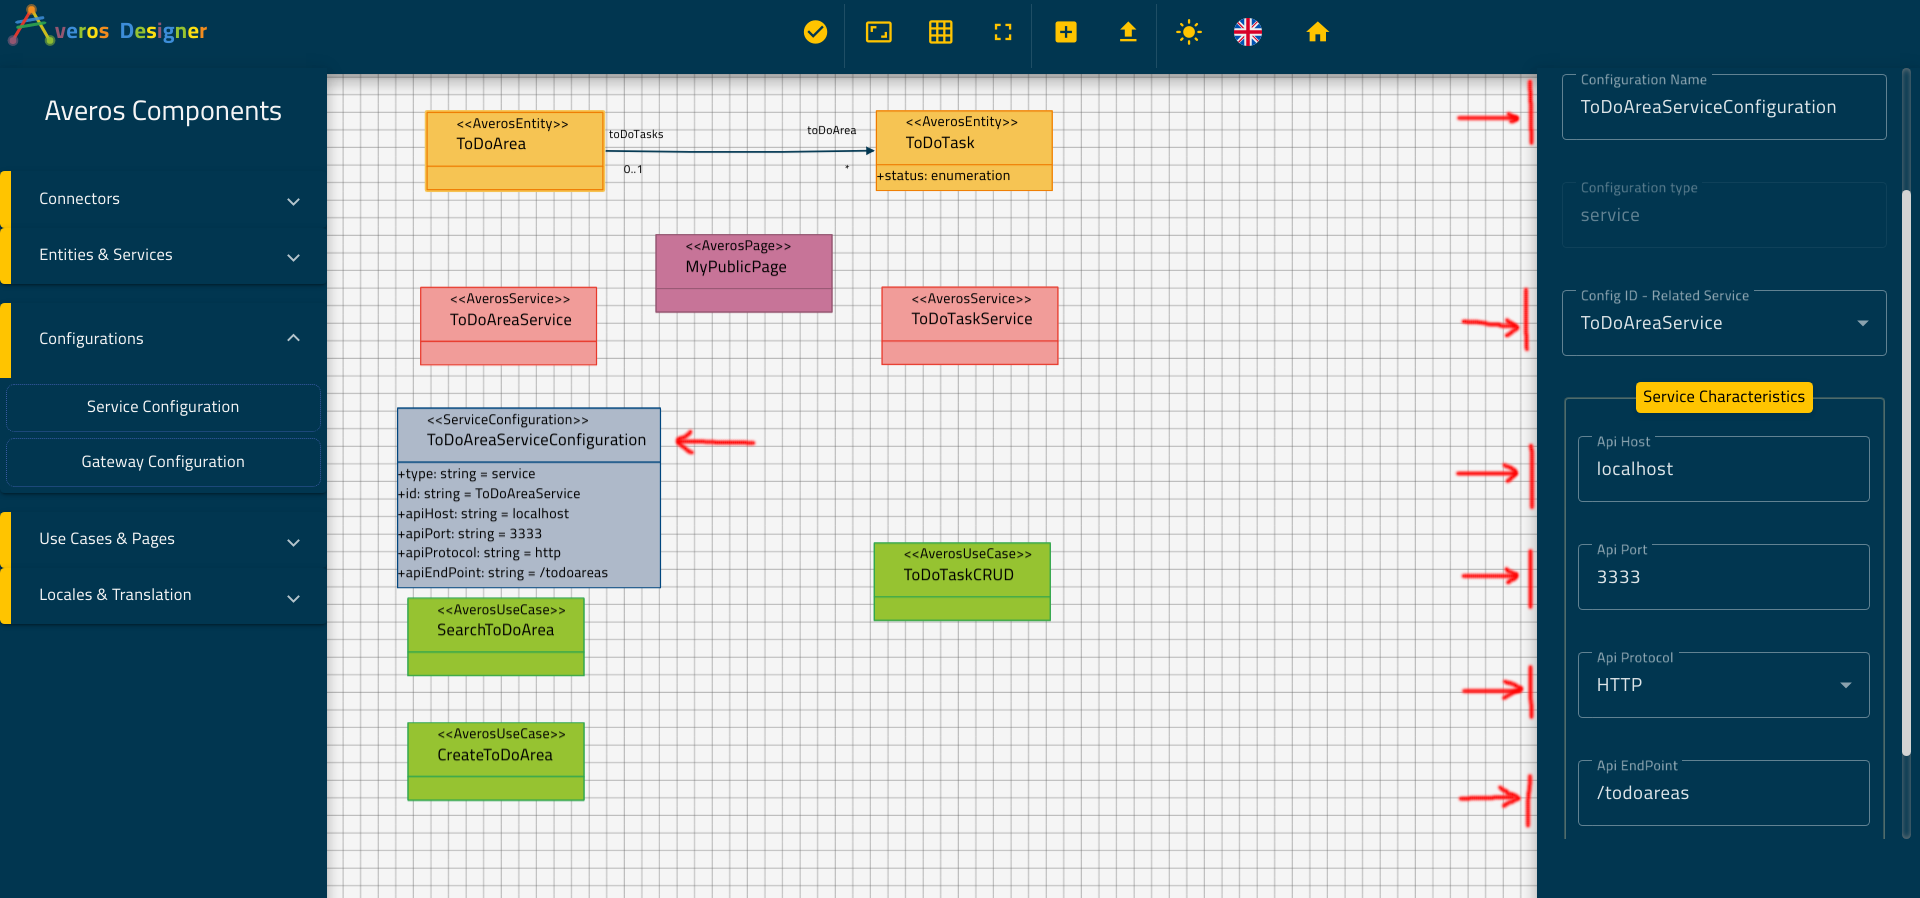
Select your new Service Configuration then go ahead and update its properties as follows:
- Configuration Name:
ToDoAreaServiceConfiguration- Config ID - Related Service: choose
ToDoAreaService- Api Host:
localhost- Api Port:
3333- Api Protocol: choose
HTTP- Api EndPoint:
/todoareas
Click apply.
🙋♂️ Please make sure your updates has been applied successfully to the component before moving on to the next one.
The updates are applied if you see that the related component in the canvas has been updated accordingly.
Your service configuration should look like the one in the picture below:
III. ToDoTaskService Service Configuration
As you did for ToDoAreaService, go ahead and create a new service configuration component for ToDoTaskService.
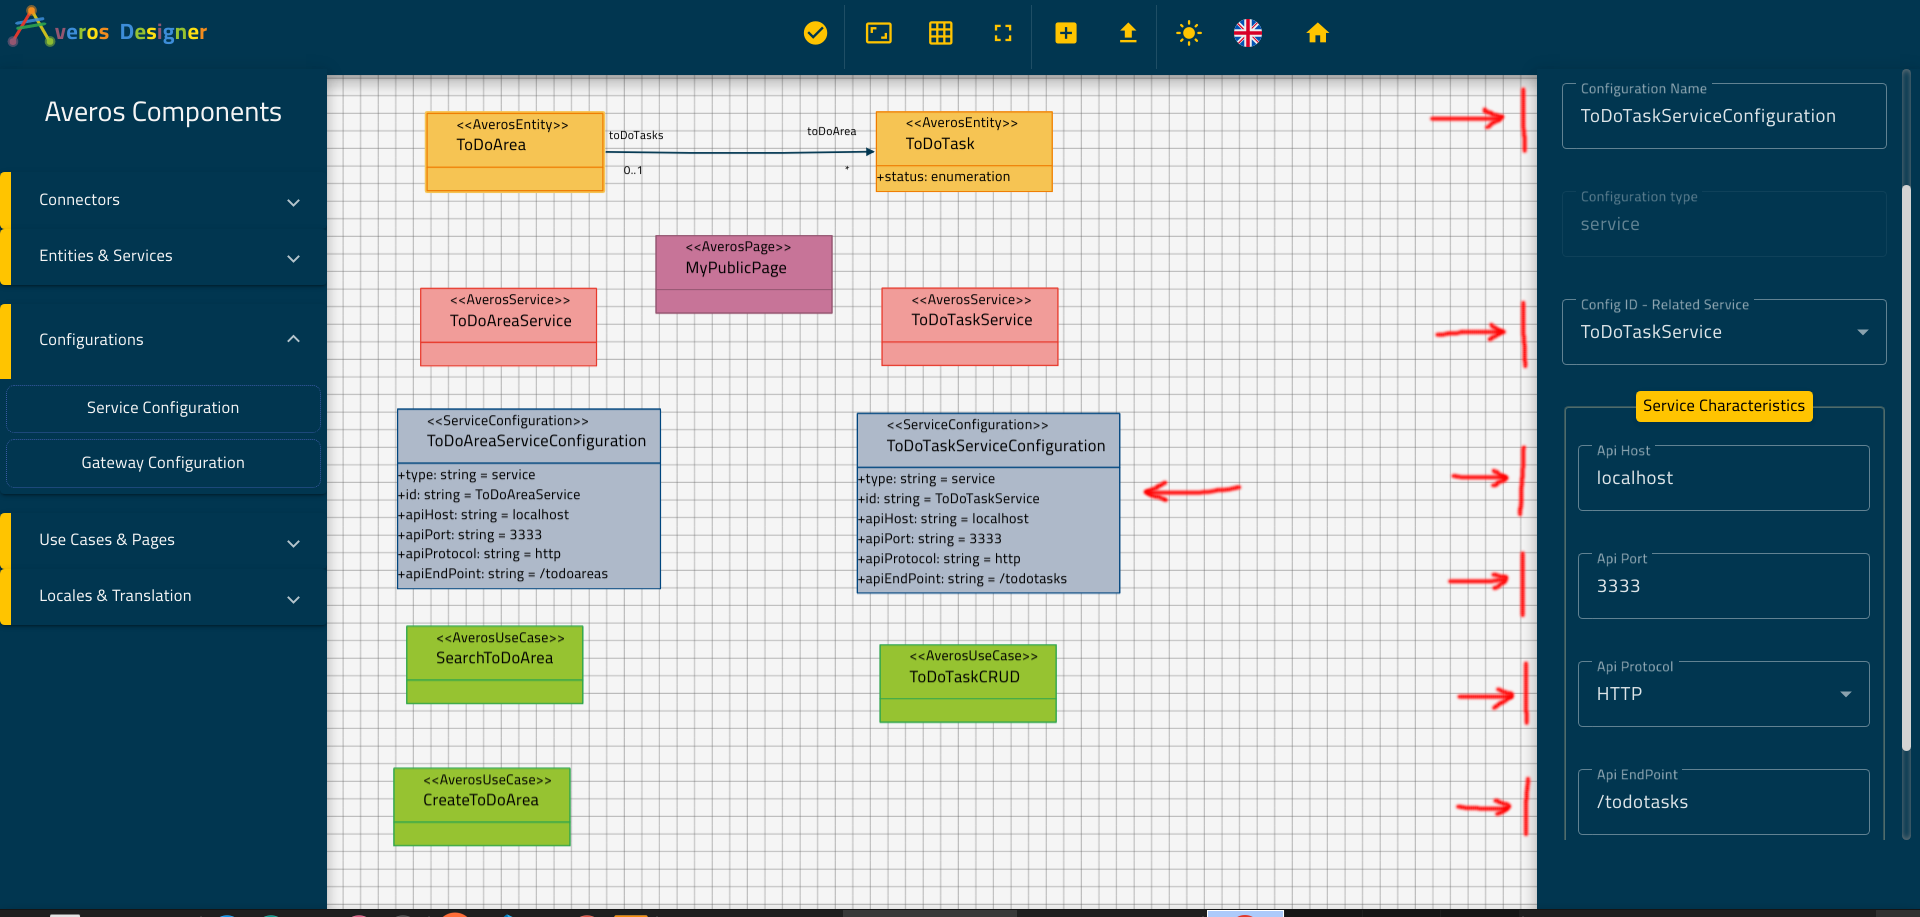
Select your new Service Configuration then go ahead and update its properties as follows:
- Configuration Name:
ToDoTaskServiceConfiguration- Config ID - Related Service: choose
ToDoTaskService- Api Host:
localhost- Api Port:
3333- Api Protocol: choose
HTTP- Api EndPoint:
/todotasks
Click apply.
🙋♂️ Please make sure your updates has been applied successfully to the component before moving on to the next one.
The updates are applied if you see that the related component in the canvas has been updated accordingly.
Your service configuration should look like the one in the picture below:
IV. AuthService Service Configuration
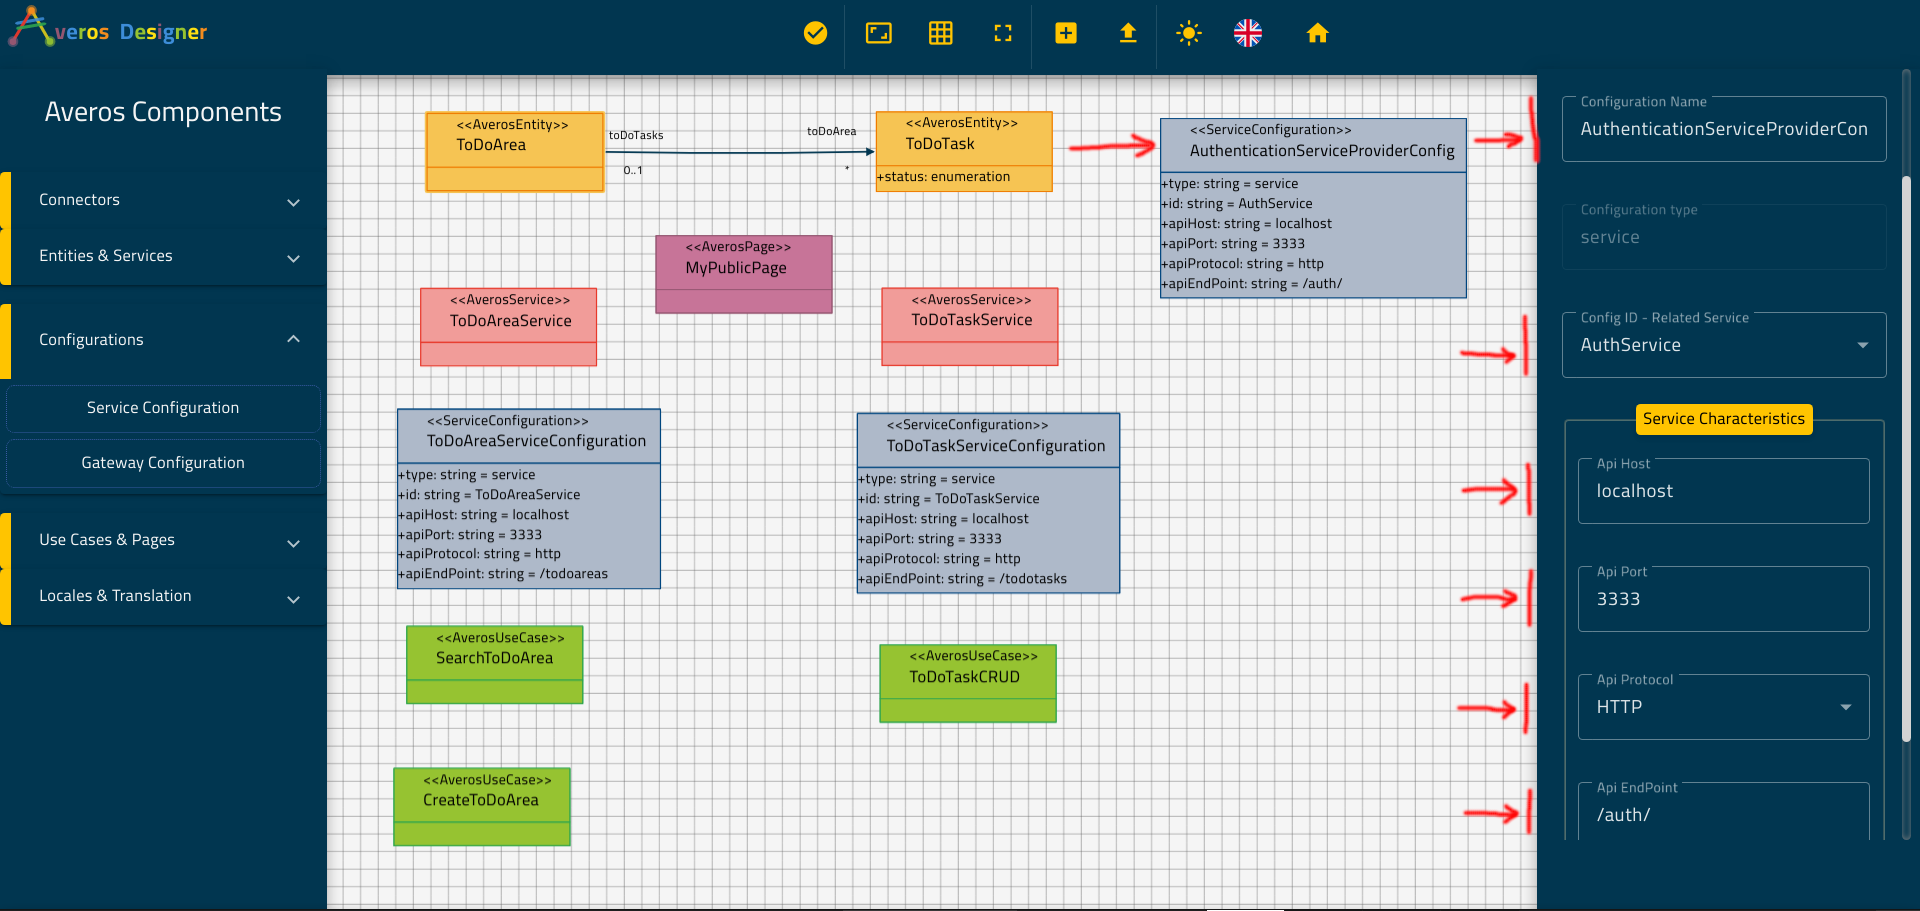
Go ahead and create a new service configuration component for AuthService.
Select your new Service Configuration then go ahead and update its properties as follows:
- Configuration Name:
AuthenticationServiceProviderConfig- Config ID - Related Service: choose
AuthService- Api Host:
localhost- Api Port:
3333- Api Protocol: choose
HTTP- Api EndPoint:
/auth/
Click apply.
🙋♂️ Please make sure your updates has been applied successfully to the component before moving on to the next one.
The updates are applied if you see that the related component in the canvas has been updated accordingly.
Your service configuration should look like the one in the picture below:
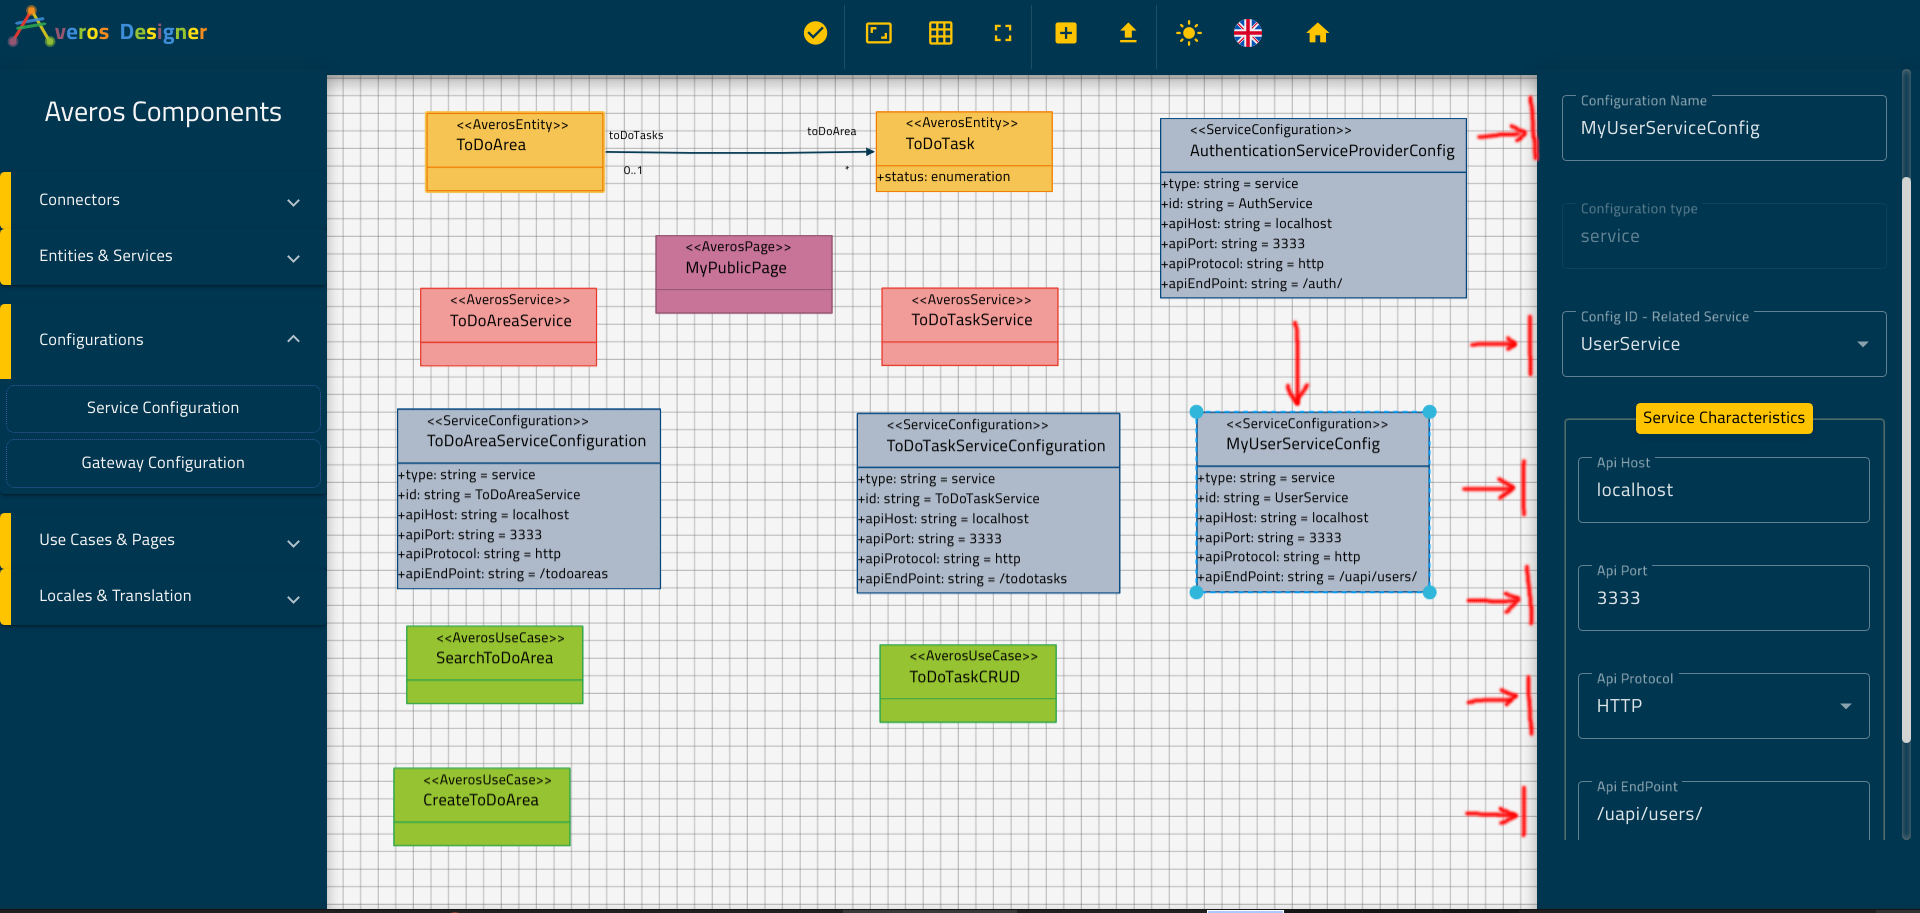
V. UserService Service Configuration
Go ahead and create a new service configuration component for UserService.
Select your new Service Configuration then go ahead and update its properties as follows:
- Configuration Name:
MyUserServiceConfig- Config ID - Related Service: choose
AuthService- Api Host:
localhost- Api Port:
3333- Api Protocol: choose
HTTP- Api EndPoint:
/uapi/users/
Click apply.
🙋♂️ Please make sure your updates has been applied successfully to the component before moving on to the next one.
The updates are applied if you see that the related component in the canvas has been updated accordingly.
Your service configuration should look like the one in the picture below:
💡If you are wondering what are the service characteristics that you have just configured; just think of them as the attributes that describe the route to the external service backend.
In other words, your application service will need to know where do the service backend live and how to reach it.
🙋♂️Note that the configurations you have just made need to match the access parameters related to averos service backend mock which you installed and executed in the prerequisites section.
If you have changed any of the default parameters when you have installed the service backend mock please update your service configurations accordingly.
🎉🎉🎉 Congratulations on making it this far! 🎉🎉🎉
Your ToDoApplication is now fully functional and ready to be taken to the next level!
But wait a moment! How about your application learns new languages?
Sounds great ?
Ok then, let’s move on to the final section in creating your application using Averos Designer.
See you soon!