Create Business Entities
Remember earlier in the design phase we have identified an entity named ToDoTask whose attributes are as follows:
id: defines the entity’s identifier. Is of typenumbername: defines the entity’s name. Is of type textdescription: defines the entity’s description. Is of typetextcreatedBy: defines who created the entity. Is of typeUserupdatedBy: defines who updated the entity. Is of typeUsercreatedAt: defines when the entity was created. Is of typedateupdatedAt: defines when the entity was updated. Is of typedatestatus: defines the status of the task. It could be one of these fixed values:Active,ClosedorNew(A task can be new, active or closed. We could have thought about other statuses; but we wanted to keep it as much simple as possible for this tutorial). Since this attribute has a set of predefined values it is of typeenumeration
We have also identifier a related managing service for the entity ToDoTask named ToDoTaskService.
Likewise, we have identified another entity named ToDoArea that has the following attributes:
id: defines the entity’s identifier. Is of typenumbername: defines the entity’s name. Is of typetextdescription: defines the entity’s description. Is of typetextcreatedBy: defines who created the entity. Is of typeUserupdatedBy: defines who updated the entity. Is of typeUsercreatedAt: defines when the entity was created. Is of typedateupdatedAt: defines when the entity was updated. Is of typedate- a relationship with
ToDoTaskentity: depicted by the fact that zero or one(0..1)ToDoAreacontains zero or many(0..*)ToDoTask
Finally, as done with the entity ToDoTask, the entity ToDoArea is managed by a service that we named ToDoAreaService.
Well, in this section we are going to create these entities along with their managing services using Averos Designer.
🔖 Note: It is worth mentioning that
Averos Frameworkgenerates a set of default attributes under the hood for any generated entity. These attributes are:
idnamedescriptioncreatedByupdatedBycreatedAtupdatedAtAs a result, you will not be invited to create these attributes when you will start creating these entities using
Averos Designer, since they will be created for you by the framework.
🔖 Also, as we have seen earlier,
ToDoAreais related toToDoTask.
And since this relationship is part ofToDoAreaattributes (ToDoAreais composed ofzero or manyToDoTask), we will - for the sake of simplicity - first createToDoTaskthen createToDoArea.
🙋♂️Please feel free to get back to your design and business requirements from time to time so that you understand what you are doing and why you are doing it this way.
🔥 Now, let’s create our entities along with their services 🔥
I. Create ToDoTask Entity
Step 1 - Drag&Drop an «AverosEntity»
From Averos Components (left side panel), click on Entities & Services, drag an Entity component and drop it into the canvas.
Here is what you should have:
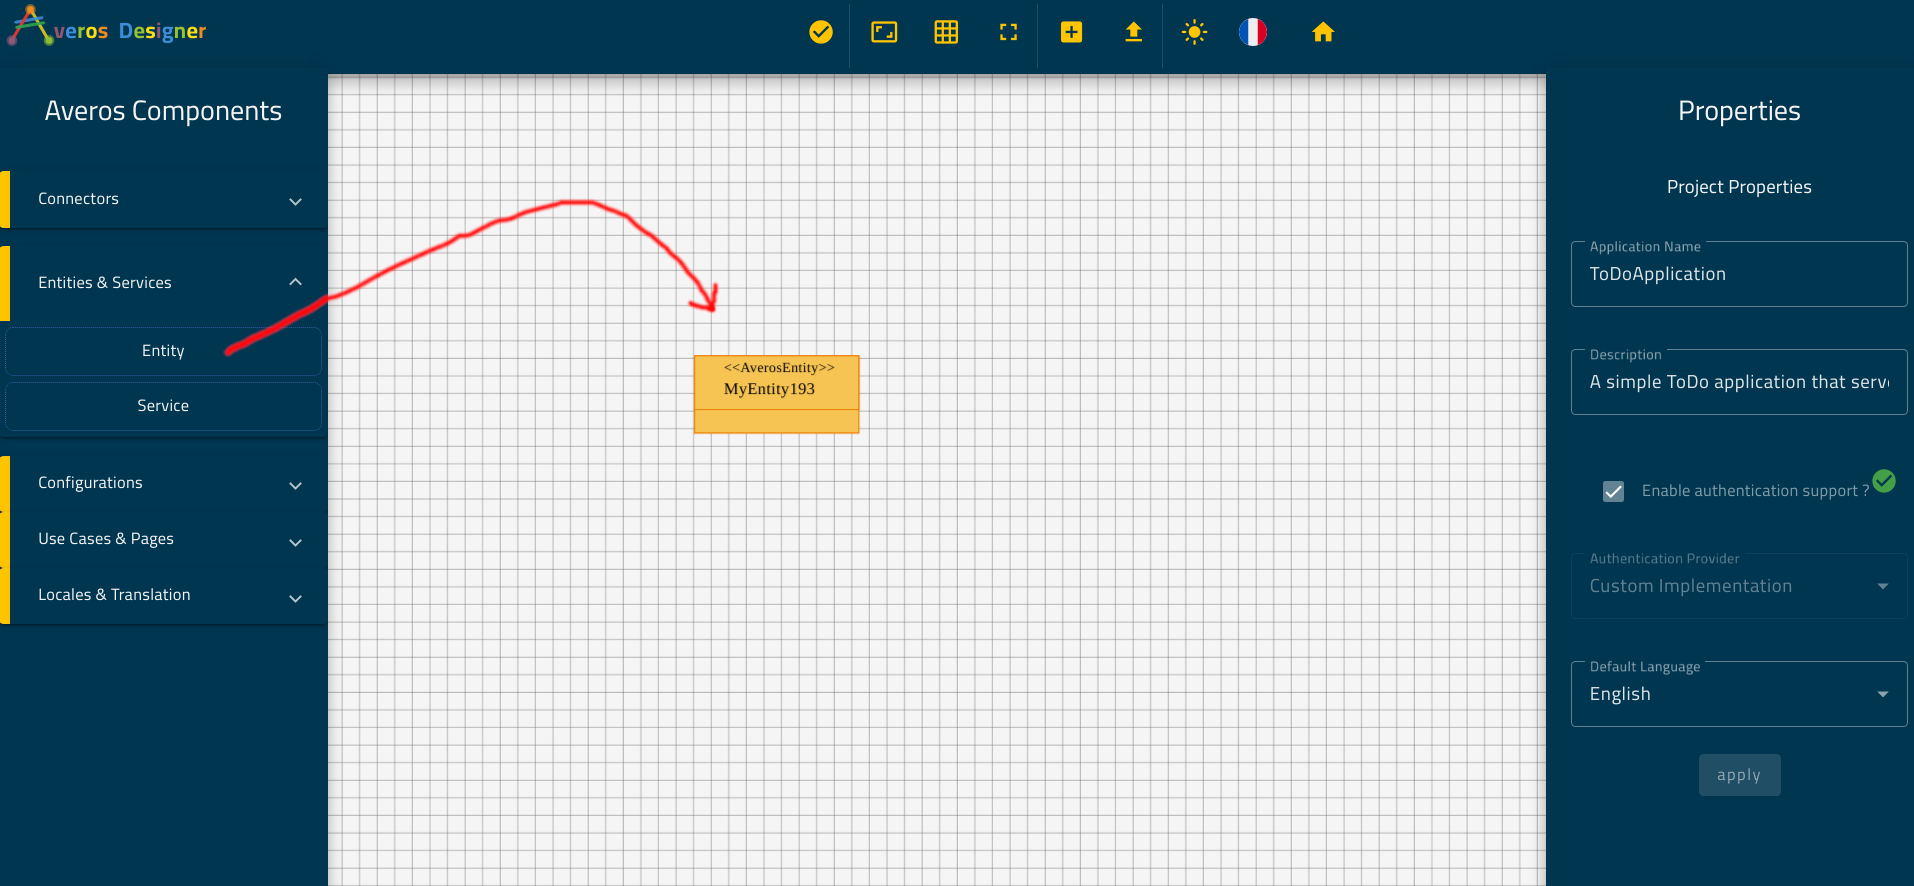
🙋♂️ The displayed entity’s name (
MyEntity193) is a random name that has been generated for you.
You will change this property among other in the next step.
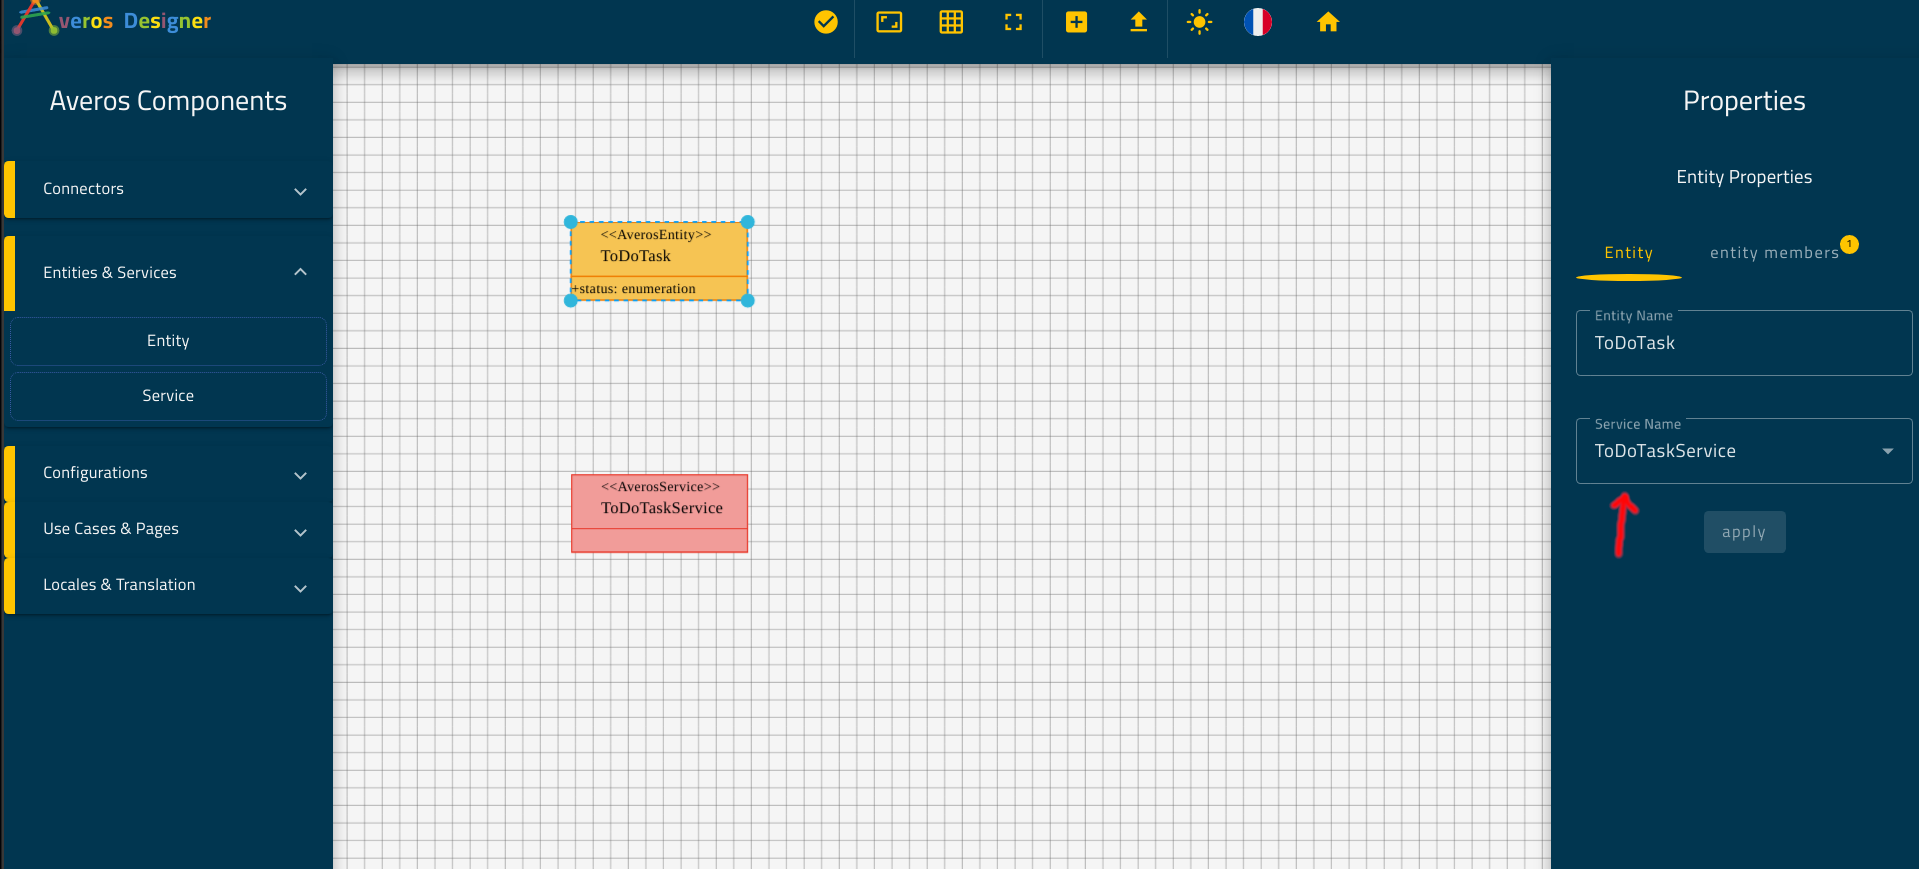
Step 2 - Update the entity’s properties
Select the previous entity from the canvas to open the Properties Panel as described below:
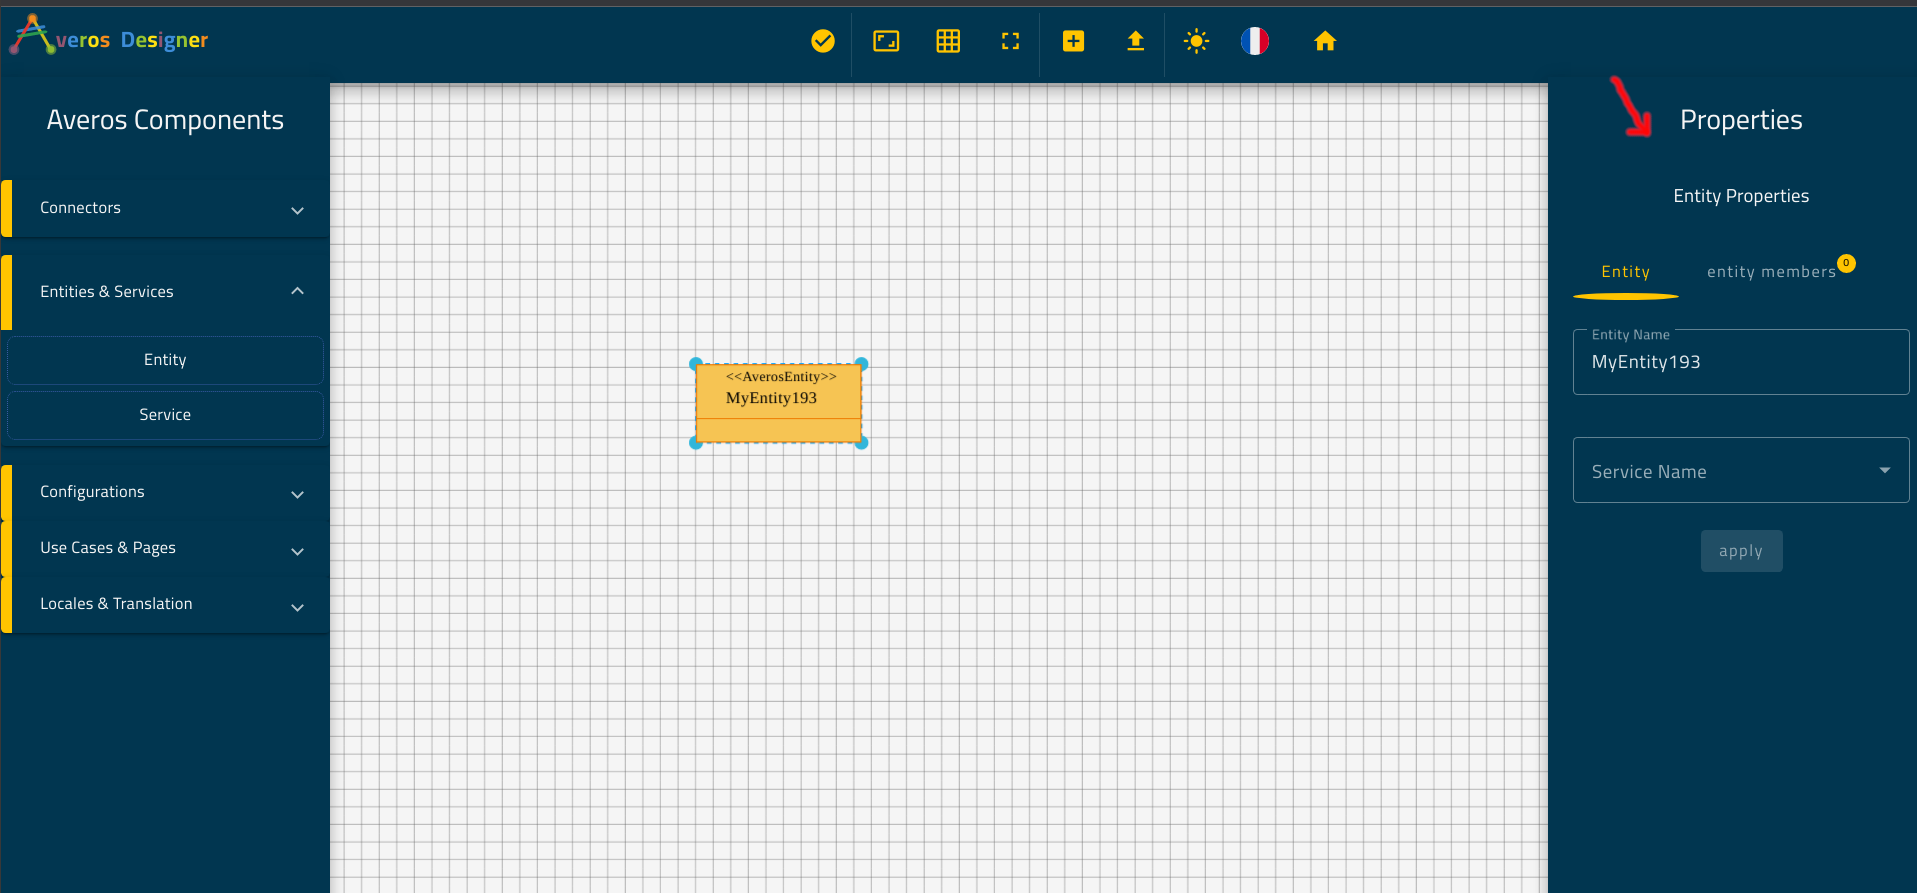
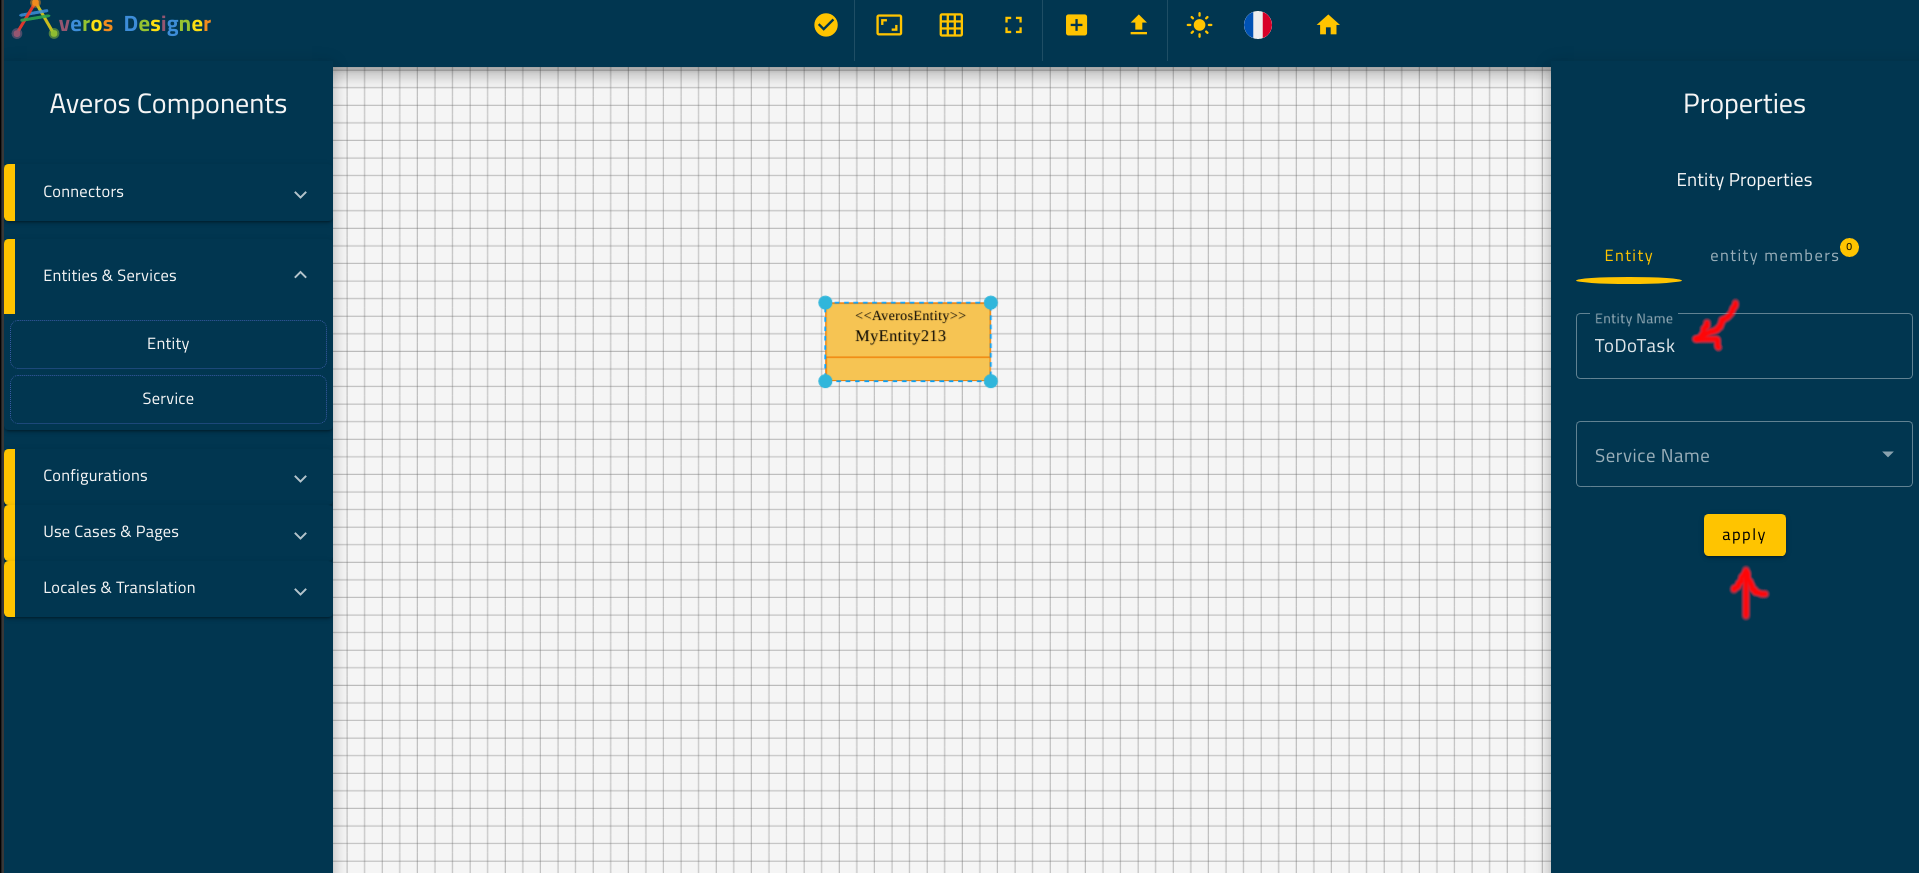
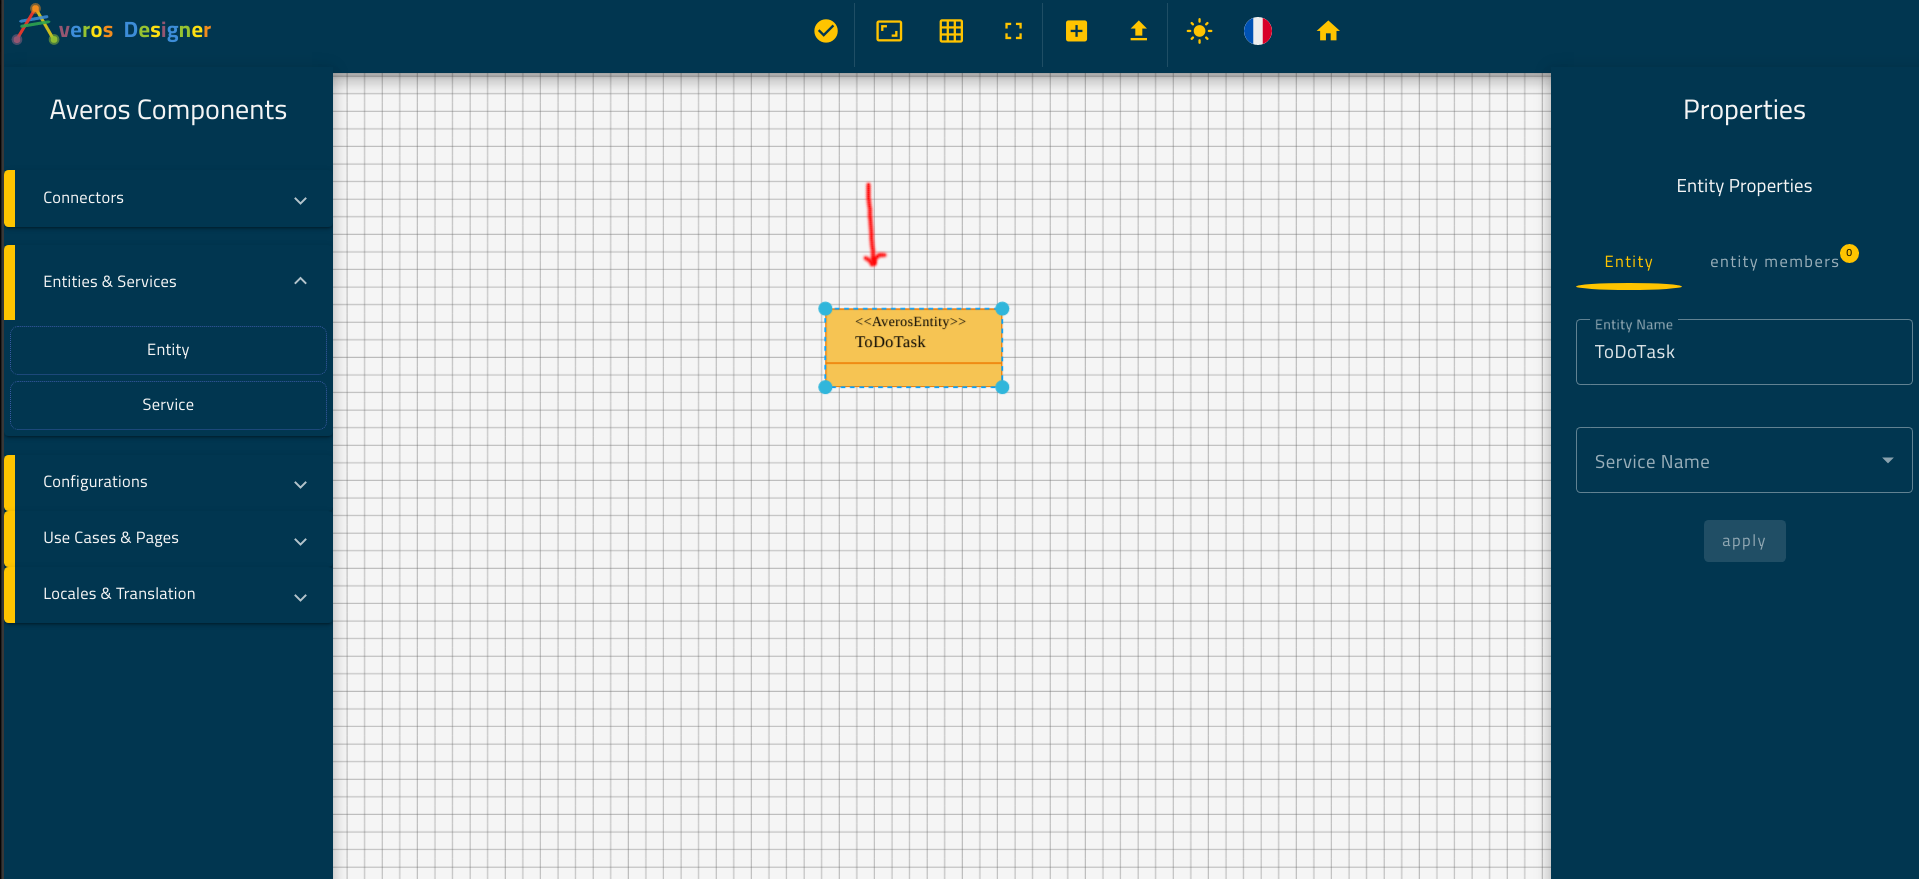
Go to Entity Properties and update the entity name with the value ToDoTask then click Apply.
Do not forget to apply your changes, by clicking on the button
Apply, before leaving the Properties Panel so that changes take place.
Step 3 - Create the entity member status
As mentioned earlier, for any generated entity, averos creates a default set of attributes.
As a result we will exclude those attributes from our design.
This leaves us with one attribute to create named status of type enumeration.
🙋♂️ you might want to have a look at your business description so that you recall how your entities looks like.
Go ahead and select your entity ToDoTask.
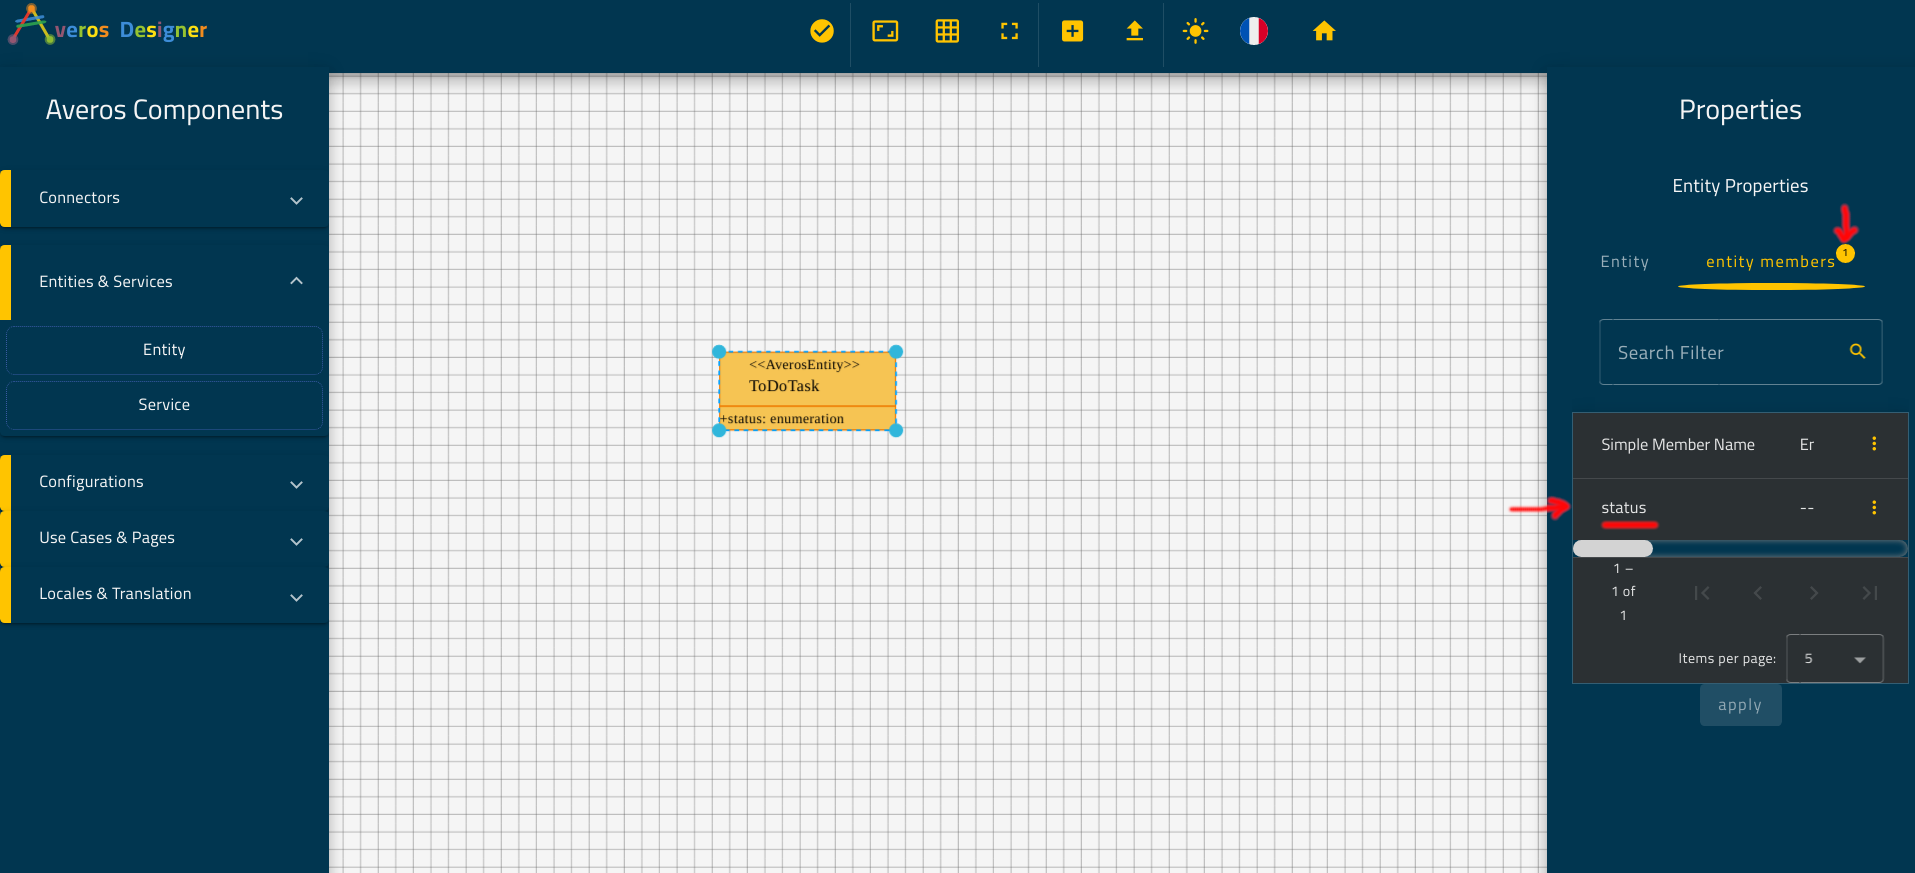
On the right panel, click on the tab entity members in the Entities Properties panel to display the list of entity members.
Click on the table actions button located on the table header actions then choose add.
Create a new simple entity member with the following values:
- Simple Member Name :
status- Member Type :
ENUMERATION- Member Domain :
Active,Closed,New


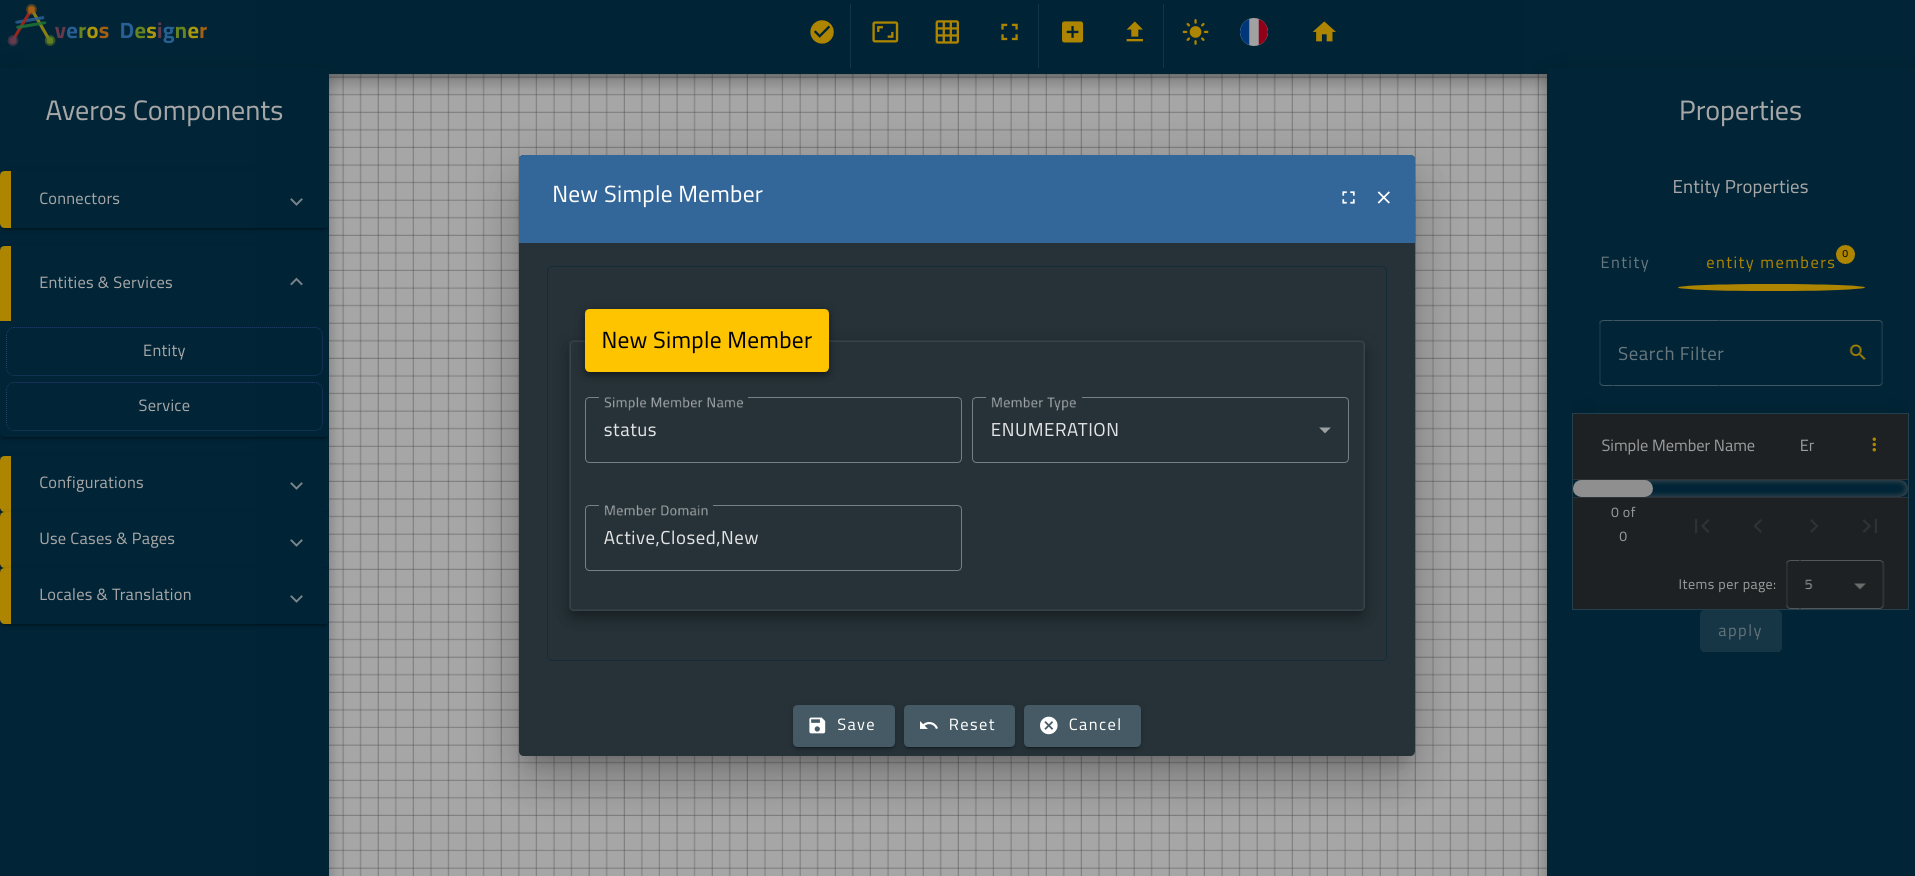
Click on save button to save your new member, then close the Simple Member Window.
Next, we are going to create ToDoTask managing service named ToDoTaskService.
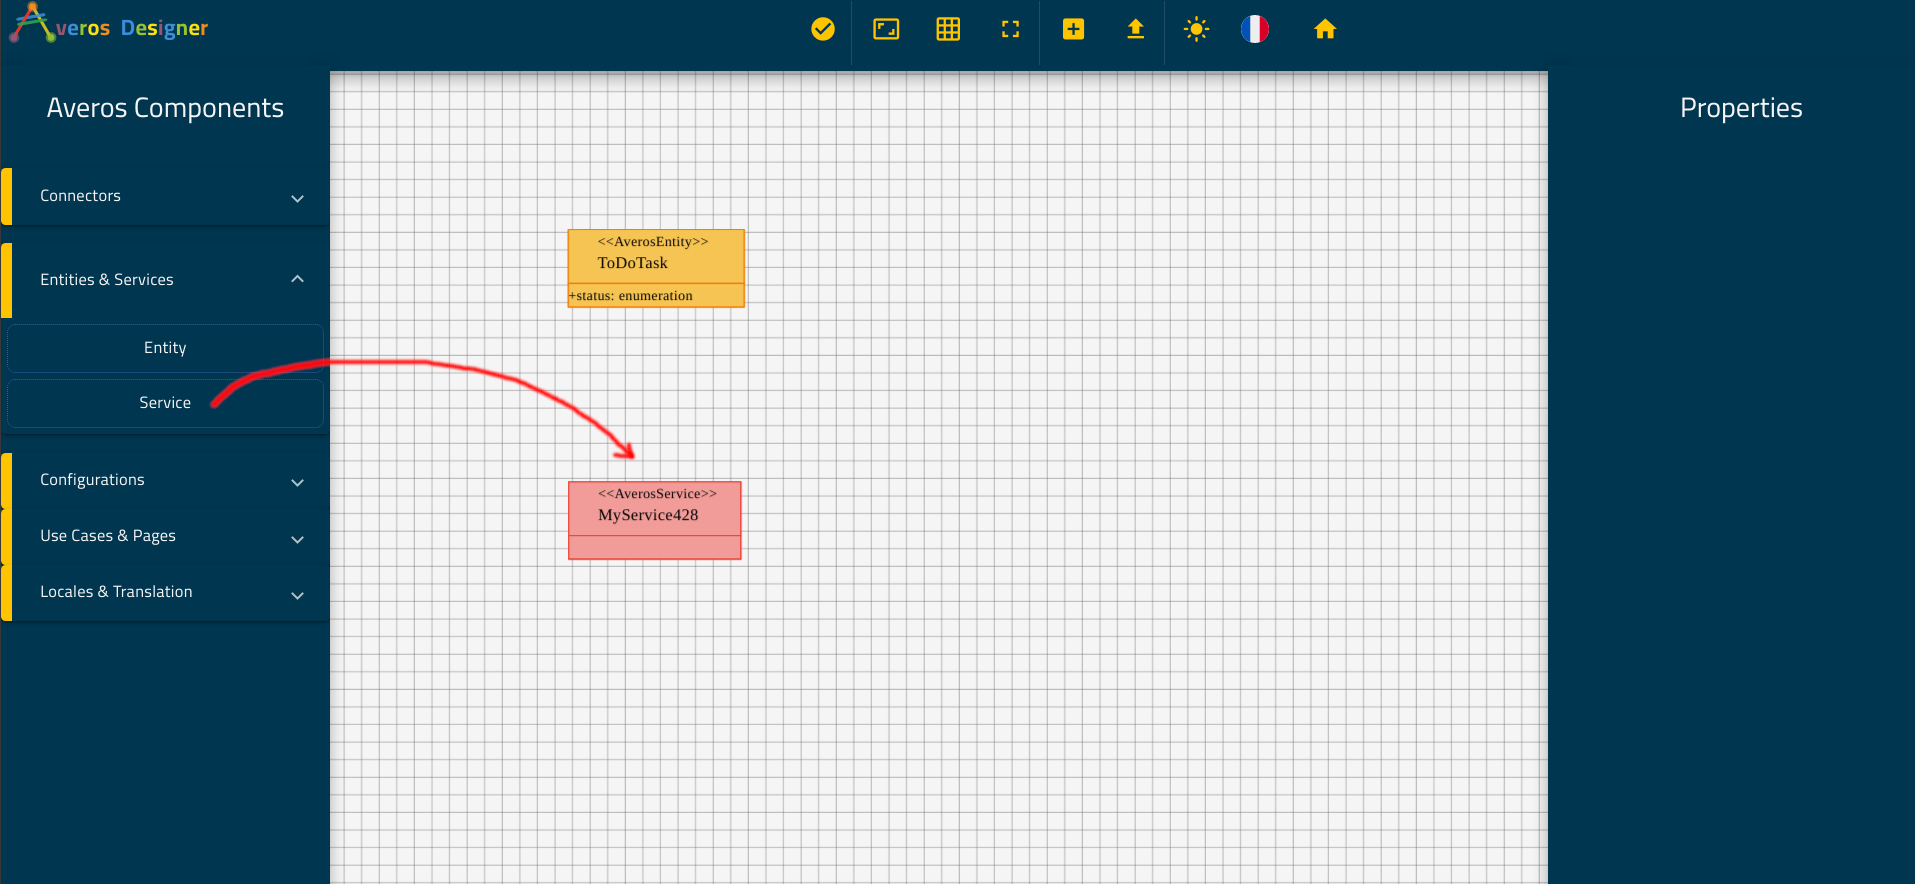
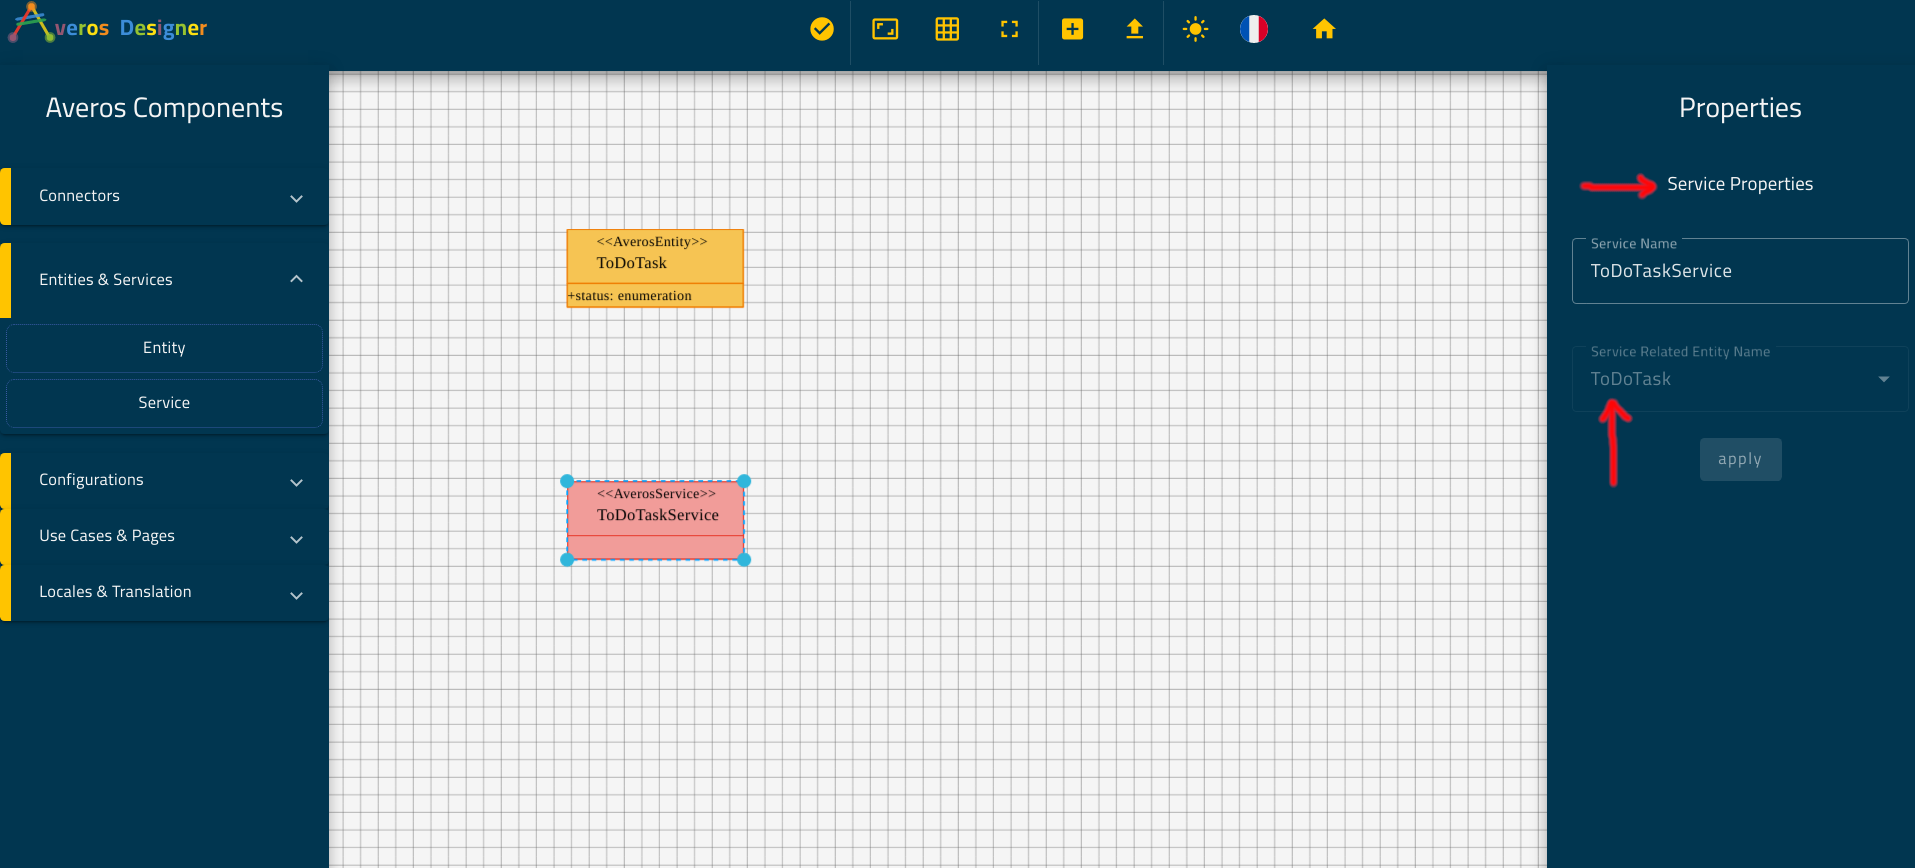
Step 4 - Create the entity’s managing service named ToDoTaskService
Go ahead and drag & drop a service component from the right side panel to the canvas.
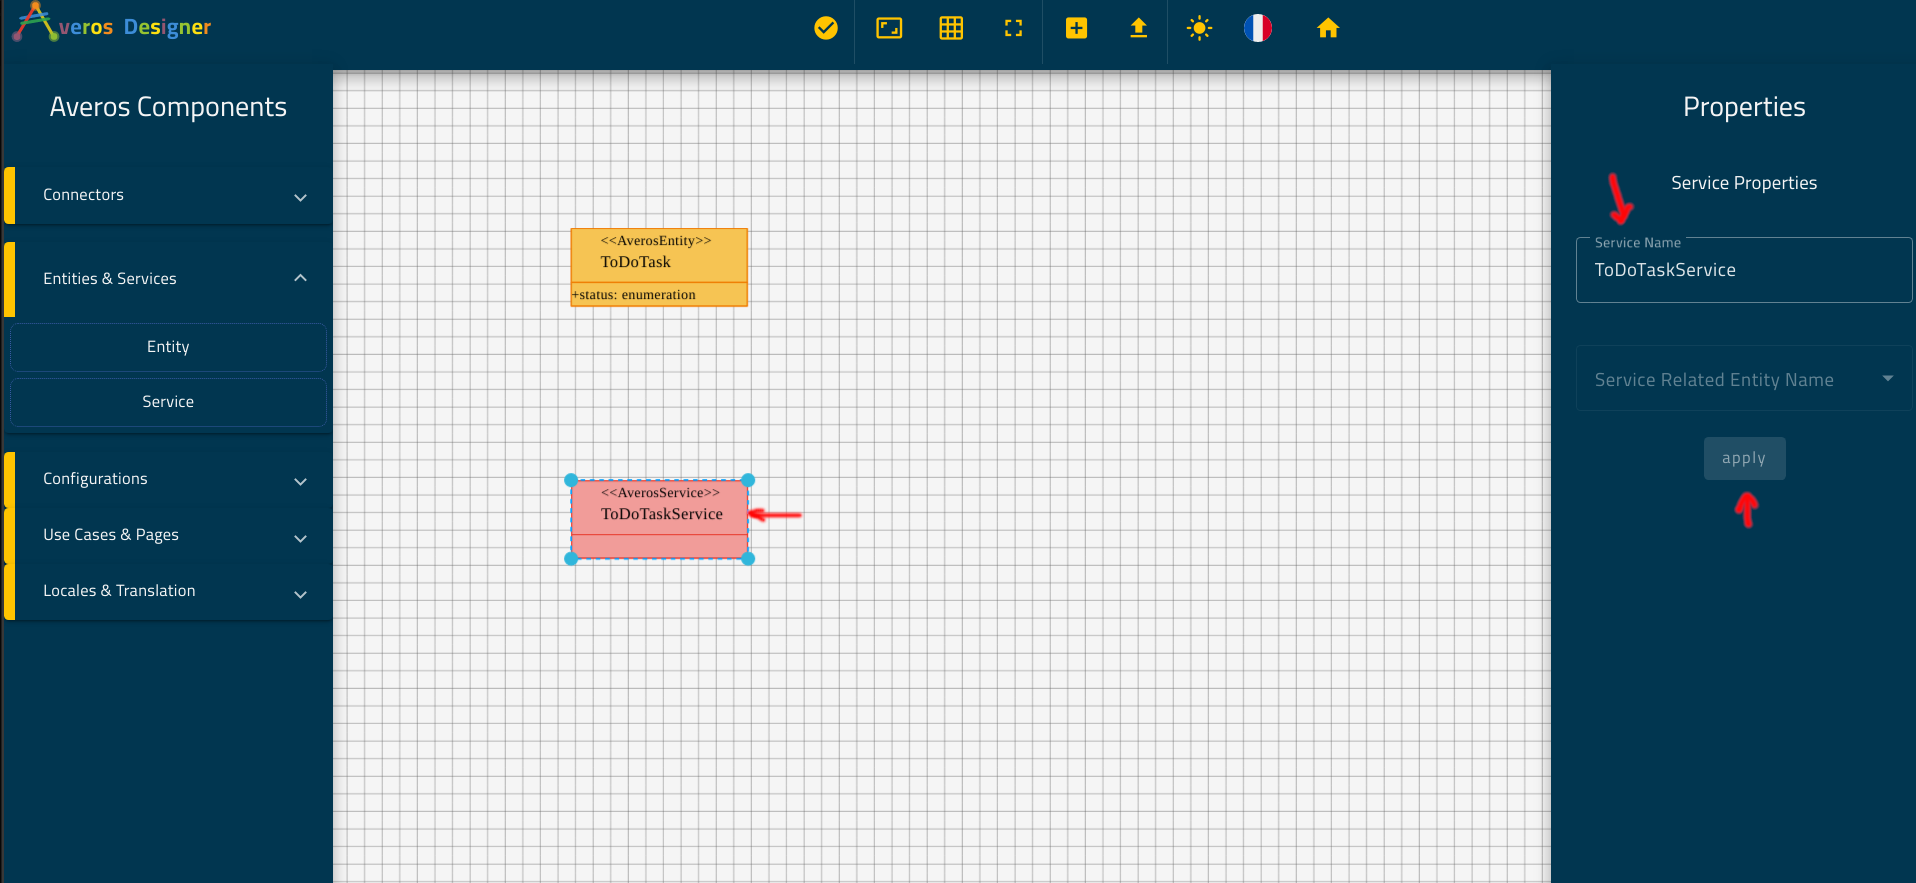
Select your service and change its name to ToDoTaskService from the Service Properties panel located in the right side.
Do not forget to Apply your changes before leaving the configuration panel.
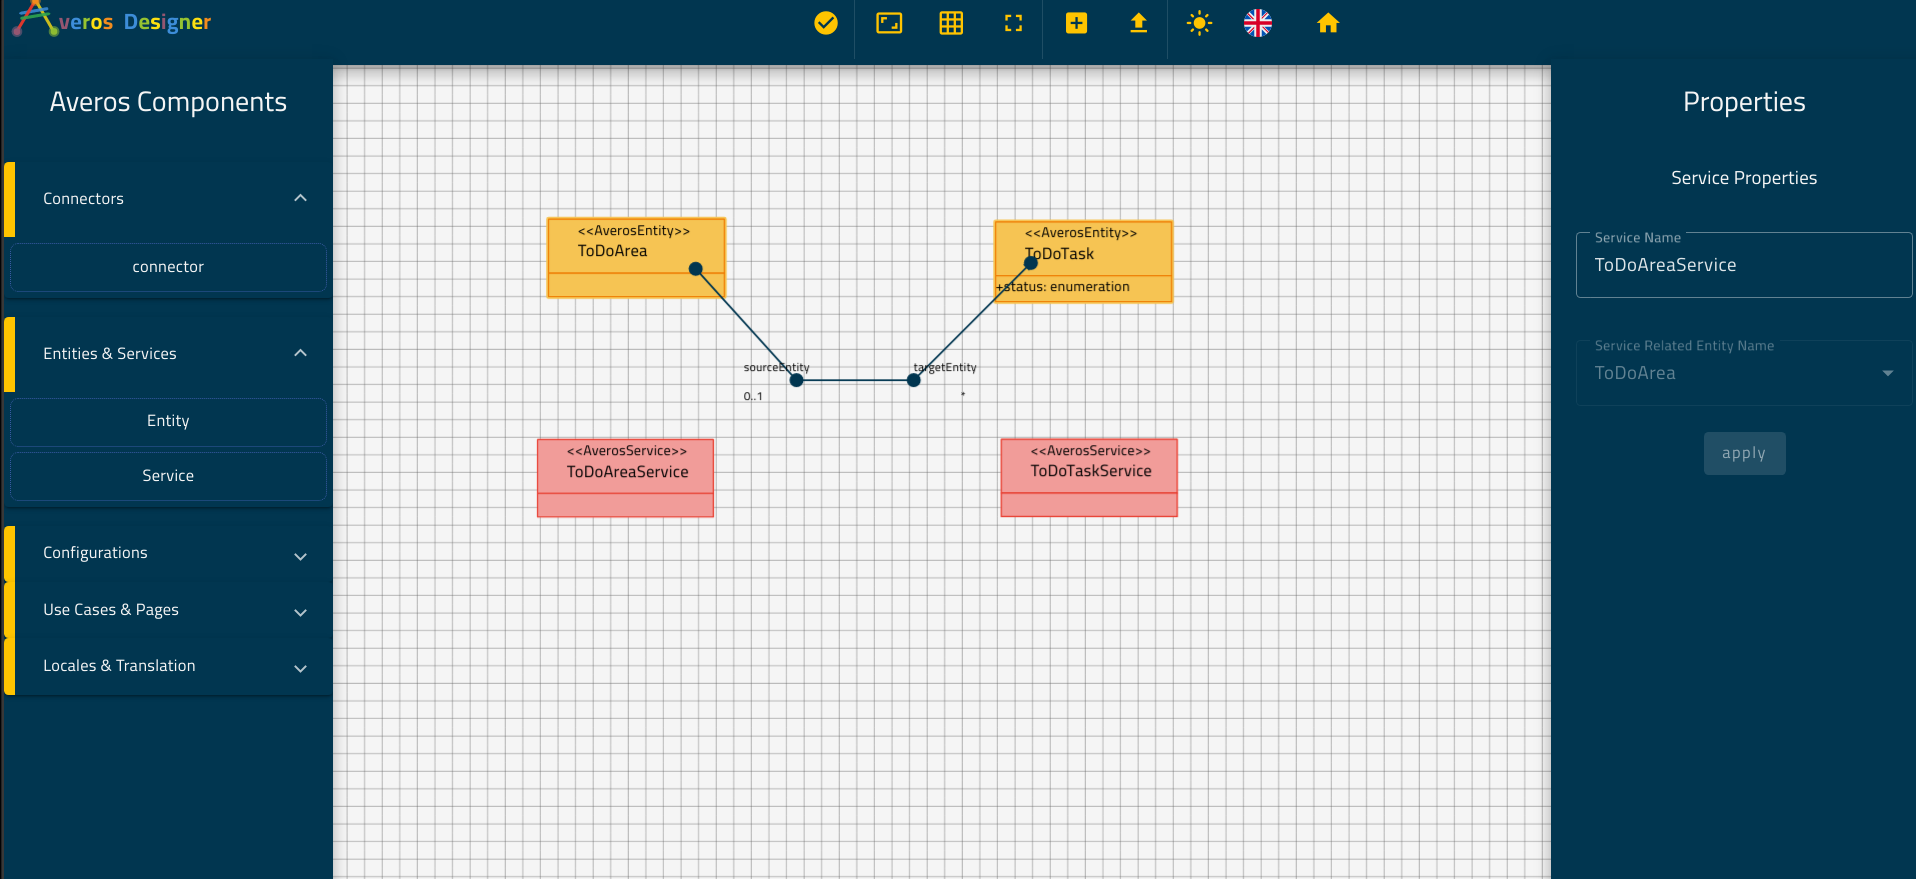
Now, since your entity ToDoTask is managed by the service ToDoTaskService you will need to link them to each other.
So go ahead and select the entity ToDoTask then open the listbox Service Name located in the Entity tab properties.
Choose ToDoTaskService then click on apply.
🙋♂️ Notice that the service listbox contains two additional services, namely
AuthServiceandUserService.
These are two averos pre-defined services that provides Authentication & User Management capabilities to our application.
AuthServiceandUserServiceshould be bound to your authentication & user management provider -averos backend mockin our case - introduced and explained earlier in the prerequisites section.
Averos will automatically link the service to its entity.
II. Create ToDoArea Entity
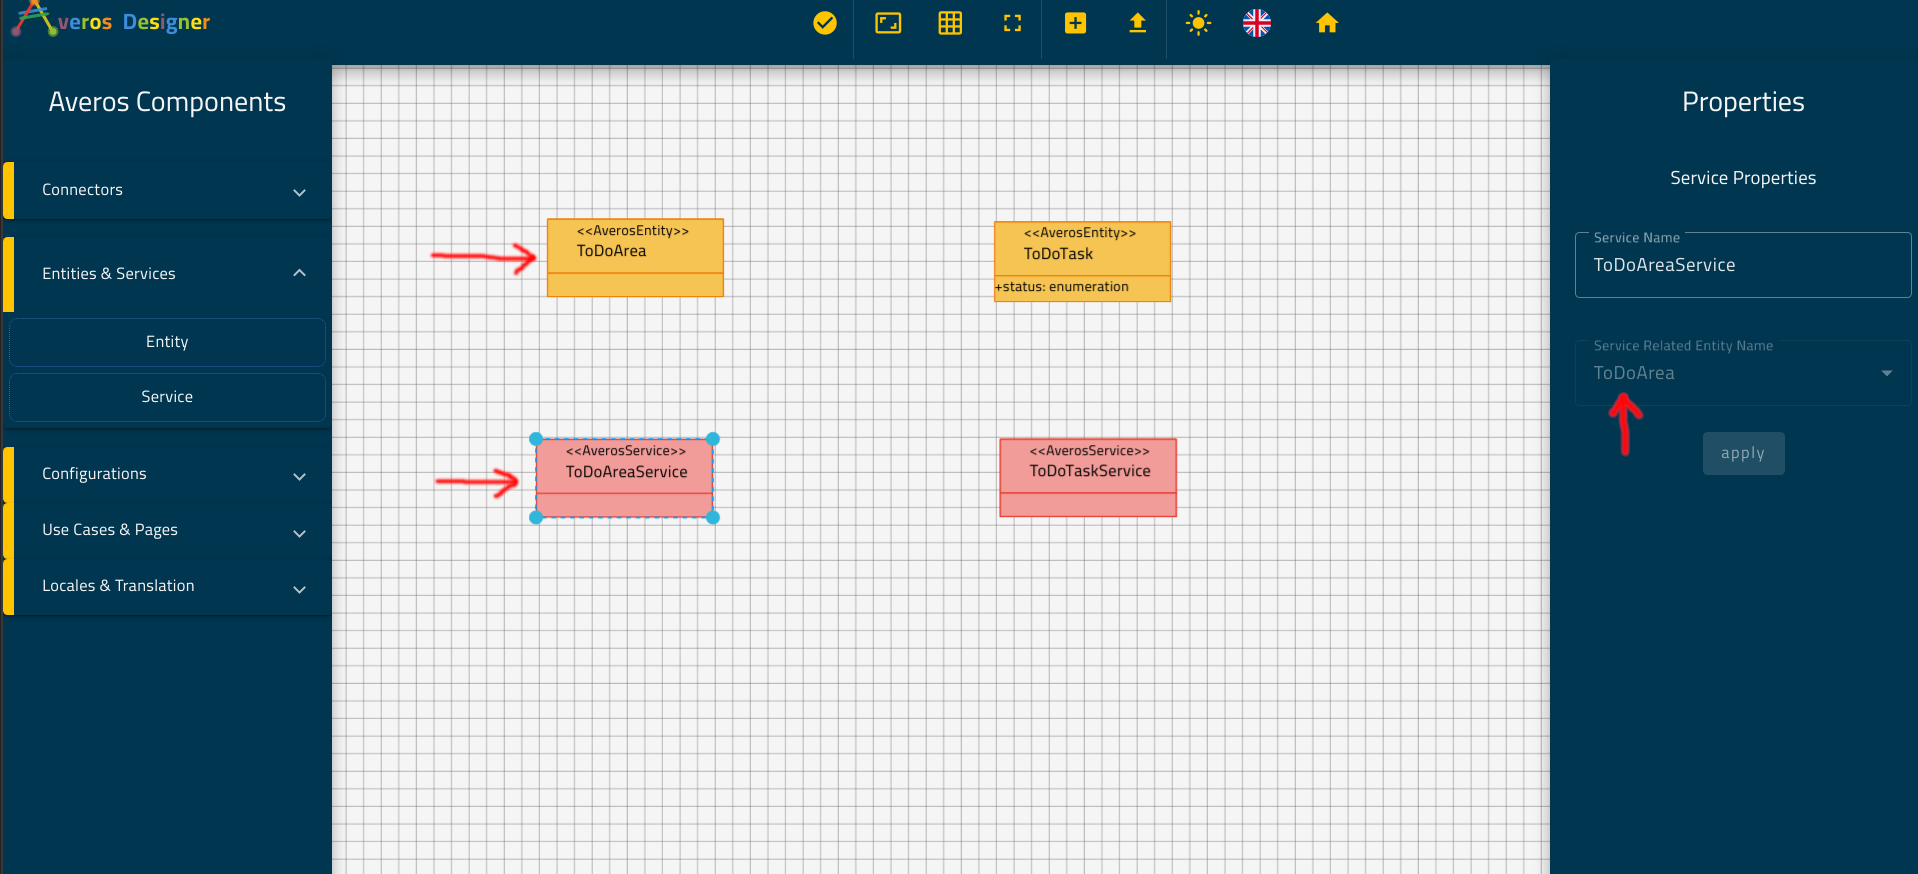
Step 1: Create ToDoArea and ToDoAreaService then link them
Repeat the same Steps 1, 2 & 4 exactly as you did earlier for ToDoTask entity.
Use the name ToDoArea for your new entity along with the managing service name ToDoAreaService.
🙋♂️ Note that ToDoArea entity does not have any additional simple members apart from the default ones.
Nevertheless, ToDoArea has a relationship with ToDoTask that is depicted by a composite member.
Since this would be the first time we came across such type of member, we will leave this Step 3 to the end, after finishing Step 1, 2 & 4.
🙋♂️ Do not forget to link the managing service ToDoAreaService to its managed entity ToDoArea.
You should end up with the following configuration:
Step 2: Create the relationship with ToDoTask
Remember that ToDoArea has a relationship with ToDoTask depicted by the fact that zero or one (0..1) ToDoArea could contain zero or many (0..*) ToDoTask.
In other words, ToDoArea is composed by zero or many ToDoTask.
This means that a ToDoArea instance can be empty, or can contain one or many ToDoTask instances.
Let’s go ahead and create this relationship.
From the Averos Components panel, expand Connectors list and drag & drop a connector into the canvas as described in the picture below.
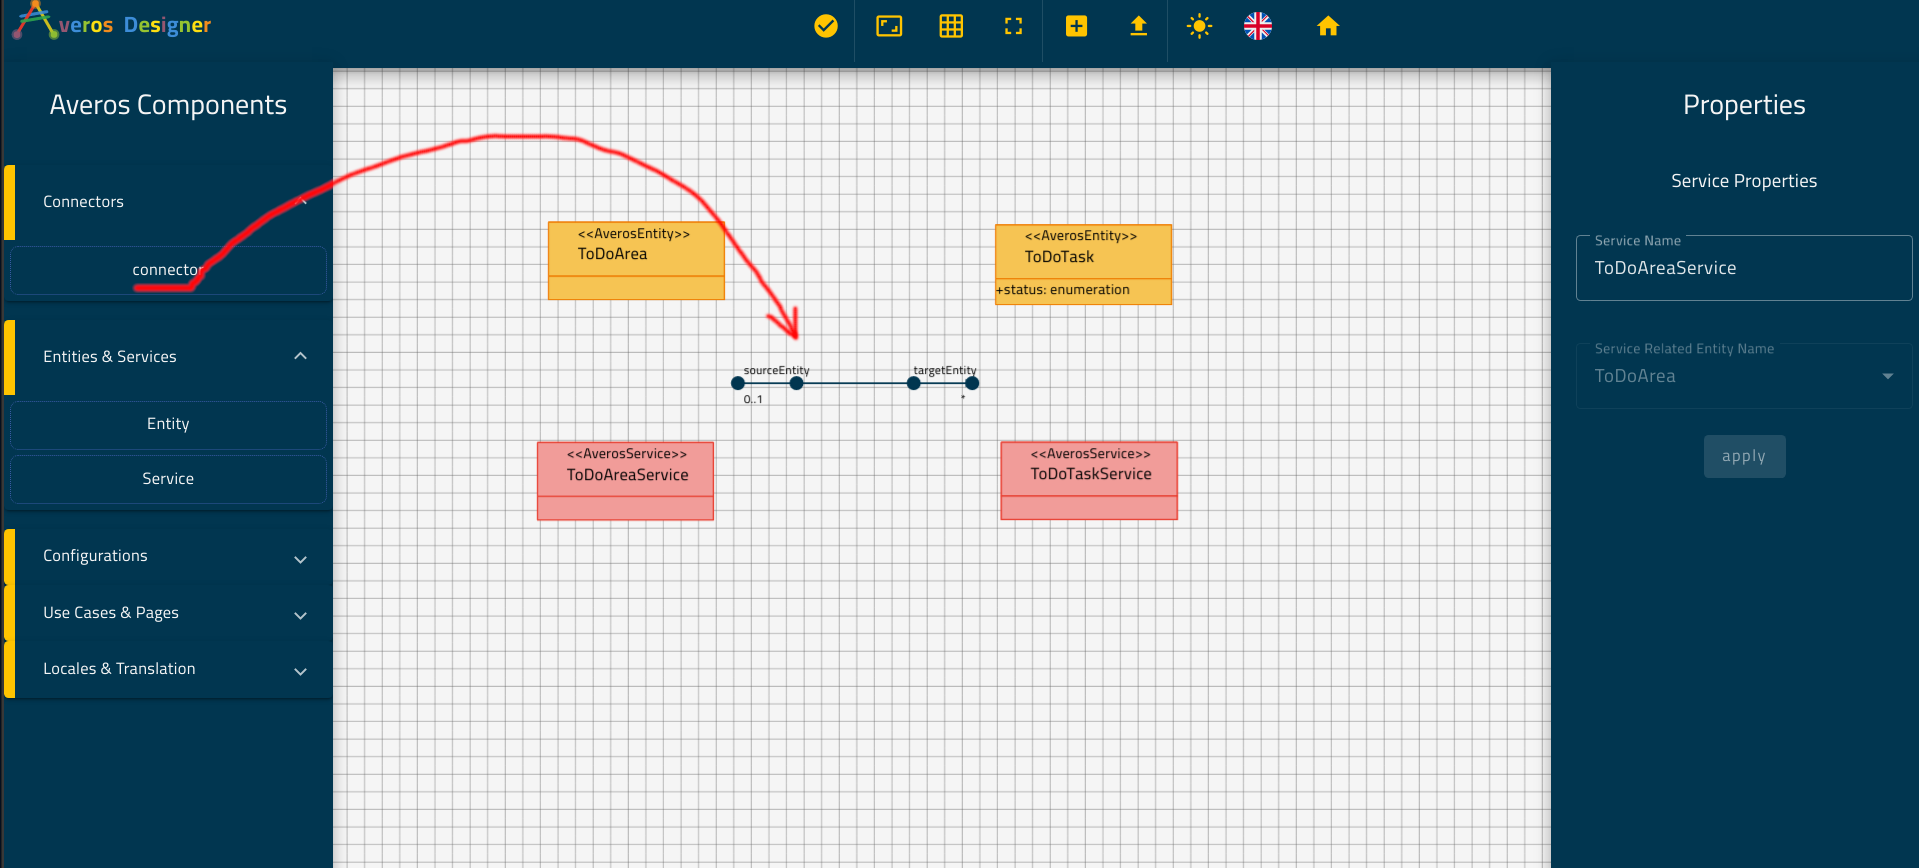
Your connector has the shape of an arrow with four nodes and two connection sides, namely sourceEntity and targetEntity.
You will use this connector to link ToDoArea as the sourceEntity to ToDoTask as the targetEntity.
Go ahead and drag the first node located in the sourceEntity side and drop it on ToDoArea entity.
Now, drag the last node located in the targetEntity side and drop it on ToDoTask entity.
Your diagram whould look like this one in the picture below:
Now, try to drag each entity apart and make sure that the connected arrow will follow the dragged entity.
Thus, you will make sure that the connection has occured between the connector and each entity. Otherwise you should repeat the connection process described earlier untill your entities are connected to the arrow.
Once connected, arrange the components so that the diagram looks like the one in the picture below.
Dont worry if you did not succed to arrange the component like suggested.
However you need to make sure that:
- the entities are each linked to the connector (try to move each entity and see whether the connecting arrow follows it or not)
- The services are linked to their managed entities (check the property
Service Namein the entity’s properties, it should match the managing service name)
💡 Protip: In order to move the arrow, use the four nodes that appear when you select the connector.
Initially the connector could be moved using four nodes, but once connected to an entity, you will not be able to move the connector from the connecting nodes unless you release the connection.
💡 Protip: Notice that once connected to an entity, a connector will follow that entity wherever it is dragged to.
Also, notice that the arrow changes its connection side with respect to the connected entity while you are dragging this entity.
We still have not configured the relationship yet, so let’s do it.
Click on the connector to display its properties in the right panel as described in the picture below.
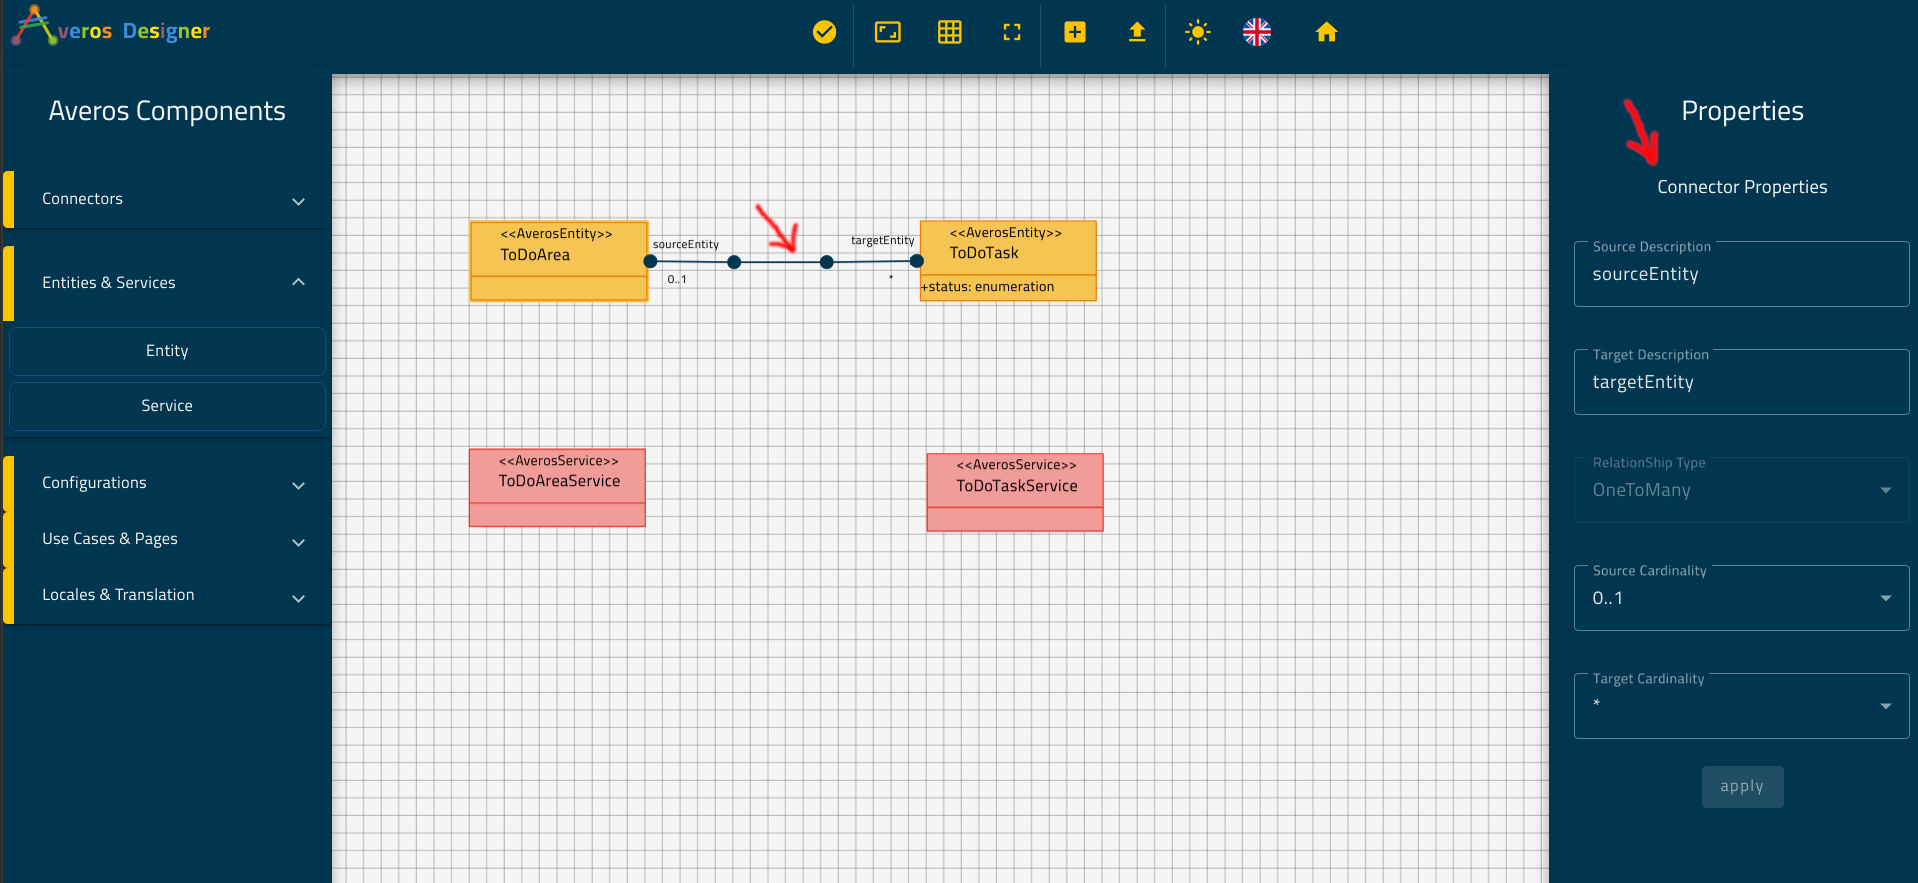
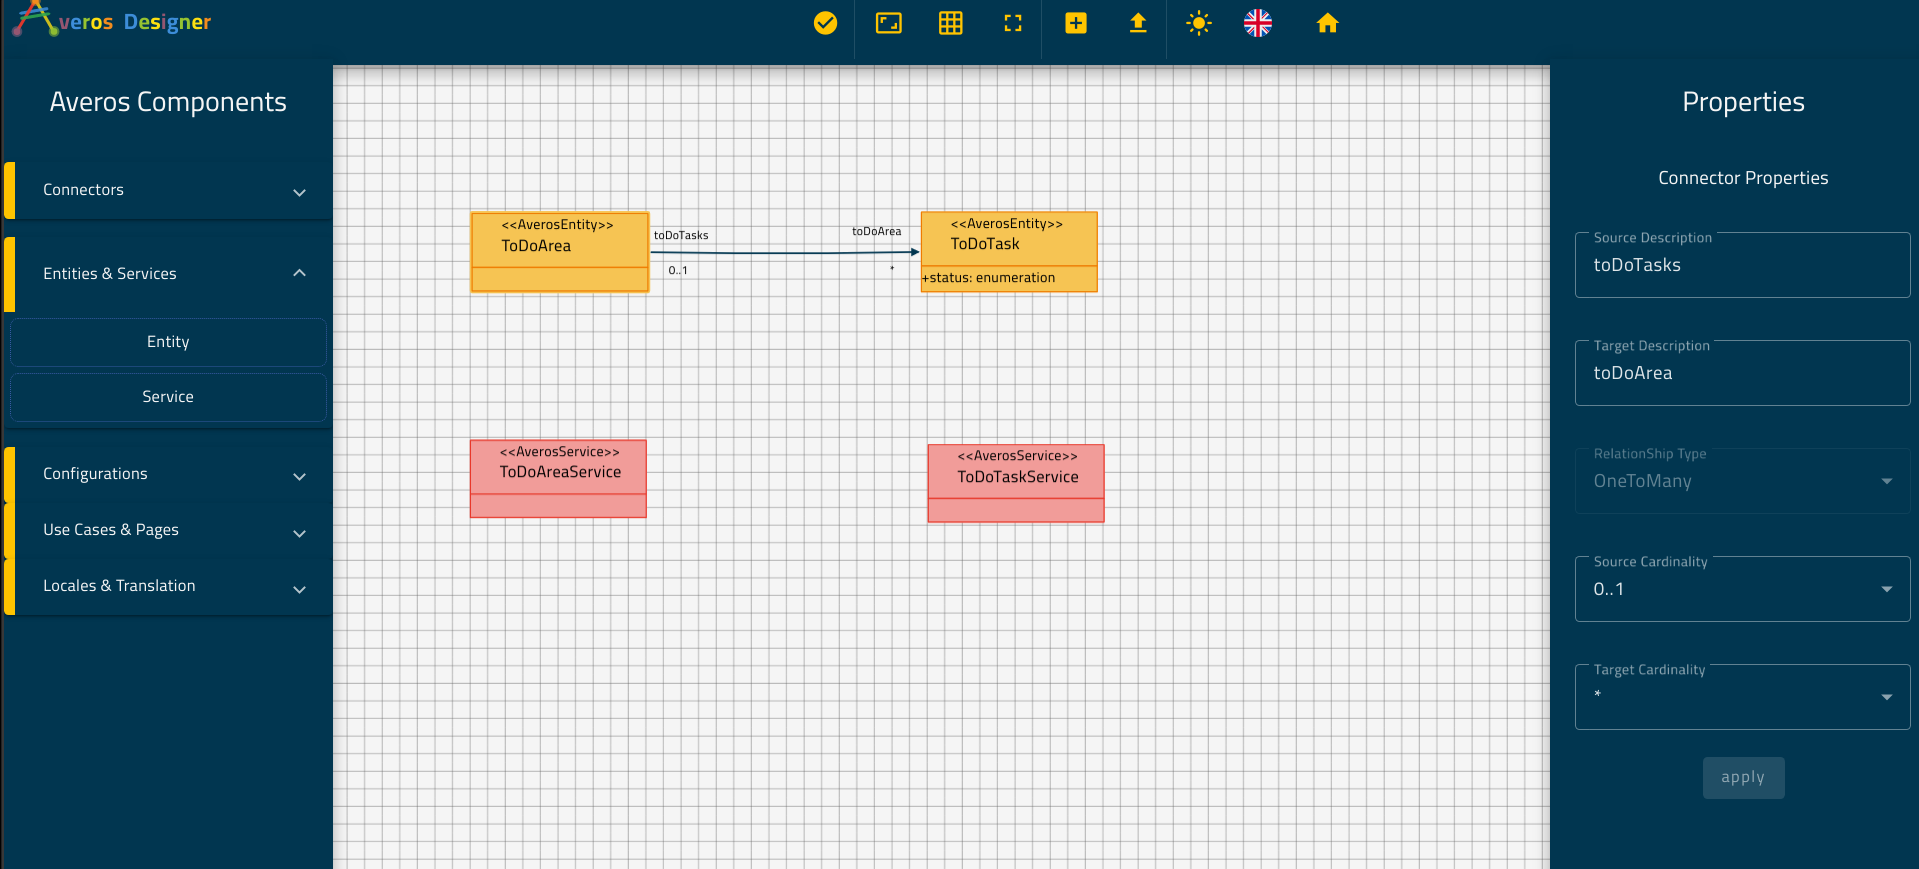
Update the connector properties with the following values as follows:
- Source Description:
toDoTasks(the path fromToDoAreatoToDoTask-an Area contains a colection of Tasks)- Target Description:
toDoArea(the path fromToDoTasktoToDoArea- A task belongs to one Area)- Source Cardinality:
0..1(A task belongs to zero or one Area)- Target Cardinality:
*(An Area contain zero or many Tasks)
Do not forget to click on apply after modifying the connector properties.
🙋♂️ Note that the disabled property Relationship Type was automatically set according to the value of both properties Source Cardinality and Target Cardinality.
Try to change these two properties and look how Relationship Type changes accordingly.
Your connector properties should look like the one below:
💡 Protip: You might want to
dragthecanvasto reach some part of your design.
Just holdctrland theleft mouse buttonin an empty space on the canvas and move your mouse.
💡 Protip: You might want to
dragthecanvasto reach some part of your design.
Just holdctrland theleft mouse buttonin an empty space on the canvas and move your mouse.
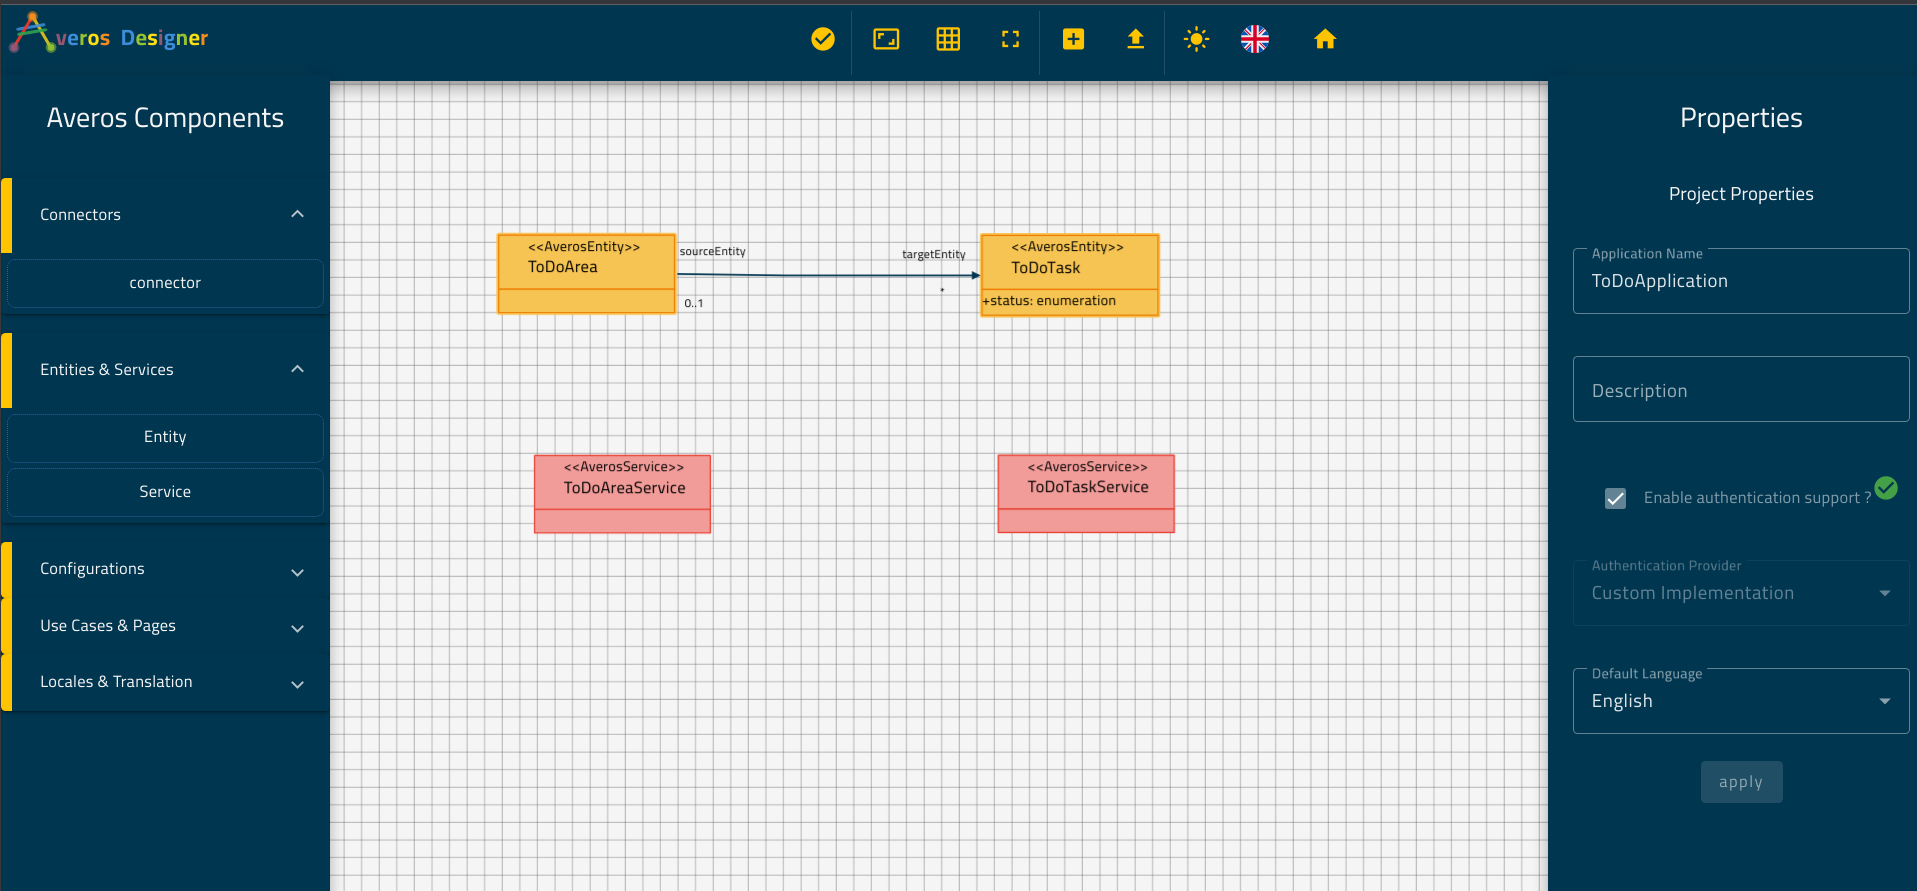
III. Save your Project
At this point you might want to save your project so that you mark your progress.
Averos Designer provides you the possibility to save your project by exporting it to a file on your local disk.
An Exported project could be imported into Averos Designer as a starting point for any future updates.
In order to export your project go ahead and validate it using the button displayed below:
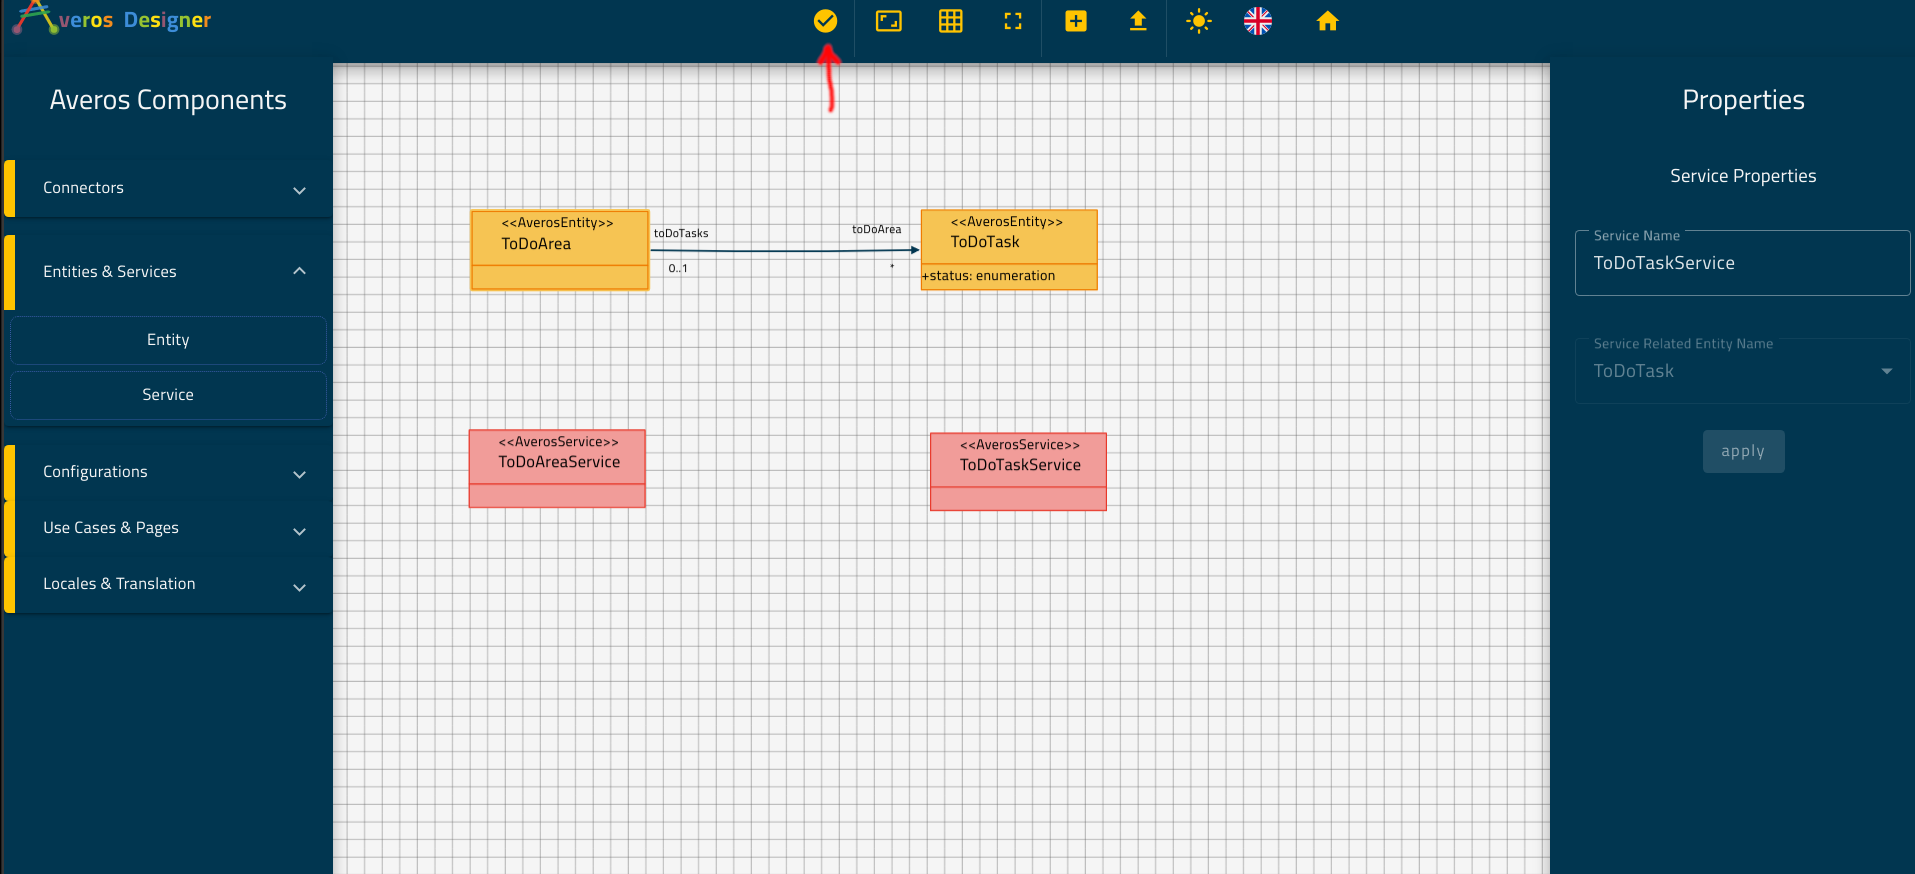
Once the project validated, a success message will pop up and both export project and generate project will be available.
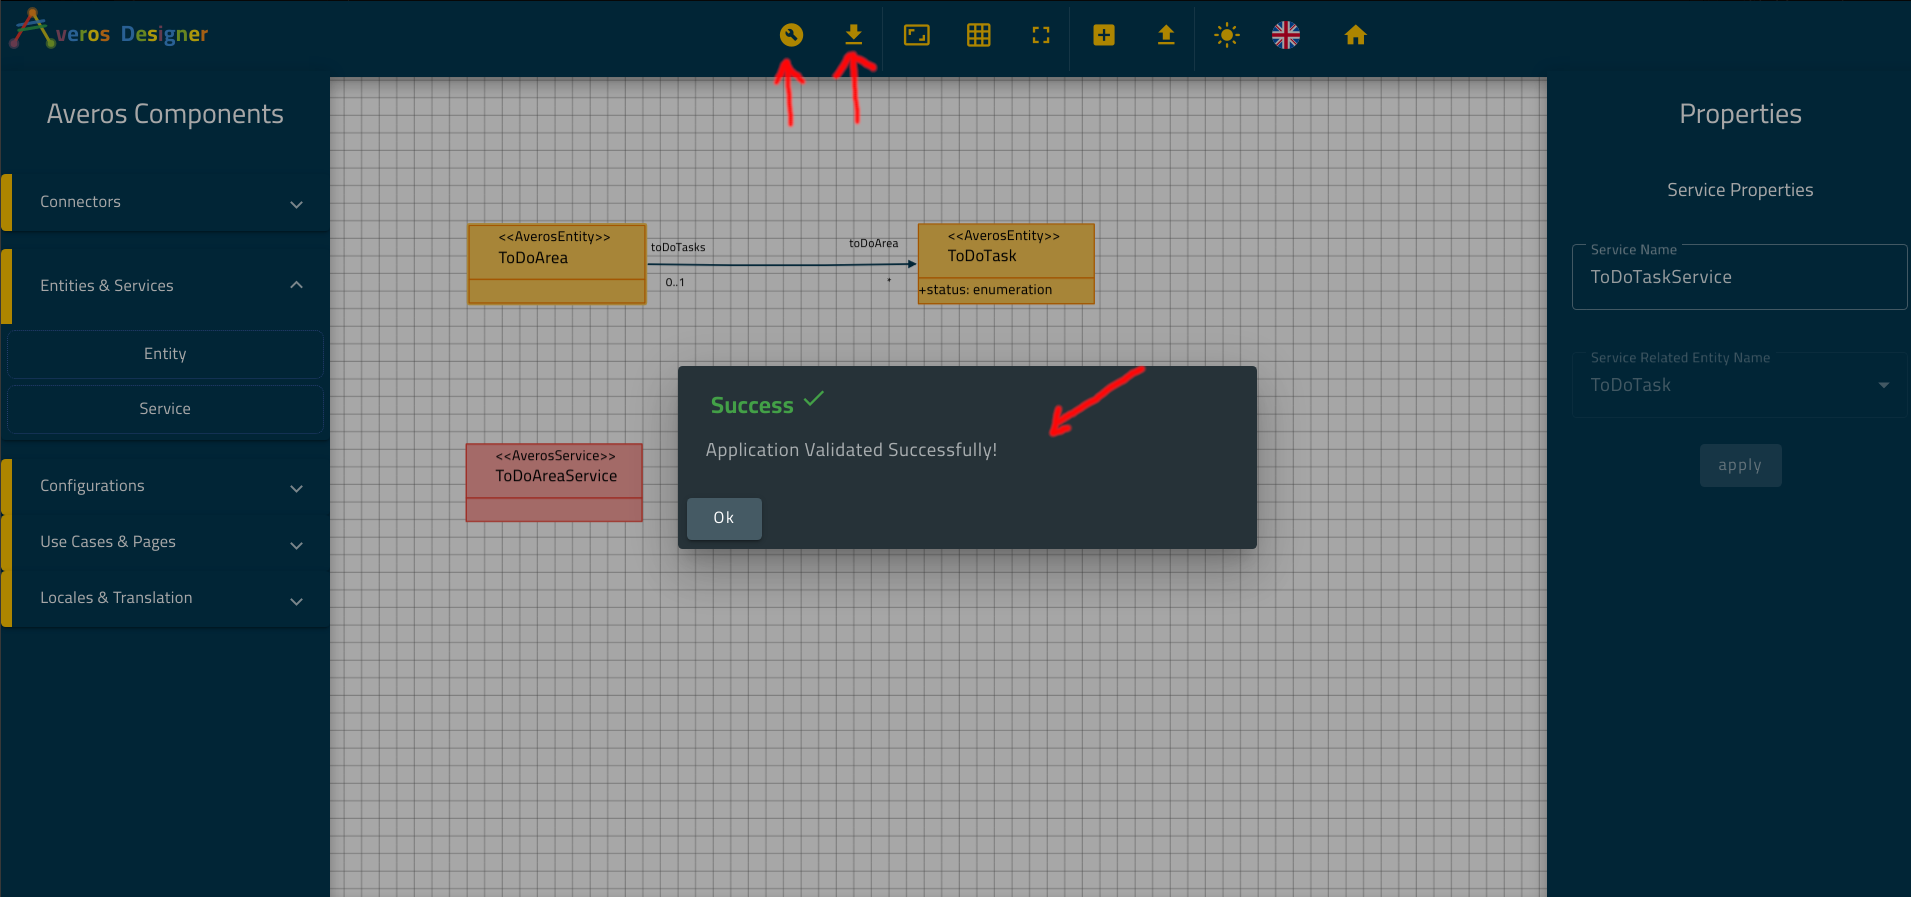
Now, go ahead and export your project to your local disk.
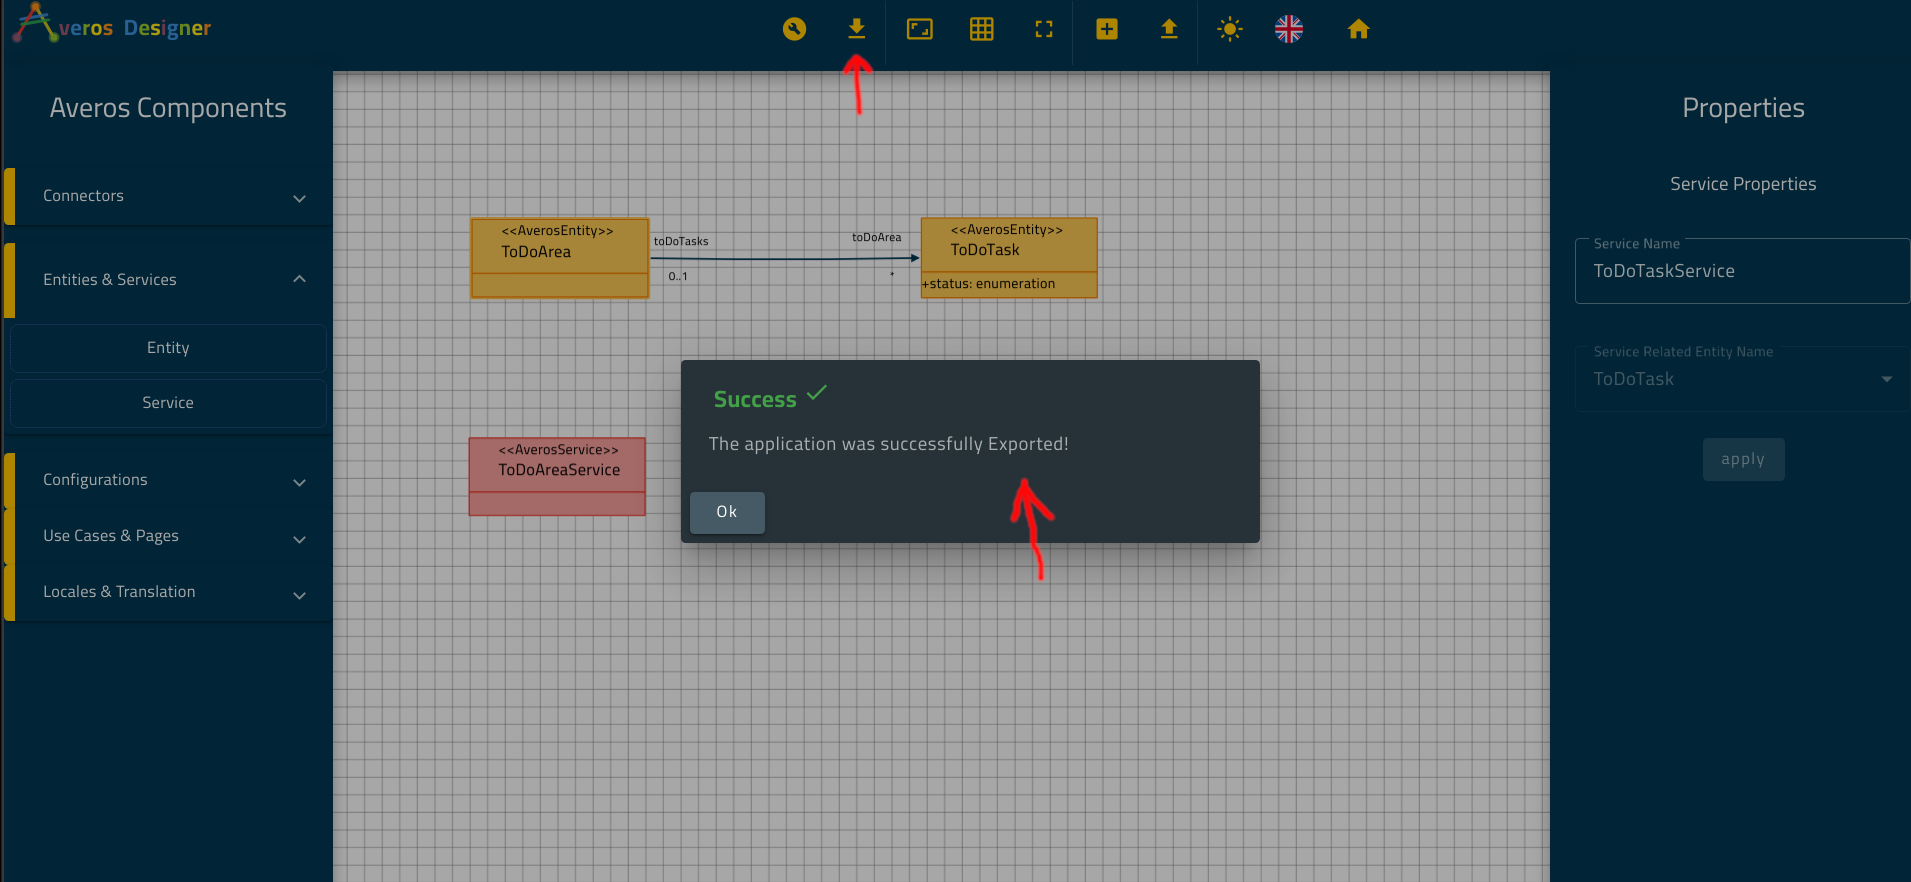
If you want to start from where you finished last time, just import your project into Averos Designer.
Congratulations on making it this far! 🚀
In the next section, we are going to create our use cases as expected by our business requirements.
See you there!