Create or Import a Project
🚩As mentioned in the previous section, Averos Designer is available anonymously for the whole public.
However, submitting an application generation request will requires you to be signed into your account space.
So please make sure you have created a new WiBuild account and validate it before starting to create your application so that you would be able to submit an application generation request.
Also, since the validation process is initiated by email, make sure you provide a real email address so that you would be able to receive the validation link.
Now let go ahead and start designing!
I. Create a New Project
Step 1 - Navigate to WiBuild
Navigate to WiBuild and sign into your account using a valid user
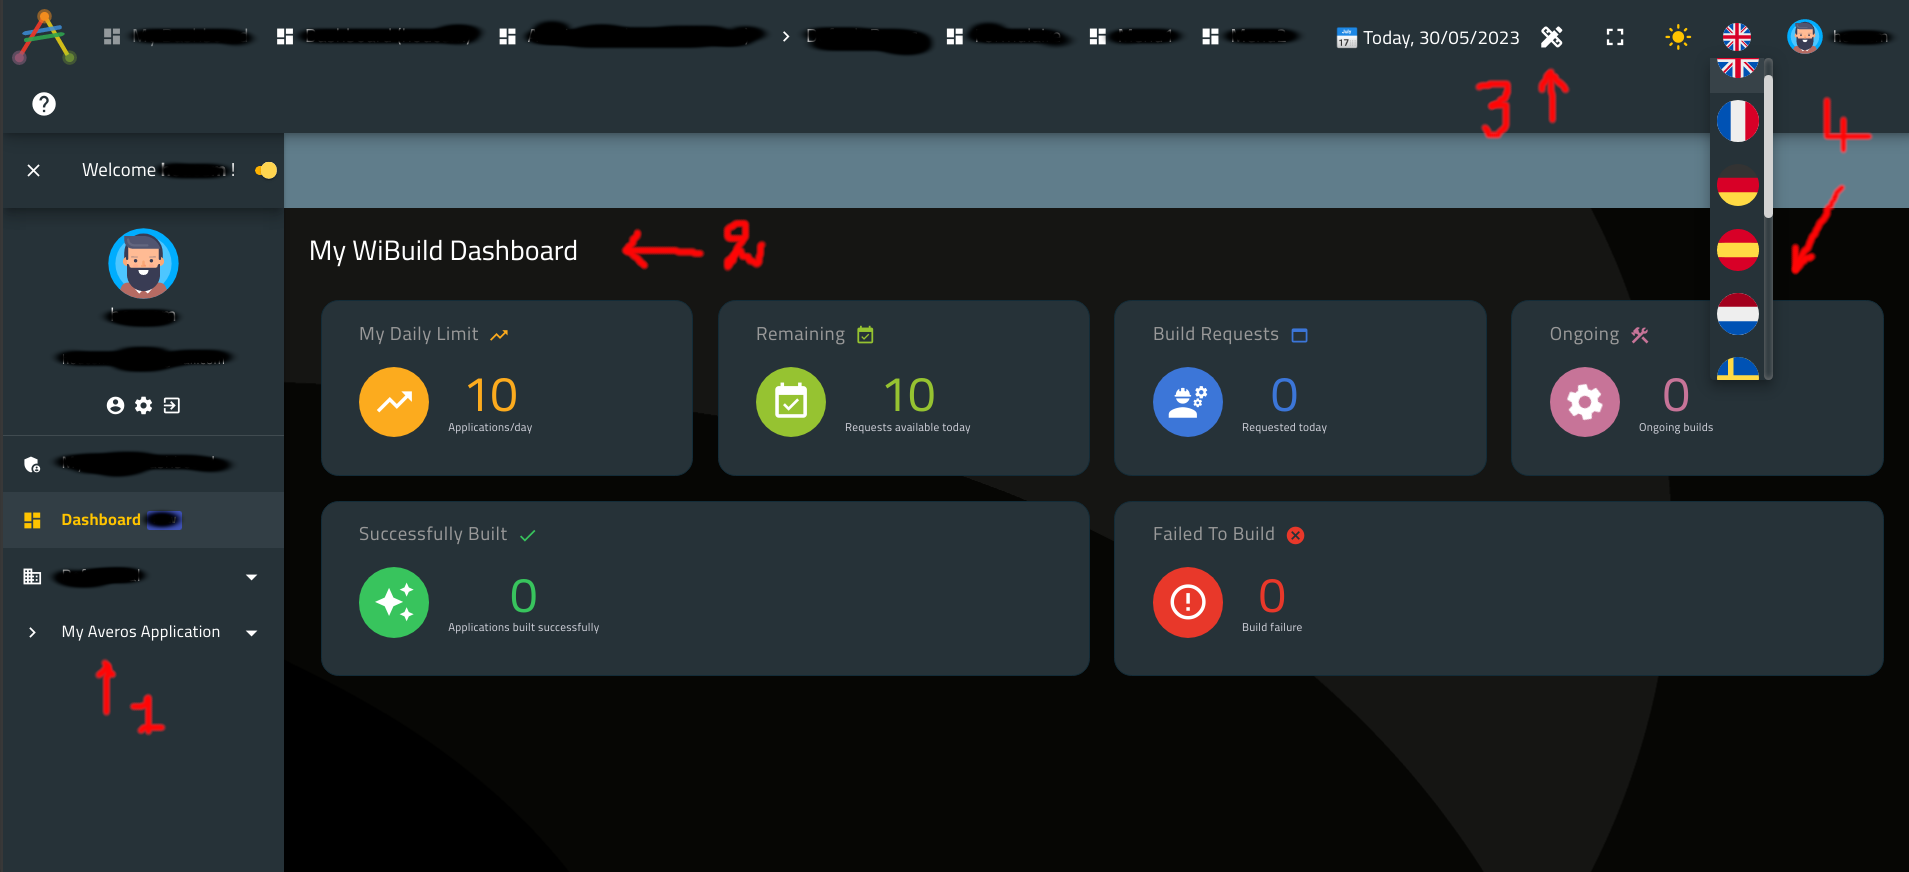
Note that four main things have been pointed out in the picture above, namely:
- Number One/1 : this is the menu to the application management module where you will be able to search and download your application binary files as well as their related averos designer projects
- Number Two/2 : this is your private dashboard. It gives you the following informations:
- Your daily generation requests limit: WiBuild allows only 10 daily generation requests per user
- Your current tolerated number of application generation requests in the current day
- The number of application build you created in the current day
- The number of ongoing application generation processes you created in the current day
- The number of generated application in the current day
- The number of failed application generation in the current day
- Number Three/3 : this button is the link to Averos Designer (this is how you open averos designer)
- Number Four/4 : shows the supported languages. You might switch to your favorite language using this menu link
Step 2 - Open Averos Designer
Now, Go ahead and open averos designer using the button you have seen earlier (Number 3 in the previous picture)
Here is what averos designer looks like:
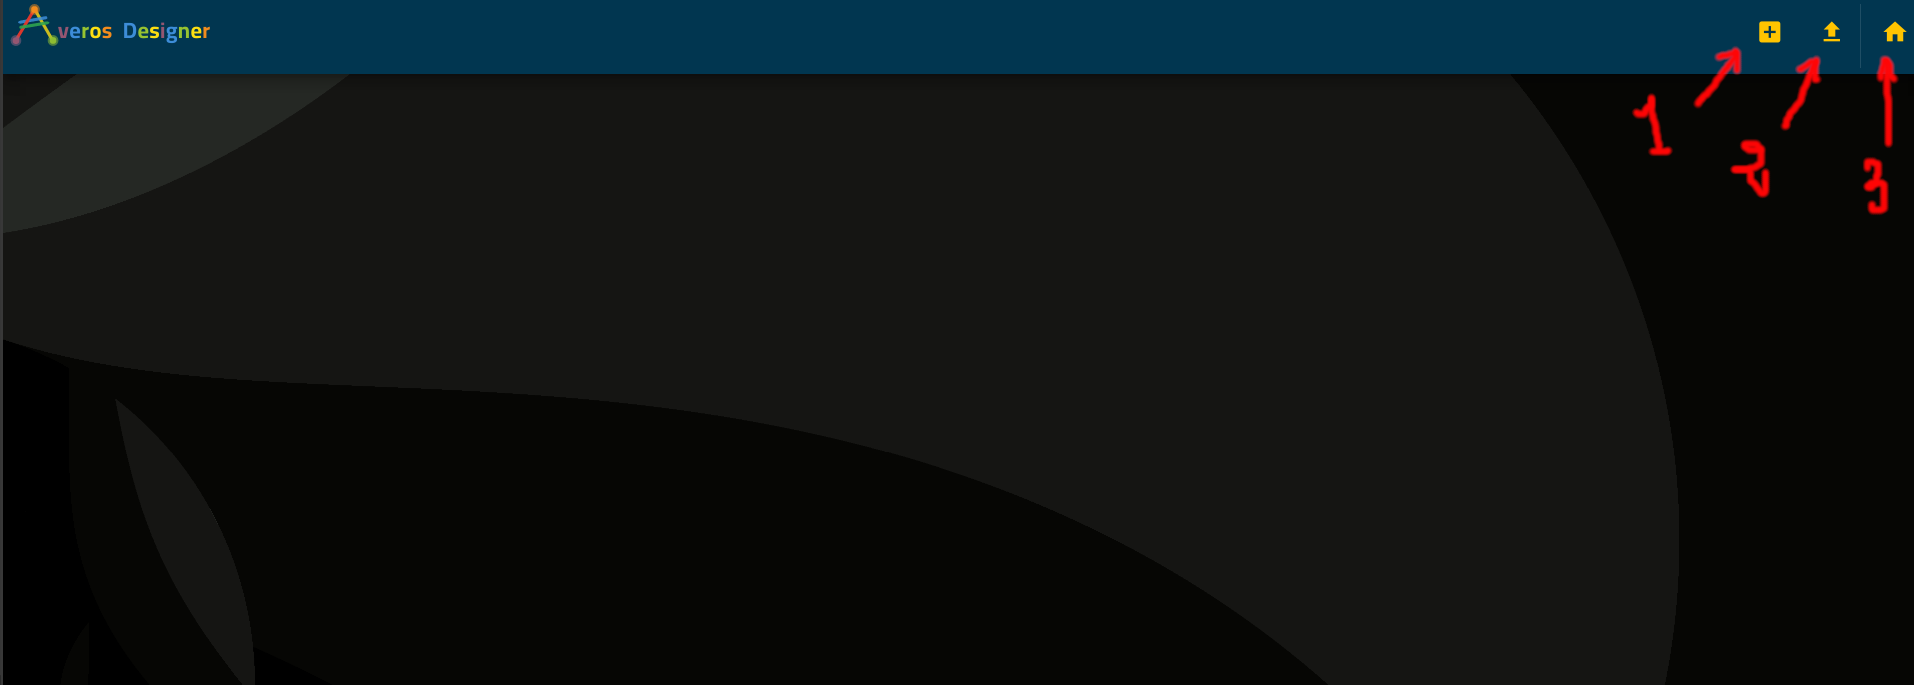
Note that three things have been pointed out in the picture above, namely:
- Number One/1 : this is the link to create a new project
- Number Two/2 : this is the link to import an existing project
- Number Three/3 : this is the link to get back to WiBuild Home screen
Step 3 - Create New Project
Create a new averos project using the dedicated menu link (Number 1)
Here is what your designer should look like:
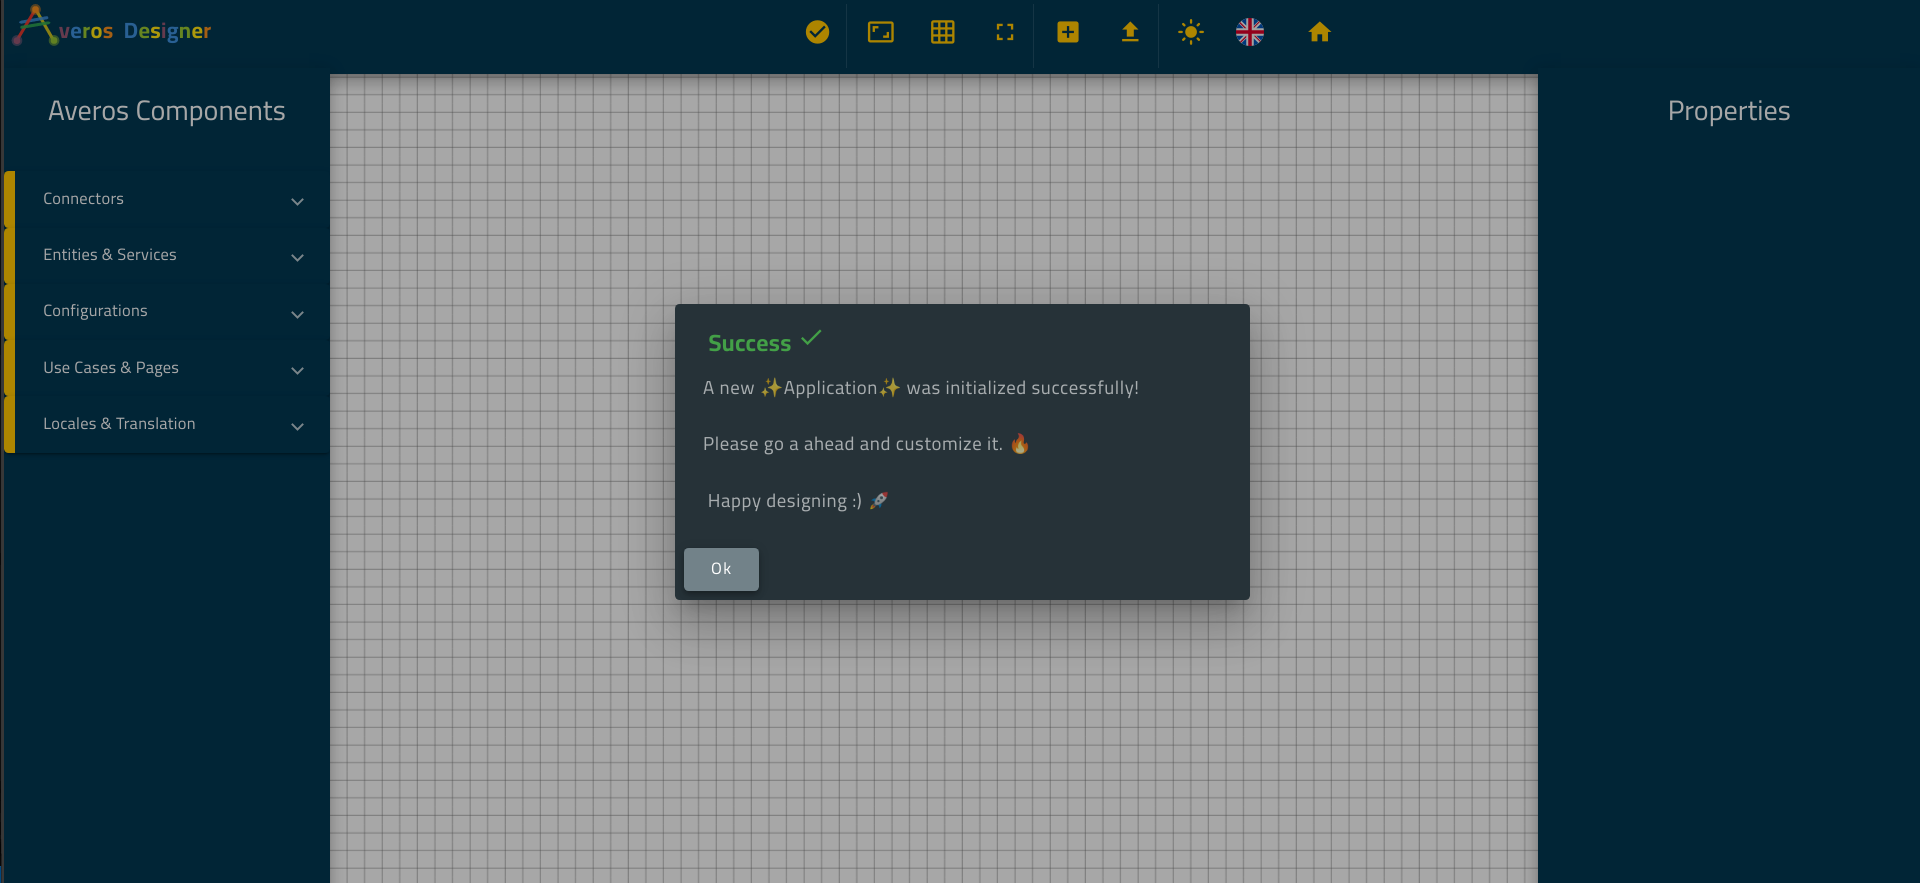
Go ahead and close the welcome message.
Let’s examine our Averos Designer Workspace:
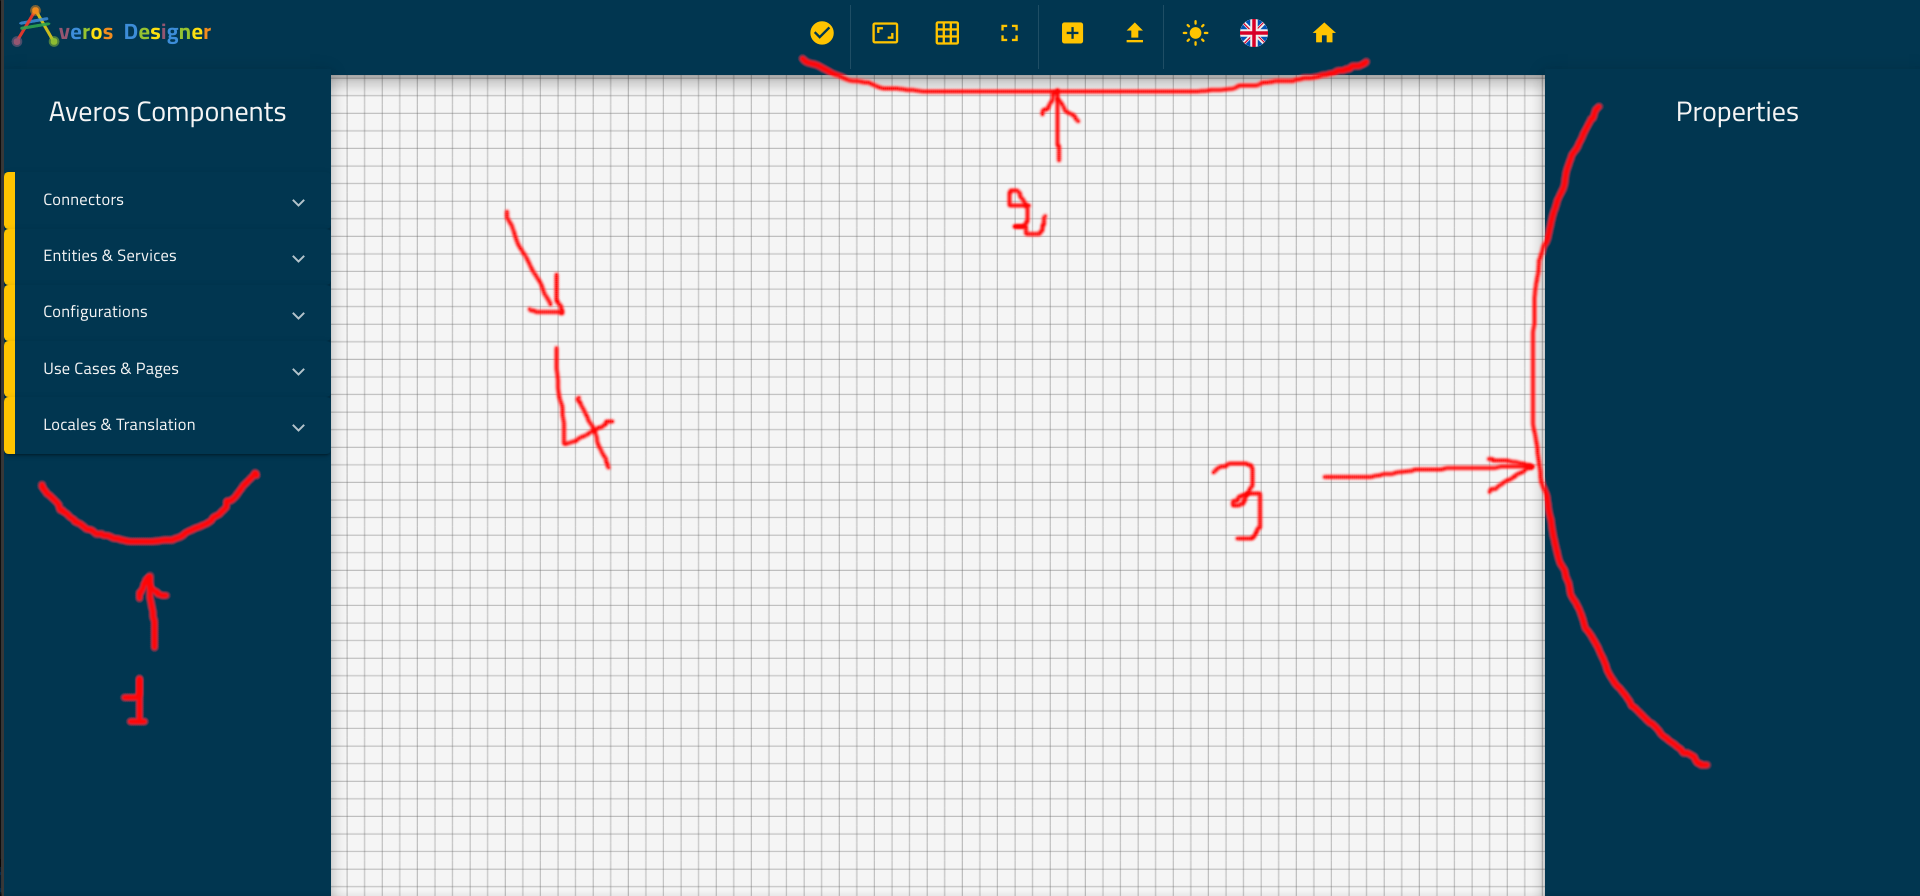
As pointed out in the picture aboce, our Averos Designer Workspace is composed of three parts:
- Number 1 : This is the Averos Components panel where you will find most of the component you will drag&drop in the canvas
- Number 2 : This is the top menu and is composed of the following menu items (icons from Left to Right):
- Home : gets you back to WiBuild home page
- Language : switch the language
- Switch light/dark Mode : switch between light and dark modes
- Import : import an averos project as a
jsonfile- New : create a new projects
- Fullscreen ON/OFF : switch fullscrenn On or Off
- Toggle canvas grid : Toggle the Canvas Grid On or Off
- reset scale : rest the canvas scale to default scale
- validate project : Validate an averos project. Once the project validation succeeded this button will be replaced by two other buttons, namely:
- Export Application : Export an application to a
jsonfile- Generate my application : submit an application generation request
- Number 3 : This is the Averos Components panel where you will find most of the component you will drag&drop in the canvas
- Number 4 : This is your workspaces’ Canvas, where will be dragged & dropped all your components. Your design will be made in this area.
Step 4 - Project Properties
Now, let’s configure our project properties. Those properties are related to your application general features.
Go ahead and click on an empty space in the canvas.
Project Properties will show up in the right panel.
Set the following parameters as follows:
Application Name:ToDoApplicationDescription: describe your application (example:A simple ToDo application that serves as an example in averos framework tutorial for citizen developers)- leave the default values for the remaining configuration parameters
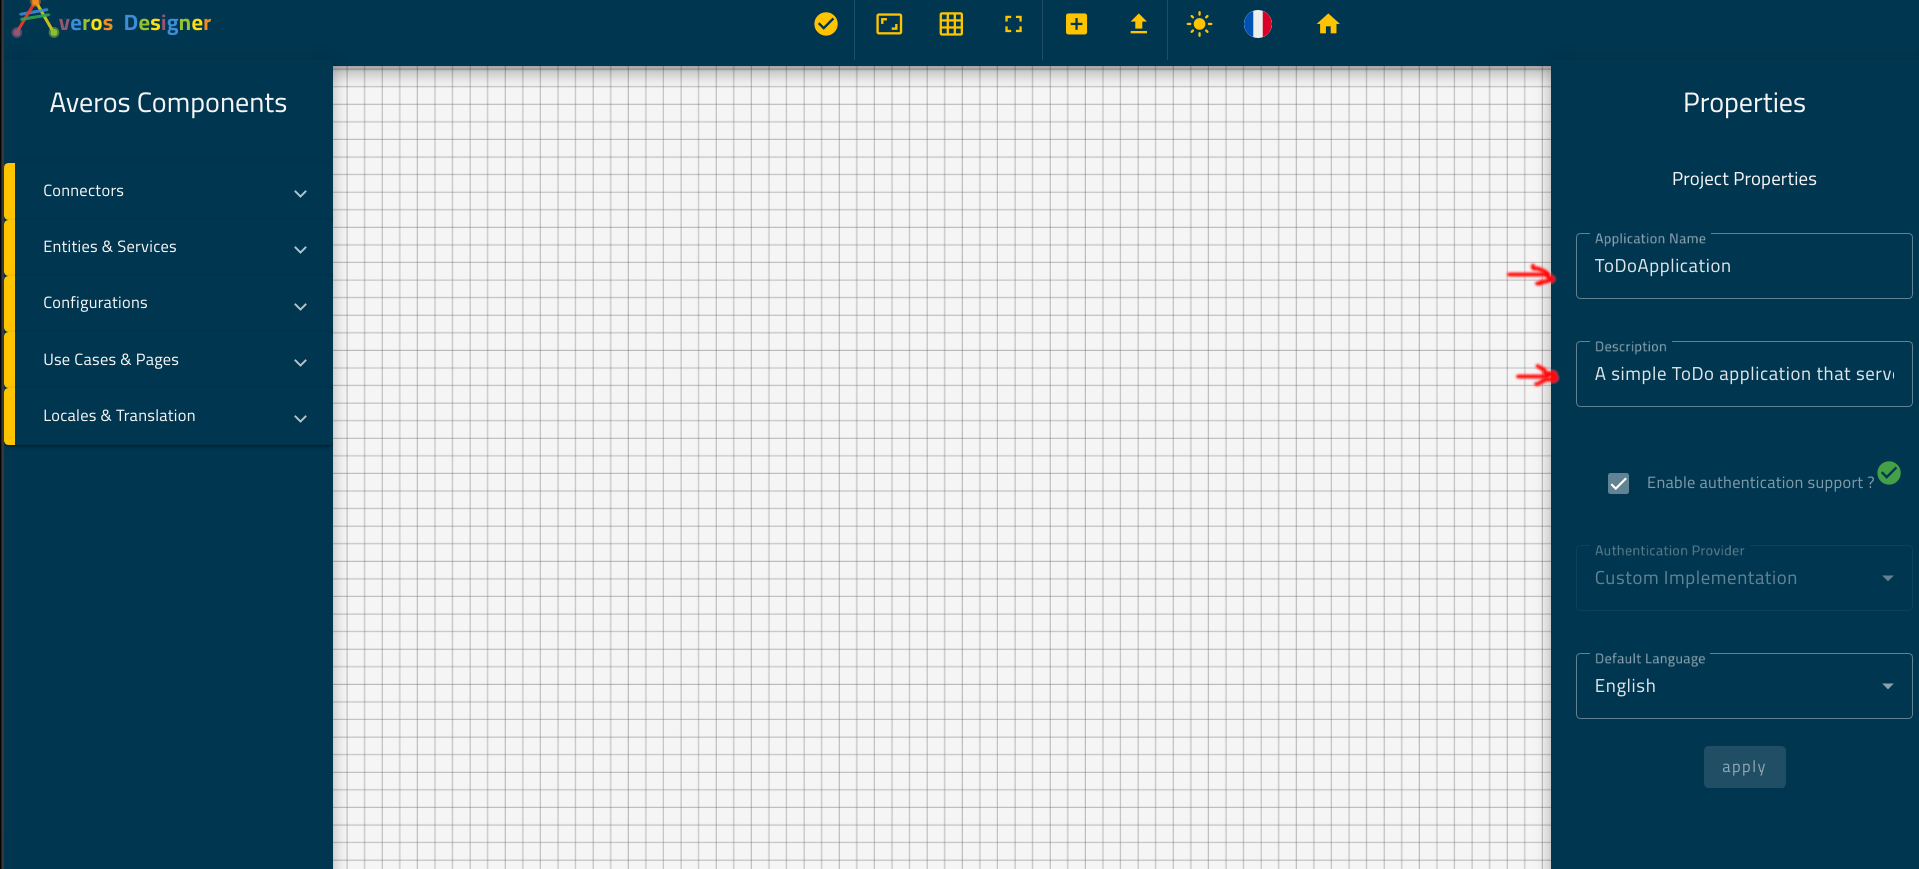
Congratulations! You have now created an empty averos application named
ToDoApplication.
Your application is by default:
- multiusers
- multi-language ready
- progressive
- responsive
- supports authentication
- has light and dark modes
- has a default login / register / profile pages
After we created and configured our ToDoApplication, it is high time we start to implement our business entities along with our business requirements.
In the next section, we are going to design our entities along with their managing services.
See you there!