Multi-Languages Application - Averos Translation
I. Introduction
So far, you have implemented all of your business requirements and generated your ToDoApplication.
Your default application language is English. Obviously, none english speakers will not understand your application.
but, what if you decide to target other markets that dont speak English ?
Well, you should probably consider re-writing the whole application display in your target language ? Or shouldn’t you ?
What if you want your application to support more than two languages ?
Should you re-write an application instance for each language ?
Well, believe it or not, your ToDoApplication already supports multi-language!
Better! Learning new languages does not require any additional code into your application.
Now your application is ready, what if you take it to the next level and let it speak multiple languages so that you can target a wider audience ?
Sounds brilliant ? Then let’s GO!
For the sake of this tutorial, we are going to add French support to our ToDoApplication.
Let’s go ahead and learn French!
🔖 Note that
averos frameworkcurrently supports 11 languages (discribed below) out of the box; so feel free to carry on with whatever additional language from that list instead of French.
II. Add a New Language Support
The current averos framework version supports these 11 languages out of the box.
| Supported Language | Language Code |
|---|---|
| Arabic [ 🇹🇳 ] | ar |
| Chinese [ 🇨🇳 ] | cn |
| English [ 🇺🇸 ] | en |
| Spanish [ 🇪🇸 ] | es |
| French [ 🇫🇷 ] | fr |
| German [ 🇩🇪 ] | de |
| Japanese [ 🇯🇵 ] | jp |
| Dutch [ 🇳🇱 ] | nl |
| Norwegian [ 🇳🇴 ] | no |
| Russian [ 🇷🇺 ] | ru |
| Swedish [ 🇸🇪 ] | se |
This means that the default user interfaces, including labels, actions, validation messages, actions messages and domain values, are already translated in these languages.
Averos framework provides a set of workflow commands that handle translation configuration.
Besides, averos-translation module could be used as a standalone multi-language enabler for any angular application; however we will not delve into this topic in this tutorial.
Shall we start adding French support to our ToDoApplication ?
In order to add a new language support to your application, Averos provides the workflow command add-language.
Go ahead and execute the following command.
Do not forget to update languageCode command parameter with your preferred language code. The list of language codes is mentioned above.
ng g @wiforge/averos:add-language --languageCode=fr
The command output should look like the following:

By the end of the workflow execution, Your application will be able to speak french at a beginner level.
This means that all generated default user interfaces-including default labels, default actions, default validation messages, default process messages and default domain values- are already translated in French.
Now we have added French support to our ToDoApplication, let’s look at our application and see what have changed since the last time we looked at it.
Go ahead and re-build/re-deploy your application by following these steps:
1. shutdown the running server
http-server
2. build and deployToDoApplicationby running the following command:ng build ToDoApplication && http-server -p 8081 -c-1 dist/to-do-application
Once ToDoApplication is up and running, go ahead navigate to http://localhost:8081
Here is what your application looks like:
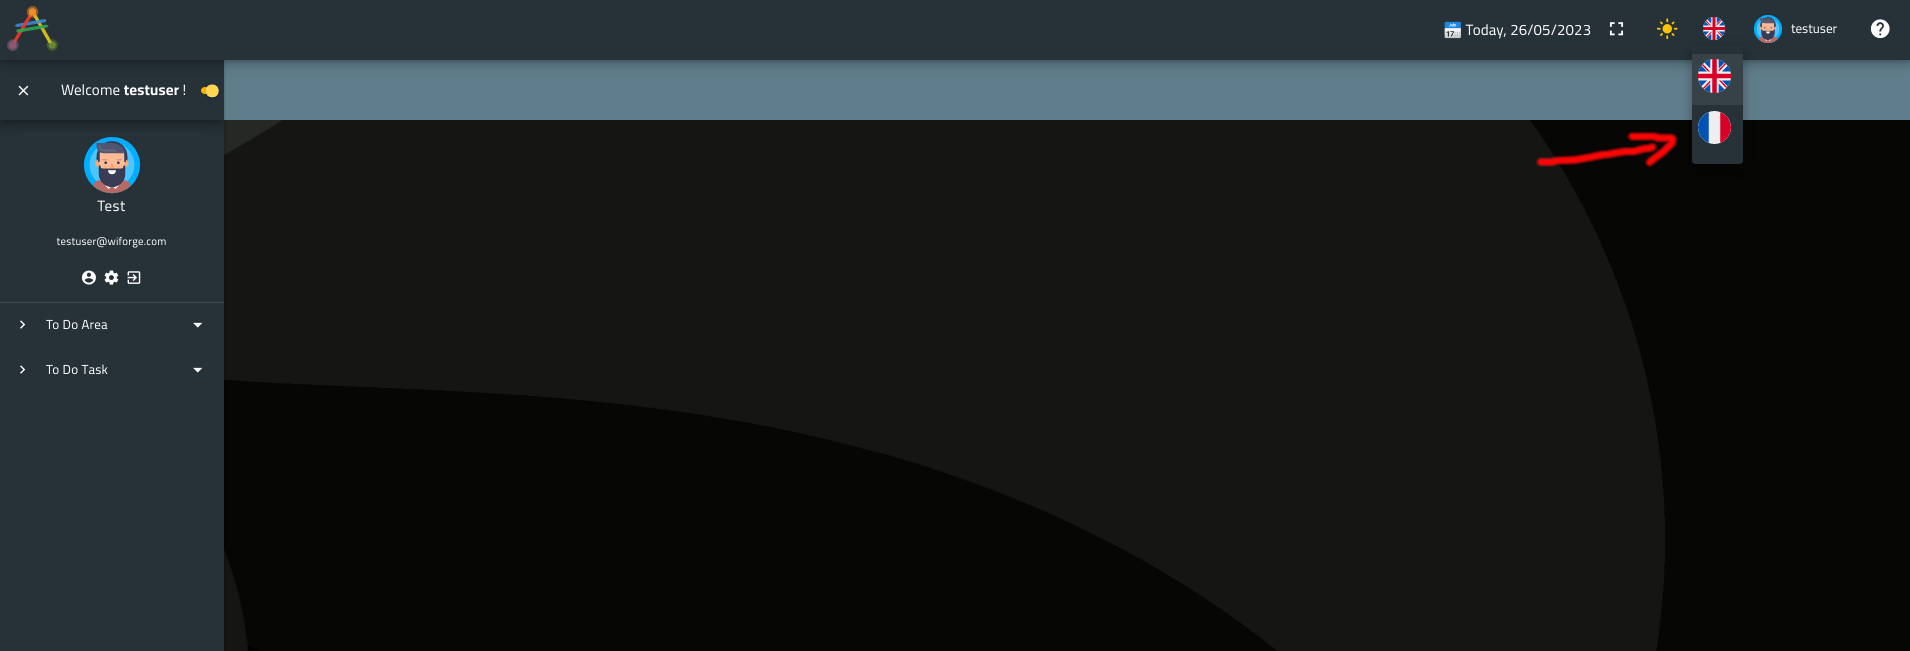
The first thing you will notice is the new French flag which was added to the list of supported languages, available in the top right upper menu.
Go ahead and switch to your new language by selecting the appropriate flag.
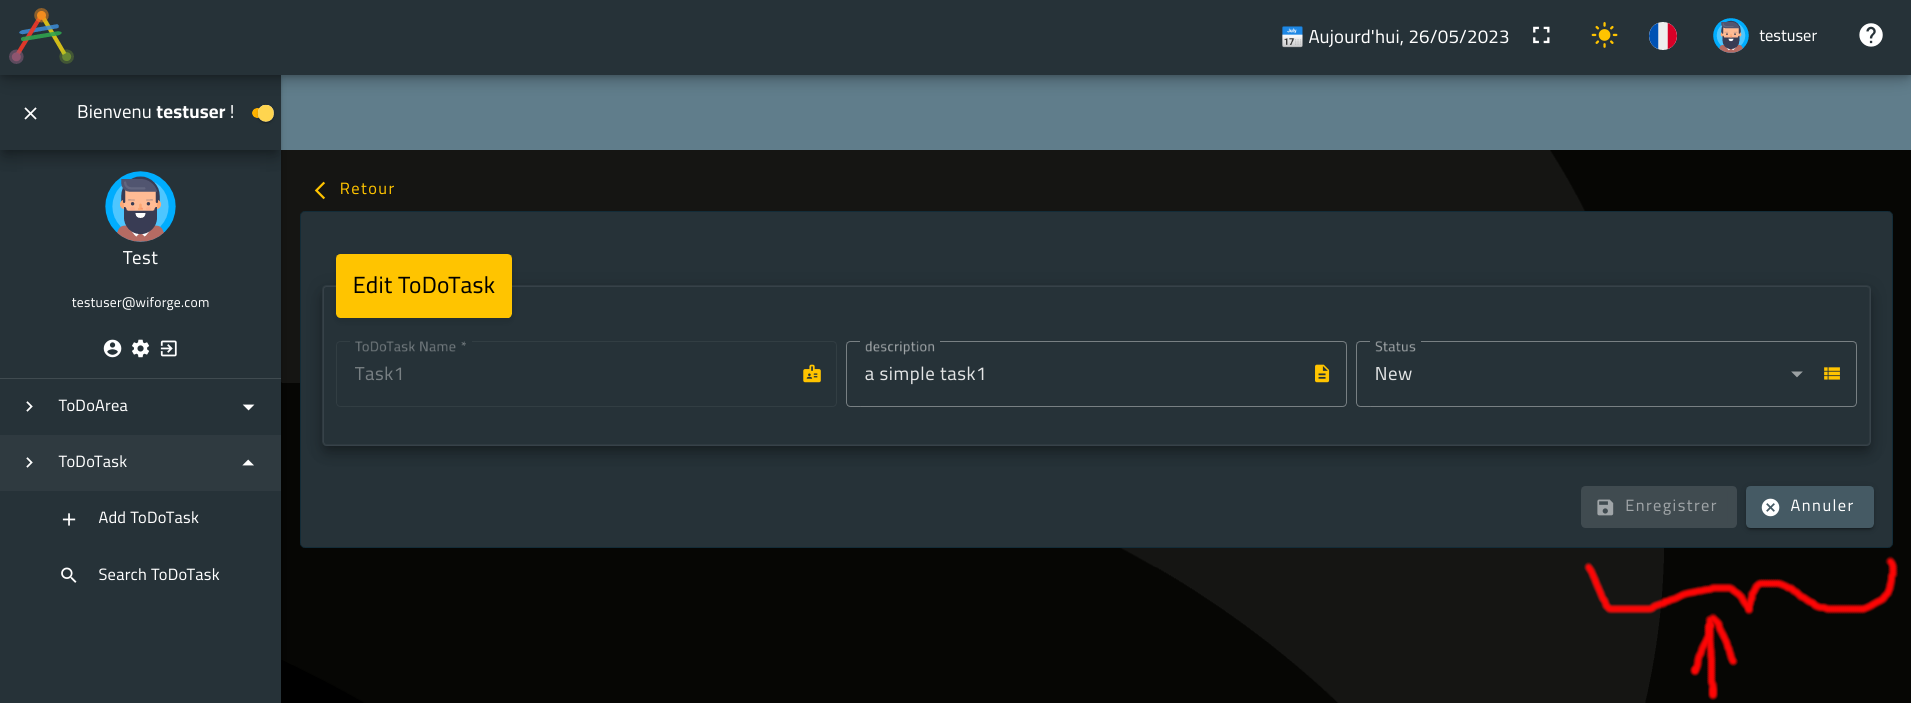
Here is what the application looks like:
Notice the date which is written in French.
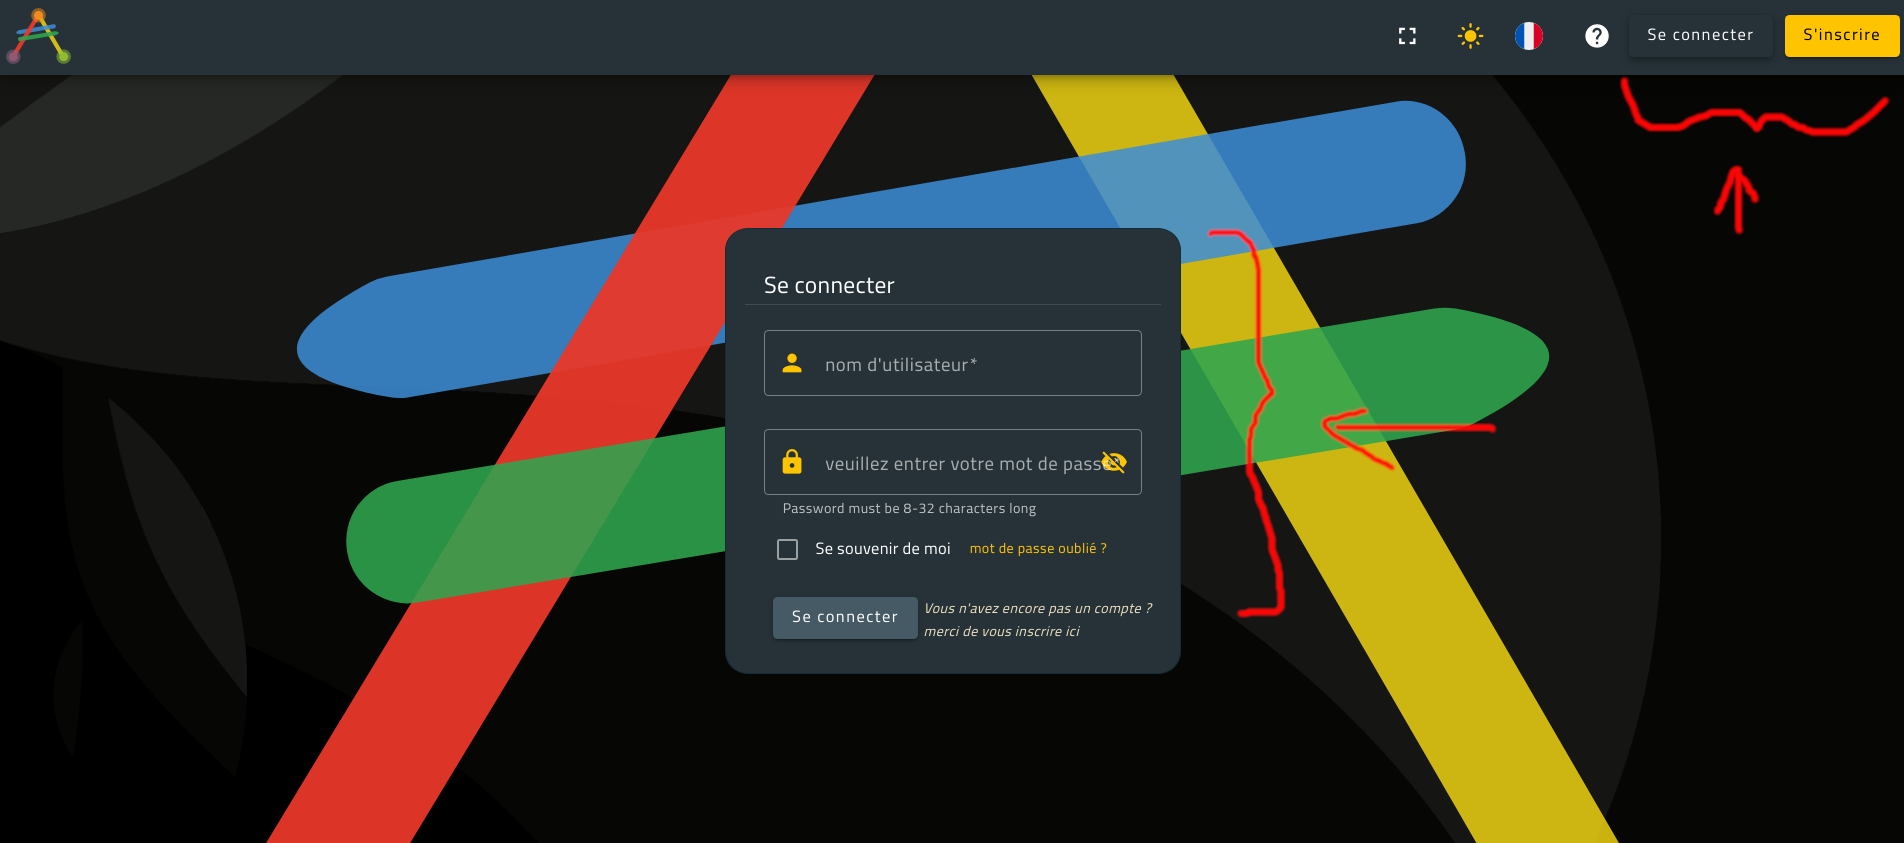
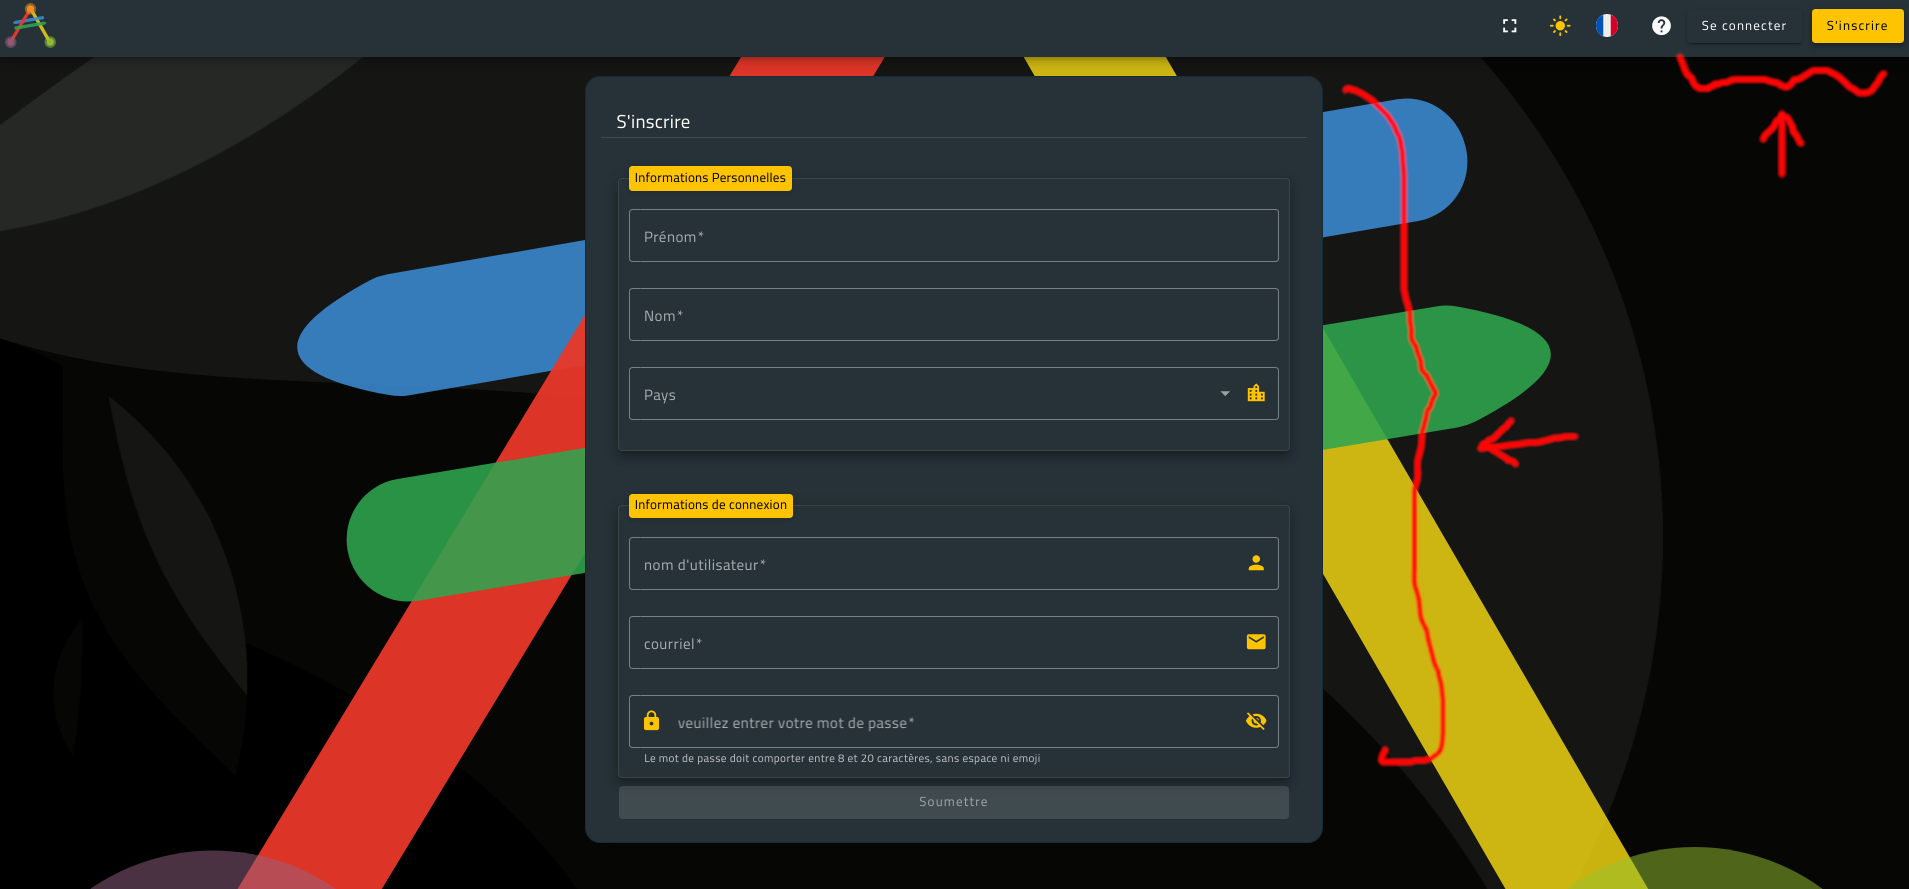
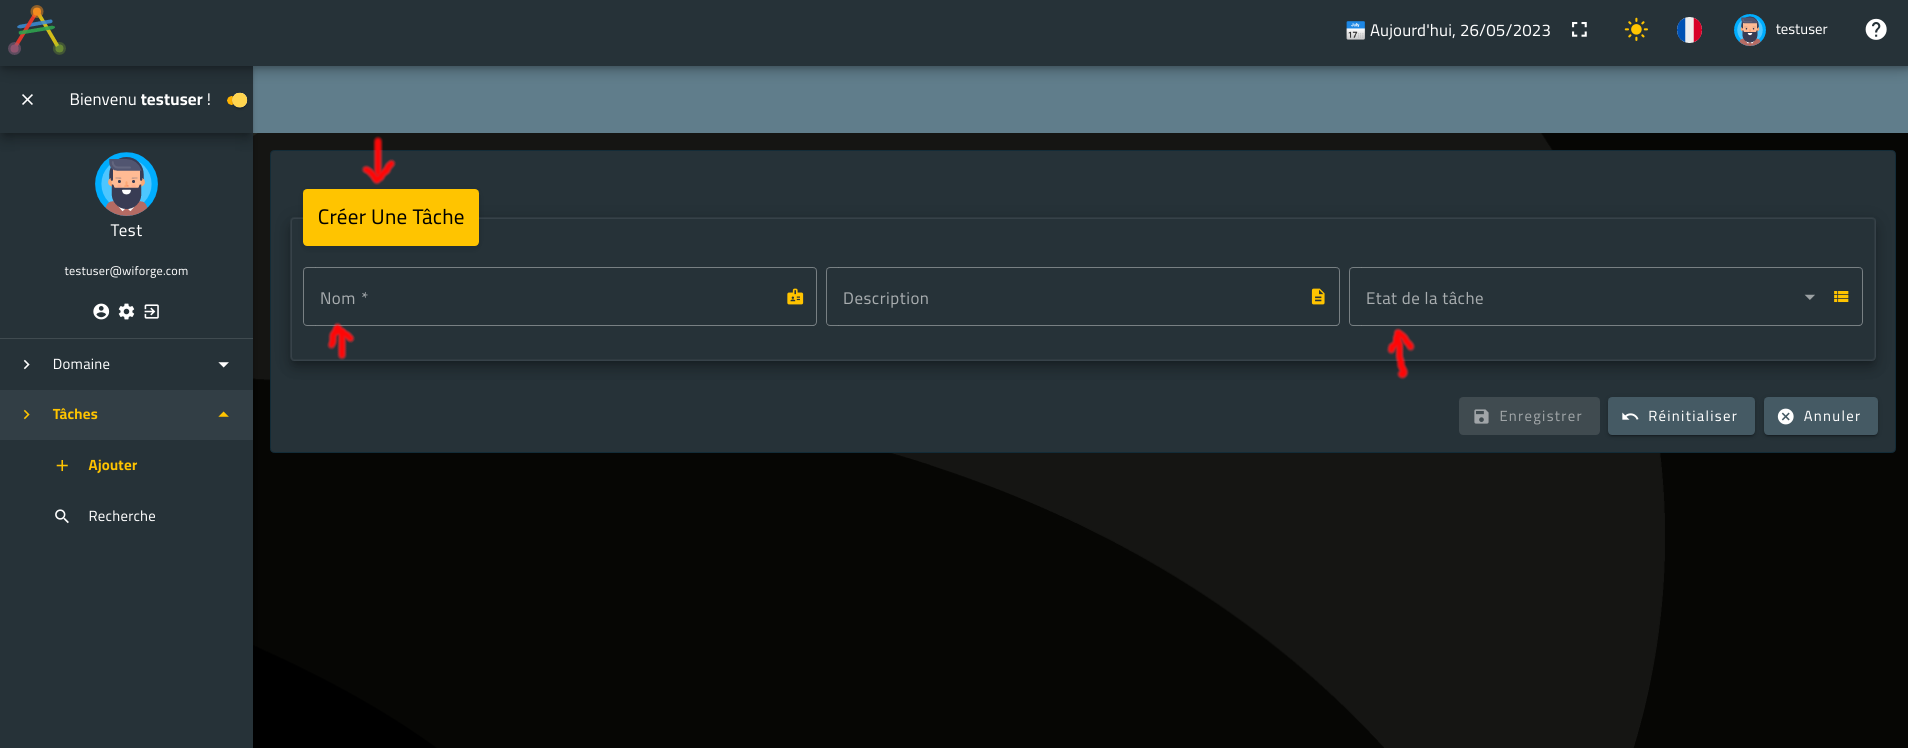
Now let’s look at these default averos components: View Component, Edit Component, Search Component, Default Sign in Component and Default Register Component.
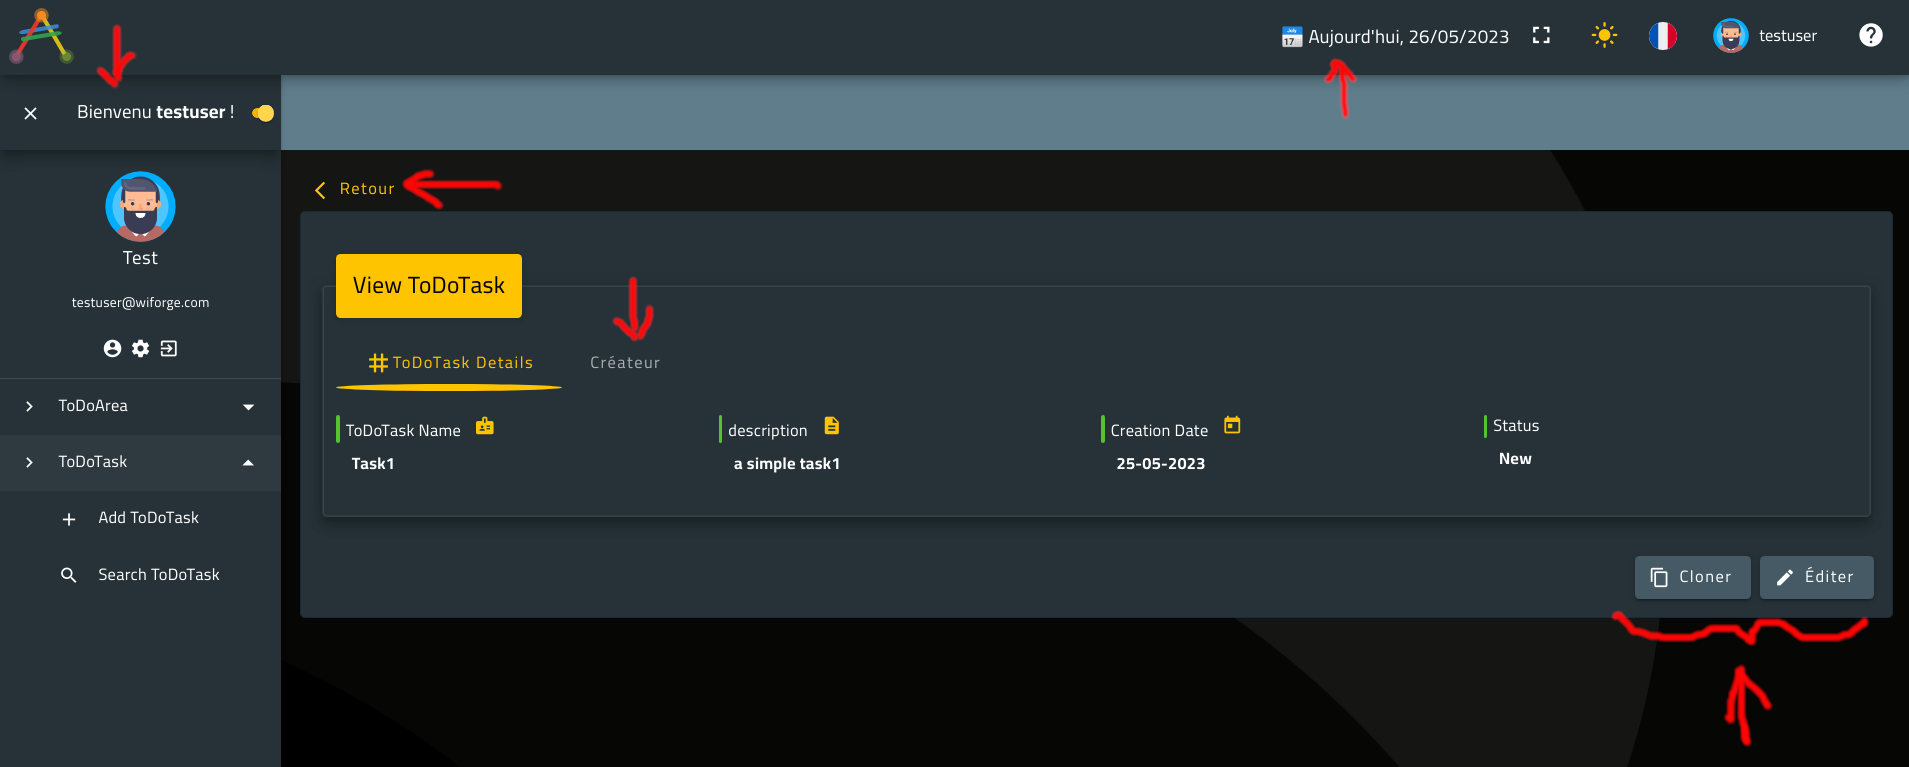
Notice that the following items have been already translated for you:
- action button labels
- default layout labels
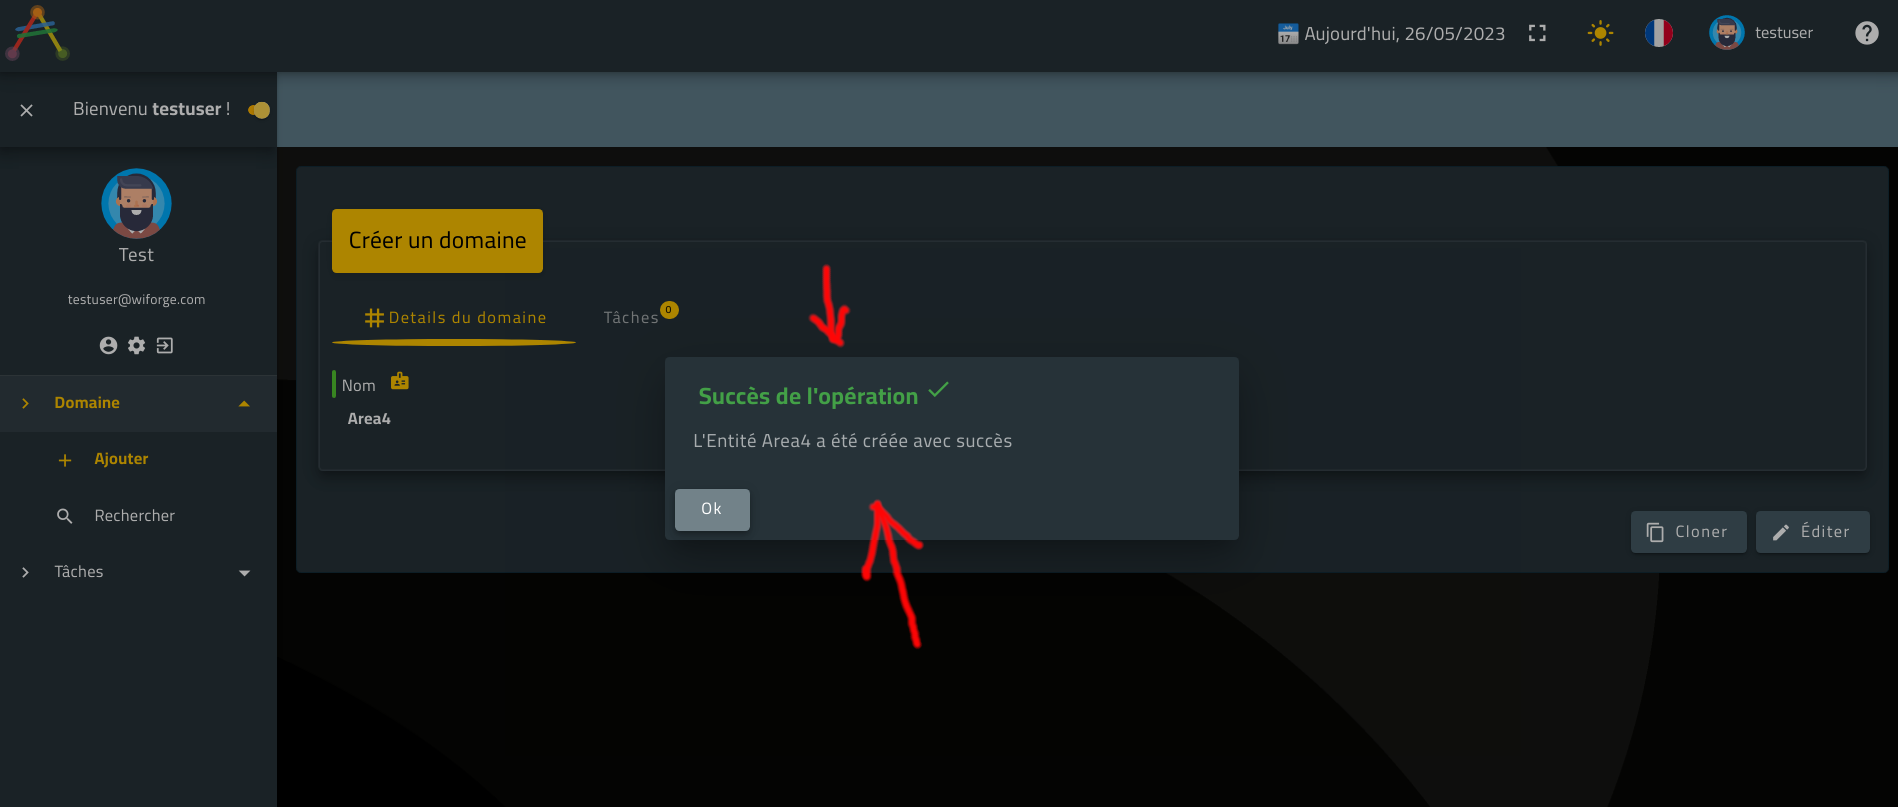
- default application messages (try to create a new Task for example and check the message)
- entities’ displayed values
- default sign in and register Component
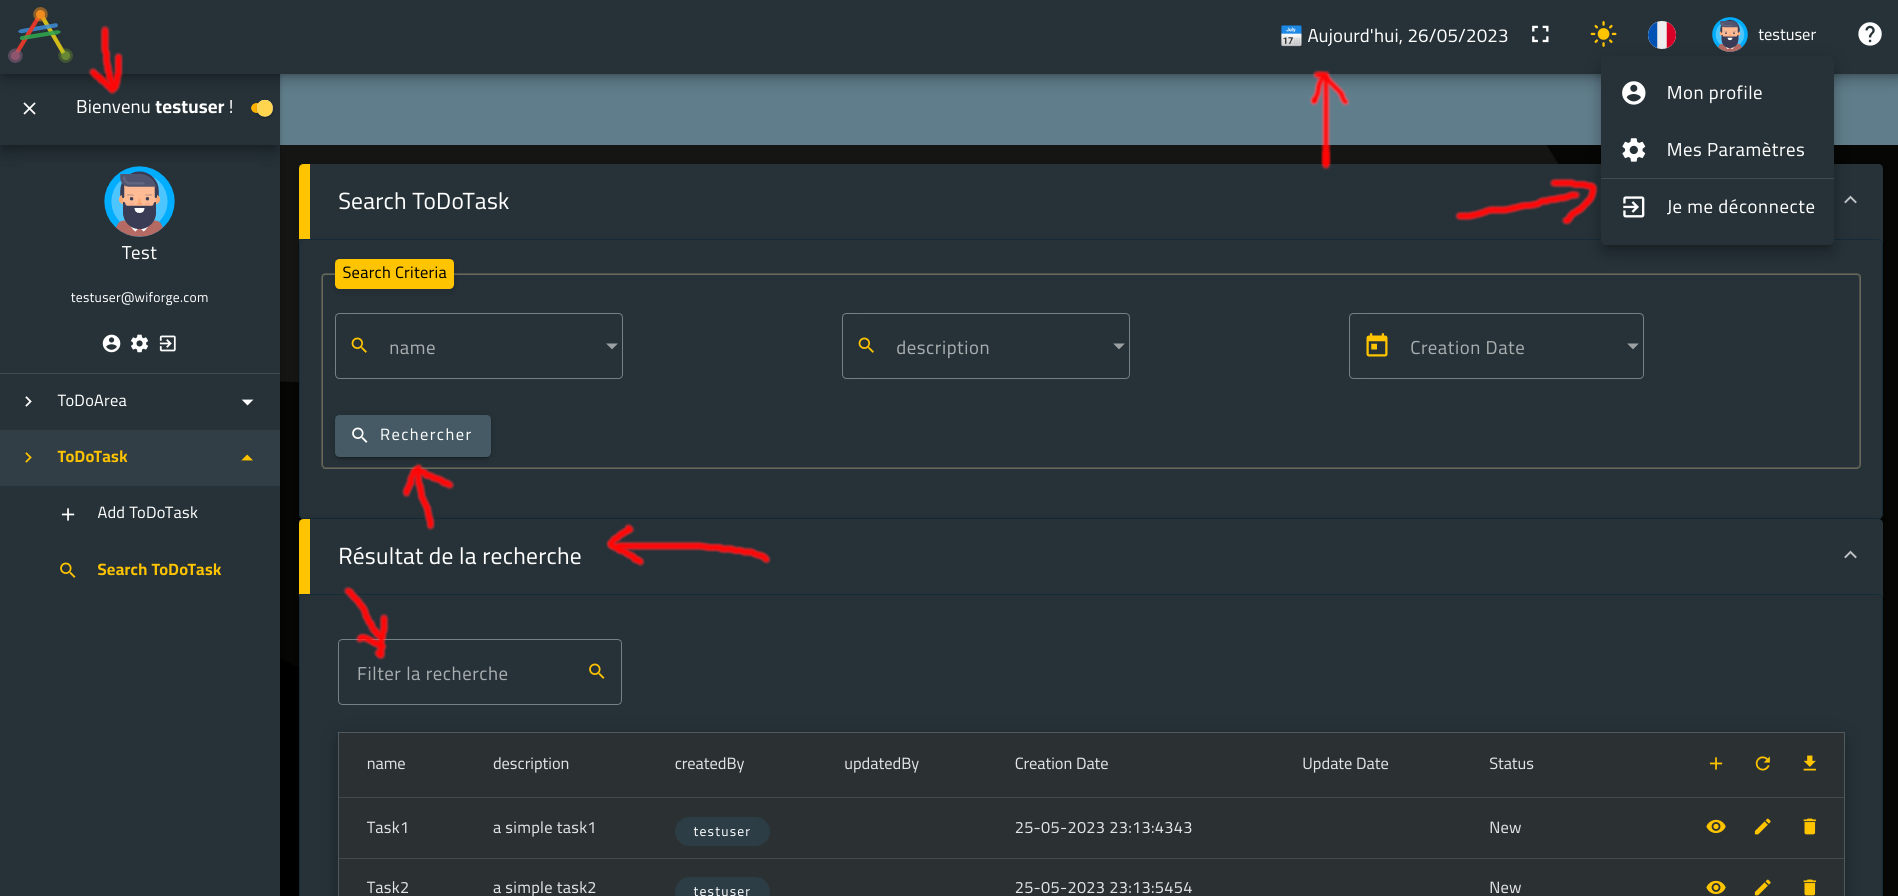
Still, our entity attributes names, our menu labels and our use cases labels/titles have not been translated yet!
Let’s improve our application vocabulary and teach it new French words!
III. Teach your application New Words
With Averos Framework, your application can be tought new words related to its echosystem.
From components and use cases labels/titles, to entities and members labels throughout action labels; every thing can be tought to your application in a new language.
OK! Let’s do this!
In order to teach your application new words in a specific language, Averos provides the following workflow command:
ng g @wiforge/averos:add-translation-entry --key=[your Word generic id] --value=[Your word in the target language] --lang=[the target language]
🚩 The command parameter key is described as the most natural, canonical word designation that identifies a specific element to be translated (ex.
todoarea.name/uc.create.todotask/uc.edit.todotask.title).
Averos Frameworkuses the following convention in order to identify its objects echosystem:
- Entity
- the entity name is defined by it’s class name in lowercase (ToDoTask entity ==>
translationKey = todotask)- entity members are defined by their names in lower case prefixed by their parent entity id (ex. ToDoTask.name ==>
translationKey = todotask.name)- use cases: All use case
translationKeysstarts withuc.[action]followed by the entity name in lower case and the target position. The target position could be either ethetitleor alabelto show in the subtitle.actionon the other hand can be one of the followinf values:create,edit,view,delete.
- search use case: uses the following pattern:
uc.search.[entityNameInLowerCase].[title | label](ex.uc.search.todotask.title)- edit use case: uses the following pattern:
uc.edit.[entityNameInLowerCase].[title | label](ex.uc.edit.todotask.label)- create use case: uses the following pattern:
uc.create.[entityNameInLowerCase].[title | label](ex.uc.create.todotask.title)- menu:
- menuItem: All menu items traslationKeys starts with
menu.followed by the entity class name in lowercase followed by the action if any. (ex. a menuItem that leads to the creation of an entity namedToDoTaskwill have the followingtranslationKey:menu.todotask.add). The grouping parent menu will have the followingtranslationKey:menu.todotask. Thus, Menu item translation keys will follow the pattermenu.${entityNameInLowerCase}.[action]where action is optional.
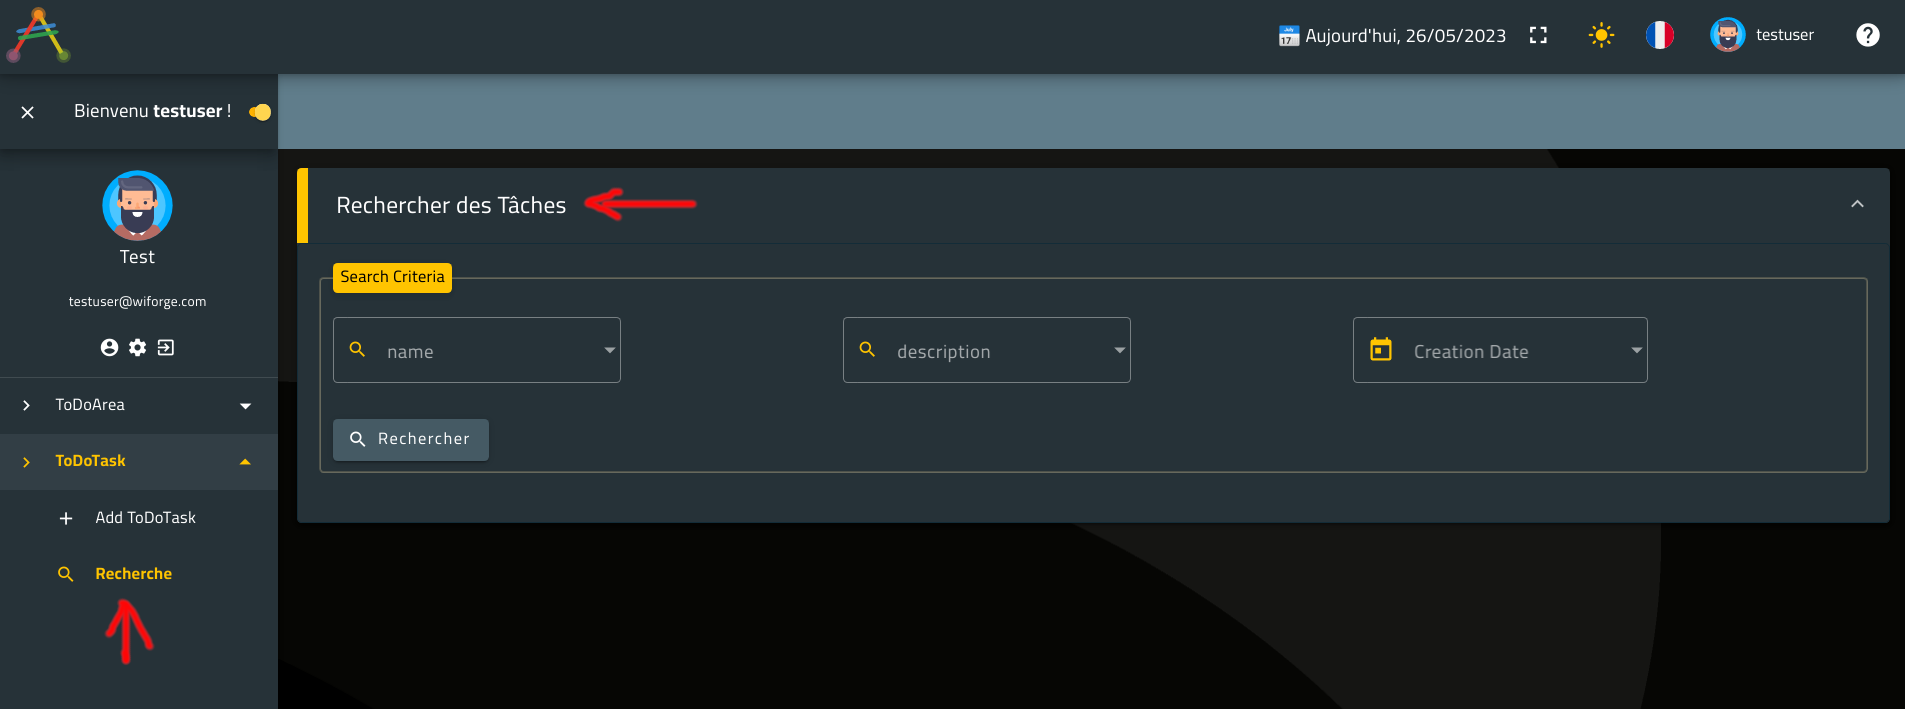
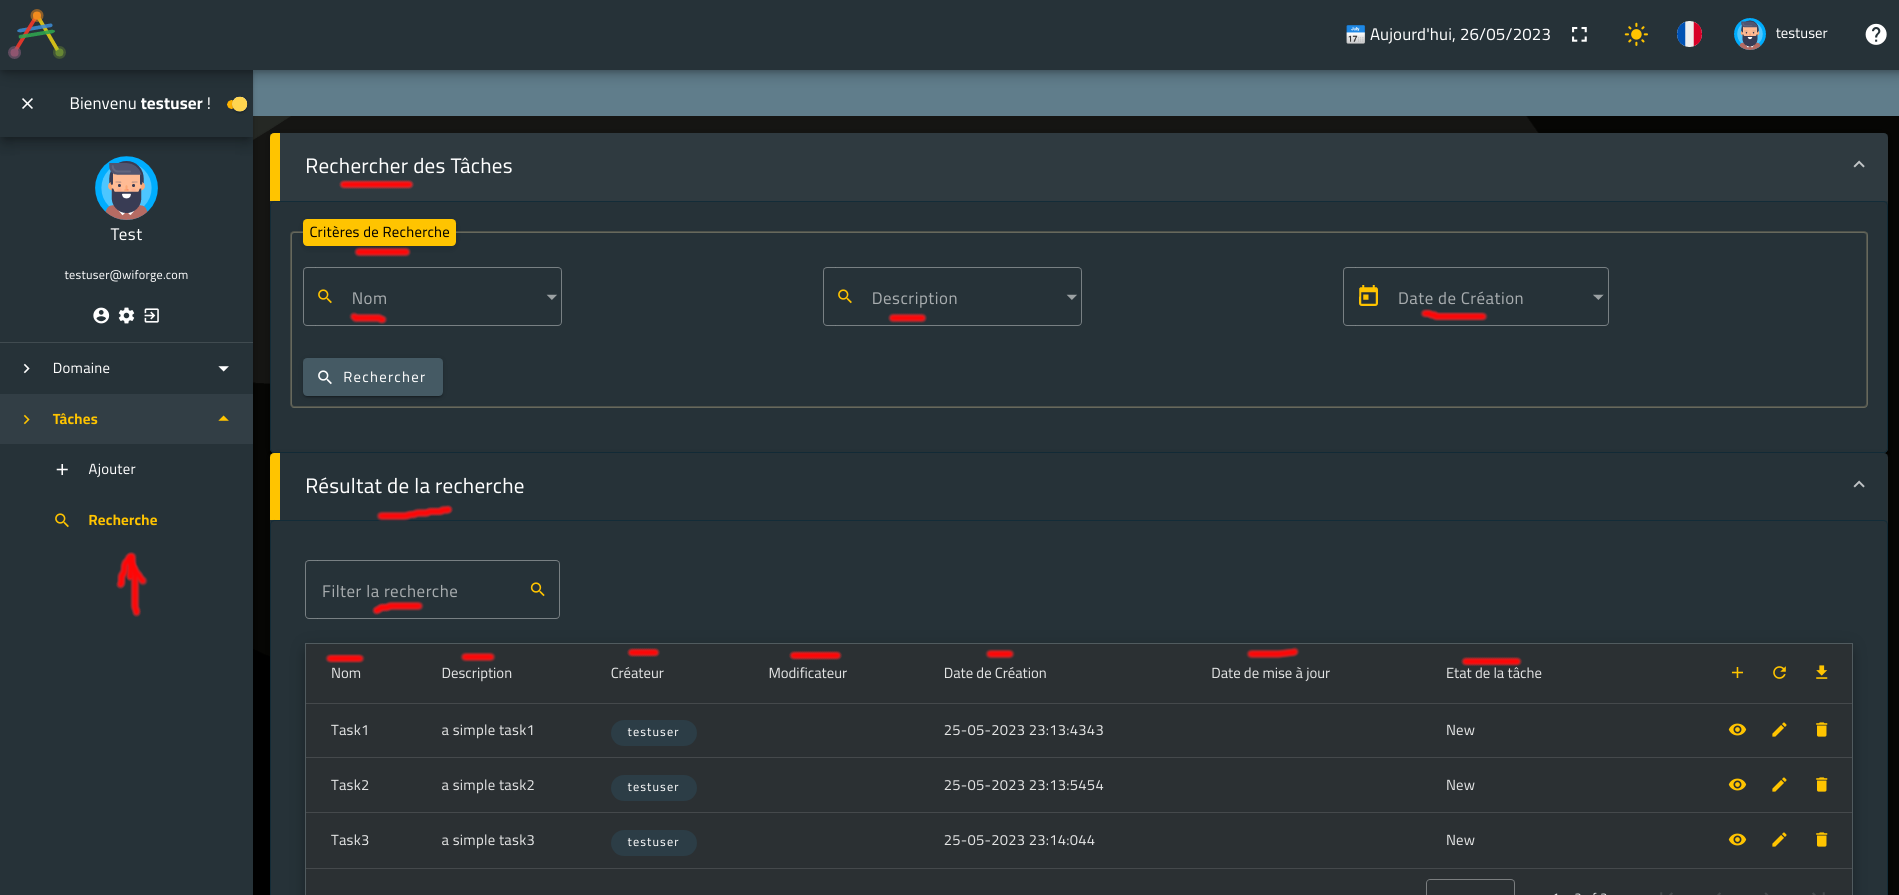
Now you know how to teach your application new words in different language, go ahead and try to teach it how to say “Search a Task” in French (or in whatever language you proceeded with) by executing the following commands:
ℹ️ Note that the first command will update the Search ToDoTask Use Case Title in french language; whereas the second one will update the menu link item label related to the previous use case also in French.
   ng g @wiforge/averos:add-translation-entry --key=uc.search.todotask.title --value='Rechercher des Tâches' --lang=fr

   ng g @wiforge/averos:add-translation-entry --key=menu.todotask.search --value='Recherche' --lang=fr
The output of both commands should look like the following:

Now, let rebuild and redeploy our application.
Here is what the application looks like after learning these two words:
Let’s switch to English and see what it looks like:
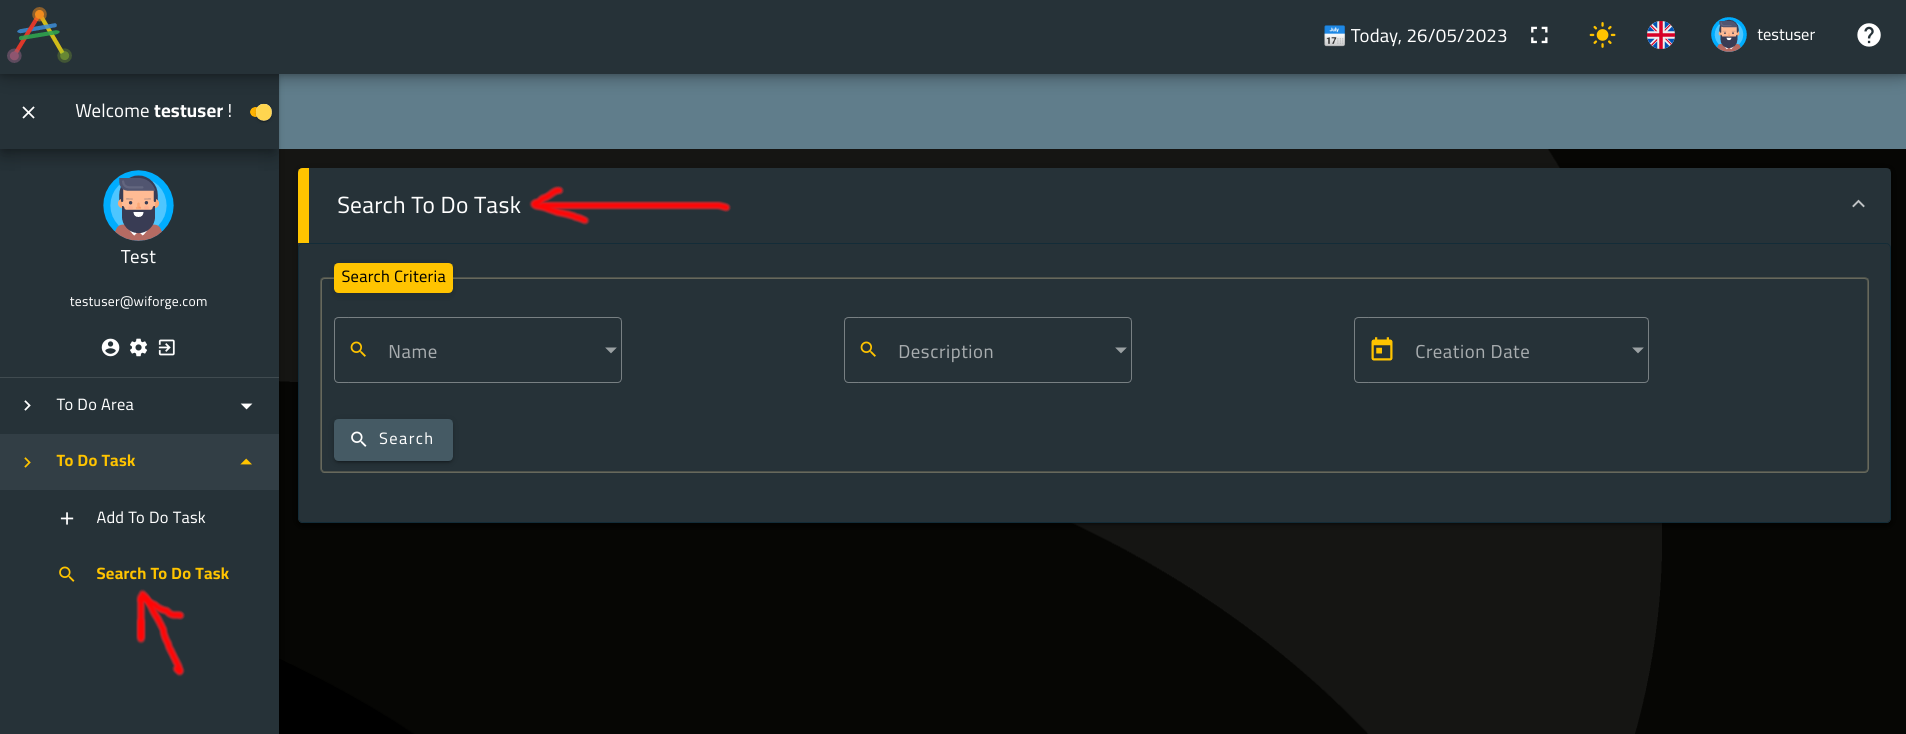
If you want to change the default
Englishlabels as well just use the same command with the appropriate language code.Example:
ng g @wiforge/averos:add-translation-entry --key=menu.todotask.search --value='Search' --lang=en
Finally, go ahead and execute the following commands to finalize your application learning.
ng g @wiforge/averos:add-translation-entry --key=todoarea.todotasks --value='Tâches' --lang=fr && ng g @wiforge/averos:add-translation-entry --key=todotask.status --value='Etat de la tâche' --lang=fr && ng g @wiforge/averos:add-translation-entry --key=todoarea.name --value='Nom' --lang=fr && ng g @wiforge/averos:add-translation-entry --key=todoarea.description --value='Description' --lang=fr && ng g @wiforge/averos:add-translation-entry --key=todoarea.createdat --value='Date de Création' --lang=fr && ng g @wiforge/averos:add-translation-entry --key=todotask.name --value='Nom' --lang=fr && ng g @wiforge/averos:add-translation-entry --key=todotask.description --value='Description' --lang=fr && ng g @wiforge/averos:add-translation-entry --key=todotask.createdat --value='Date de Création' --lang=fr && ng g @wiforge/averos:add-translation-entry --key=todotask.updatedat --value='Date de mise à jour' --lang=fr && ng g @wiforge/averos:add-translation-entry --key=todoarea.updatedat --value='Date de mise à jour' --lang=fr && ng g @wiforge/averos:add-translation-entry --key=uc.create.todoarea.title --value='Créer un domaine' --lang=fr && ng g @wiforge/averos:add-translation-entry --key=uc.create.todoarea.label --value='Details du domaine' --lang=fr && ng g @wiforge/averos:add-translation-entry --key=uc.edit.todoarea.title --value='Editer un domaine' --lang=fr && ng g @wiforge/averos:add-translation-entry --key=uc.edit.todoarea.label --value='Détail du domaine' --lang=fr && ng g @wiforge/averos:add-translation-entry --key=uc.view.todoarea.title --value='Consulter un domaine' --lang=fr && ng g @wiforge/averos:add-translation-entry --key=uc.view.todoarea.label --value='Details du domaine' --lang=fr && ng g @wiforge/averos:add-translation-entry --key=uc.search.todoarea.title --value='Recherche de domaine' --lang=fr && ng g @wiforge/averos:add-translation-entry --key=uc.search.todoarea.label --value='Critères de recherche' --lang=fr && ng g @wiforge/averos:add-translation-entry --key=menu.todoarea --value='Domaine' --lang=fr && ng g @wiforge/averos:add-translation-entry --key=menu.todoarea.search --value='Rechercher' --lang=fr && ng g @wiforge/averos:add-translation-entry --key=menu.todoarea.add --value='Ajouter' --lang=fr && ng g @wiforge/averos:add-translation-entry --key=uc.create.todotask.title --value='Créer Une Tâche' --lang=fr && ng g @wiforge/averos:add-translation-entry --key=uc.create.todotask.label --value='Détails de la tâche' --lang=fr && ng g @wiforge/averos:add-translation-entry --key=uc.edit.todotask.title --value='Editer une tâche' --lang=fr && ng g @wiforge/averos:add-translation-entry --key=uc.edit.todotask.label --value='Détails de la tâche' --lang=fr && ng g @wiforge/averos:add-translation-entry --key=uc.view.todotask.title --value='Consulter les Tâches' --lang=fr && ng g @wiforge/averos:add-translation-entry --key=uc.view.todotask.label --value='Détails de la Tâche' --lang=fr && ng g @wiforge/averos:add-translation-entry --key=menu.todotask --value='Tâches' --lang=fr && ng g @wiforge/averos:add-translation-entry --key=menu.todotask.add --value='Ajouter' --lang=fr && ng g @wiforge/averos:add-translation-entry --key=uc.search.todotask.label --value='Critères de Recherche' --lang=fr && ng g @wiforge/averos:add-translation-entry --key=todotask.createdby --value='Créateur' --lang=fr && ng g @wiforge/averos:add-translation-entry --key=todotask.updatedby --value='Modificateur' --lang=fr && ng g @wiforge/averos:add-translation-entry --key=todoarea.createdby --value='Créateur' --lang=fr && ng g @wiforge/averos:add-translation-entry --key=todoarea.createdby --value='Créateur' --lang=fr && ng g @wiforge/averos:add-translation-entry --key=todoarea.updatedby --value='Modificateur' --lang=fr
Congratulations! Your application now speaks French fluently!
Let’s rebuild and redeploy our application, and see what it looks like:
1. shutdown the running server
http-server
2. build and deployToDoApplicationby running the following command:ng build ToDoApplication && http-server -p 8081 -c-1 dist/to-do-application
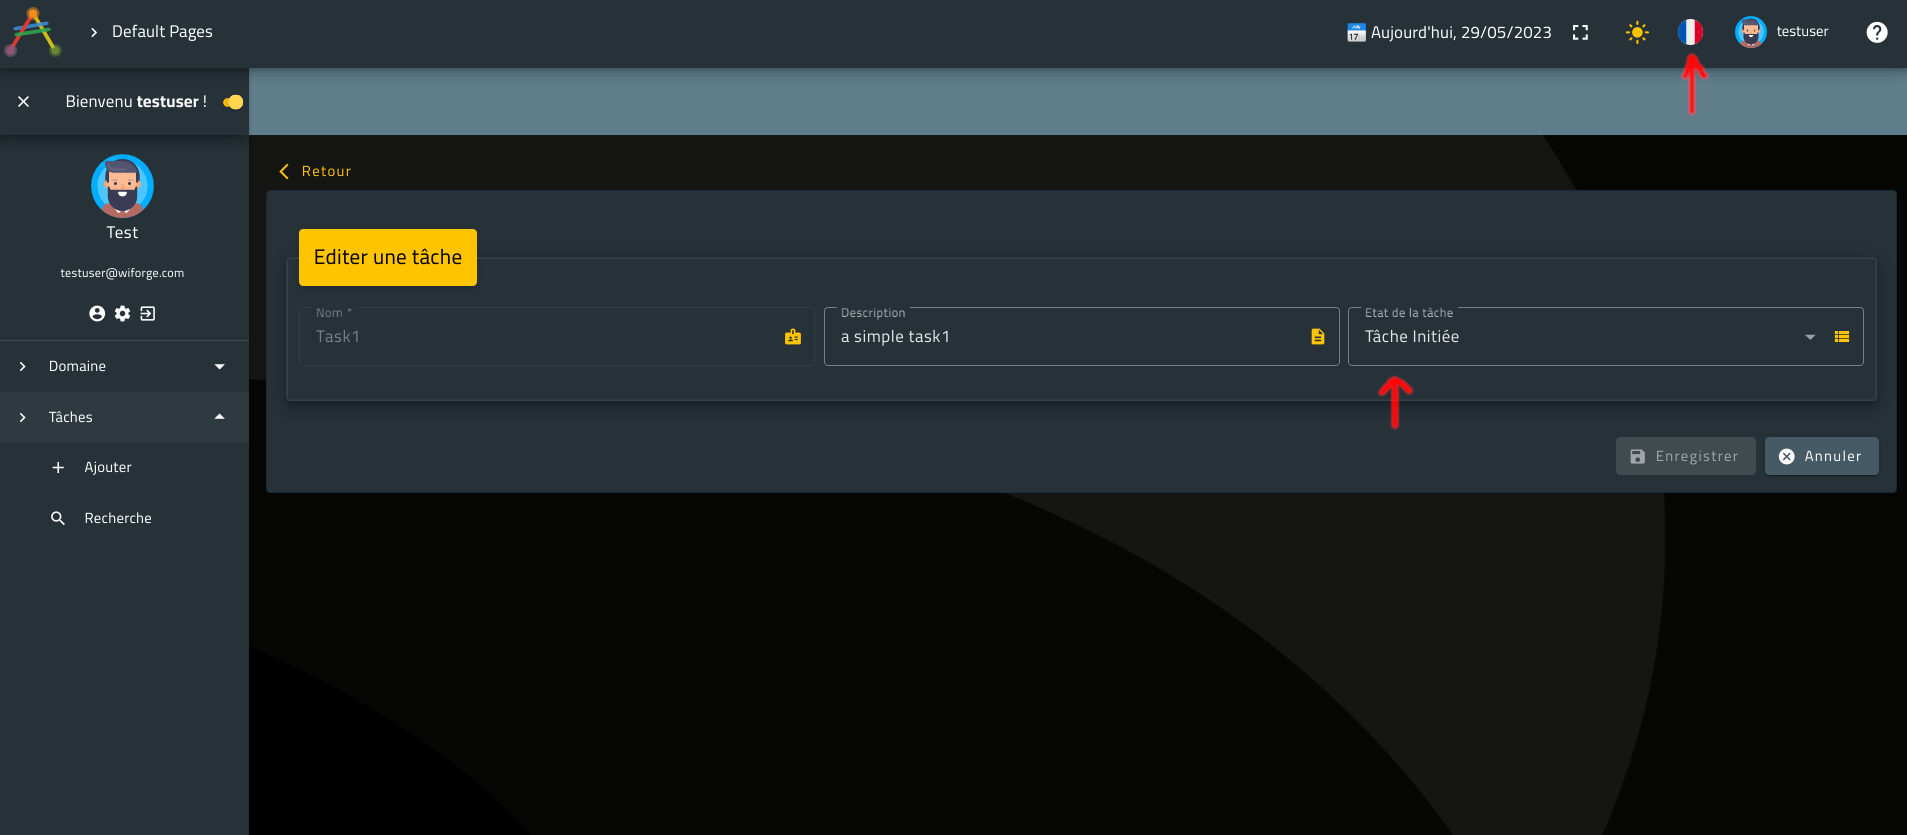
Here is what our application now looks like (Everything is almost translated into the new language you chose-French in my case):
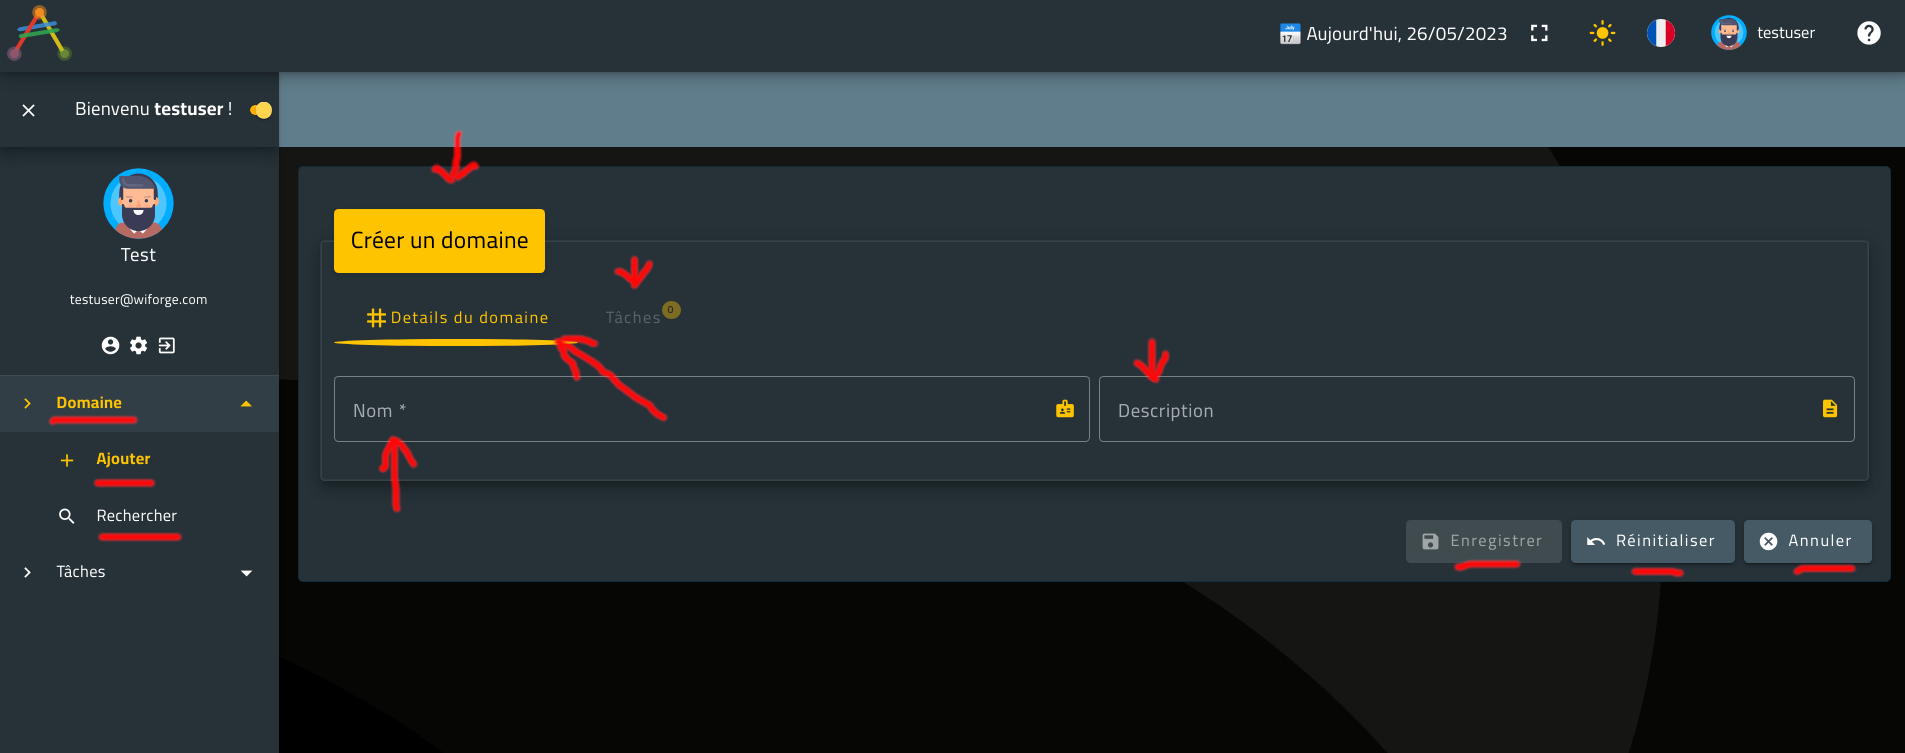
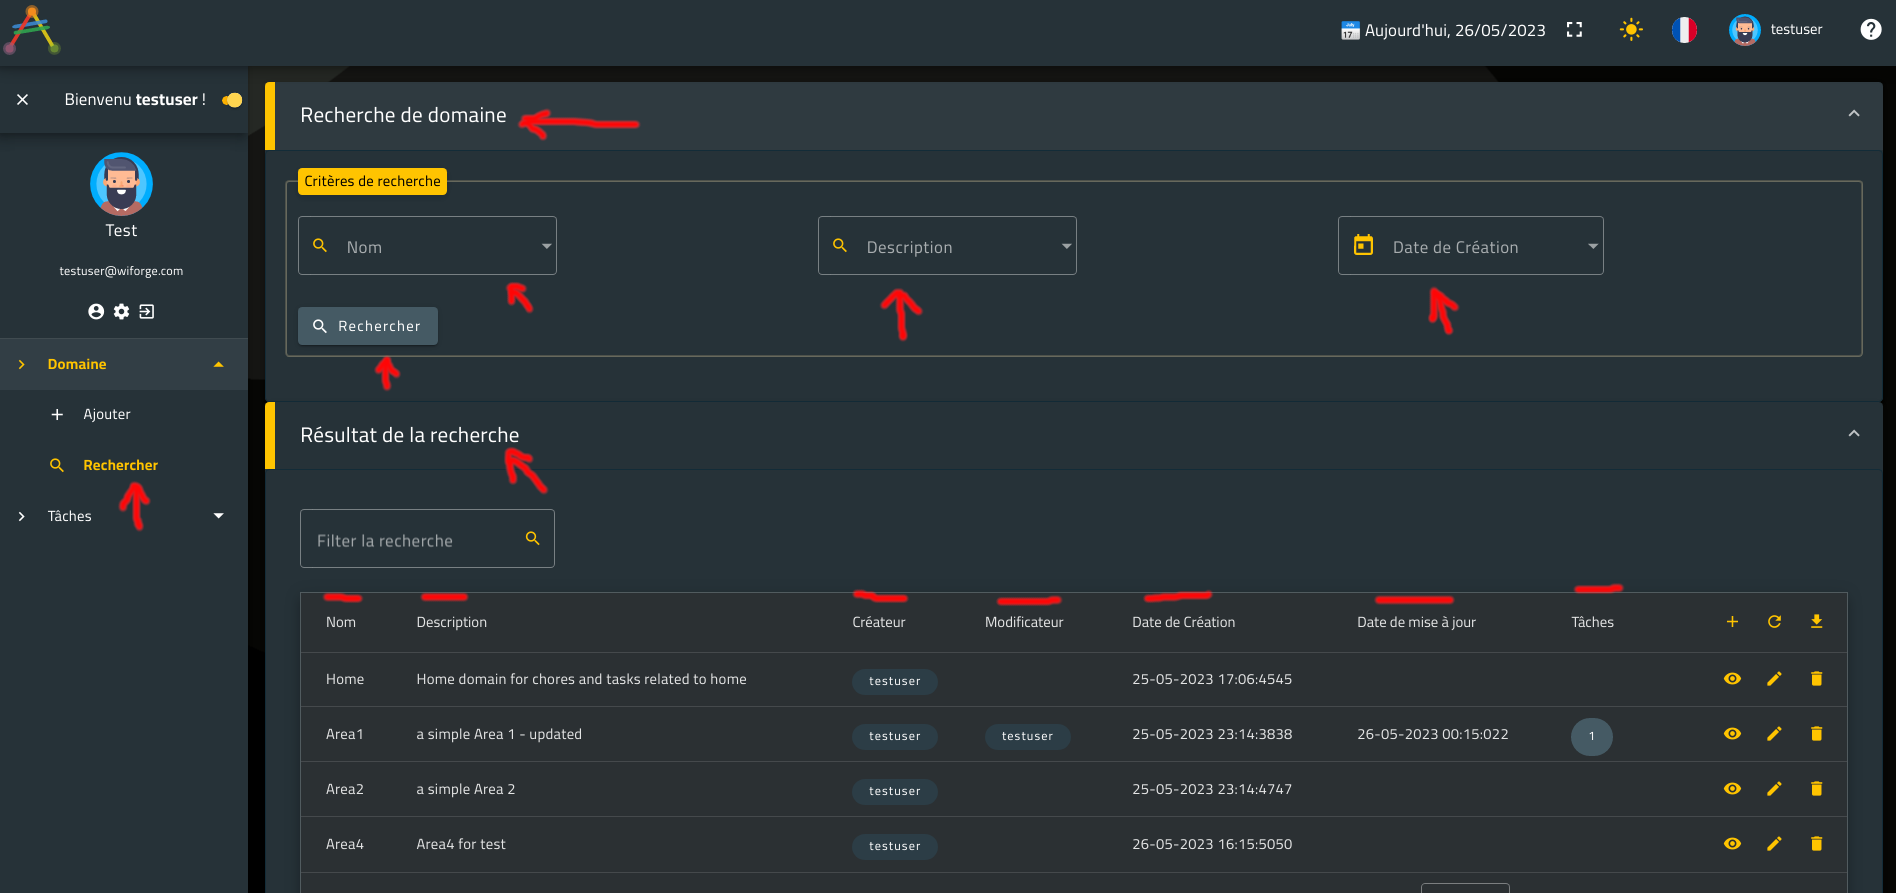
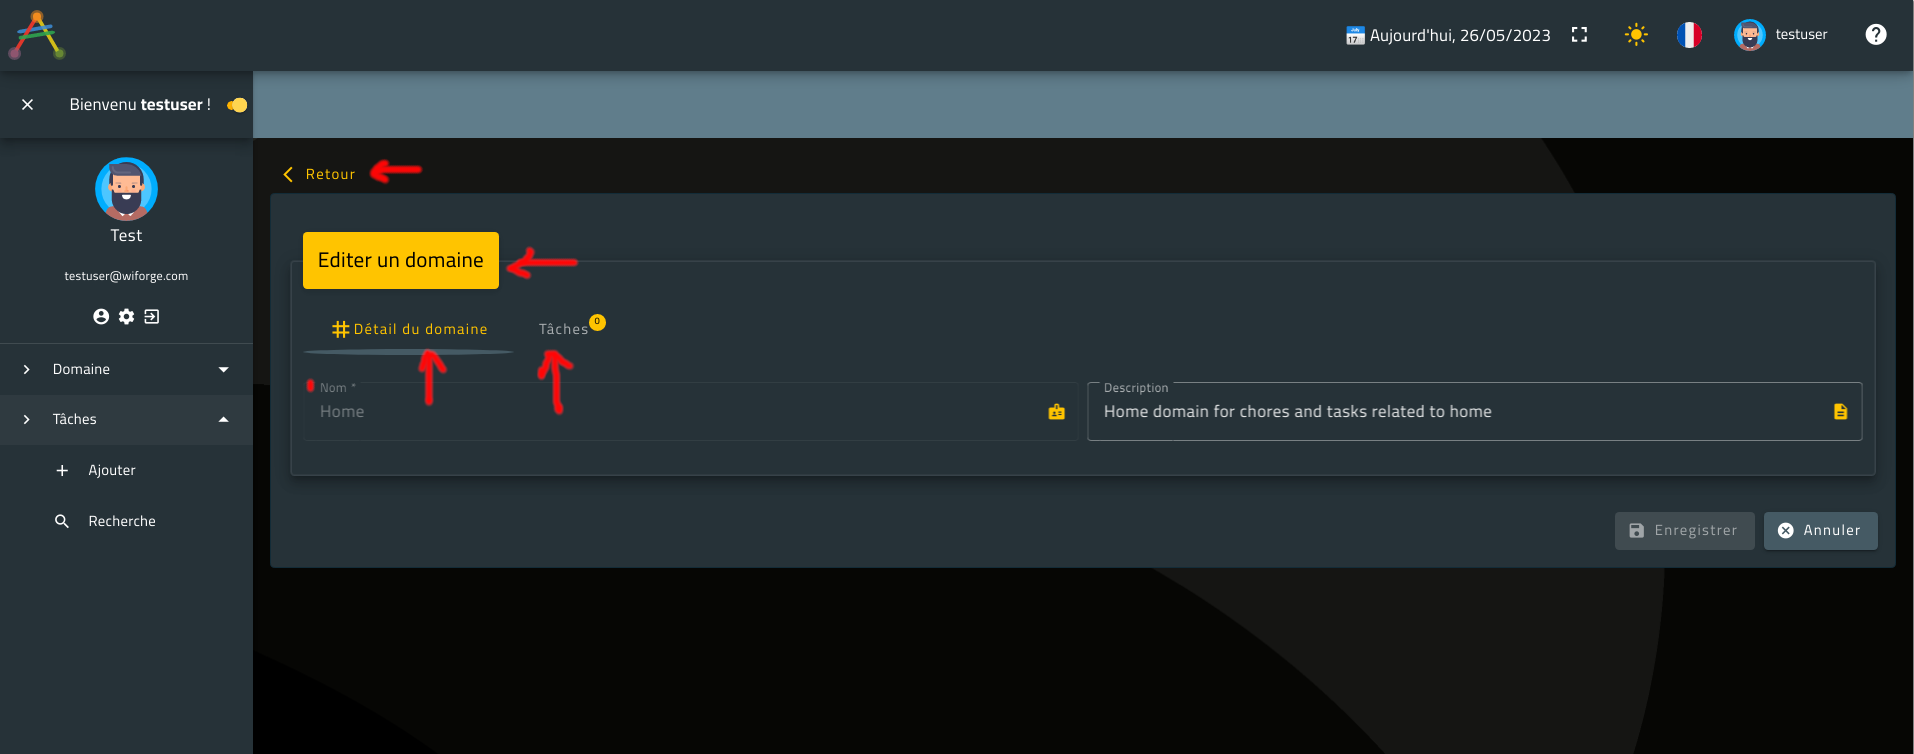
You might notice that almost every label and title available in your application have been translated into French.
Now let’s see another cool feature regarding entity values translation. Shall we ?
IV. Take Translation Even Further - Combo Values Translation
Remember, we defined the member status of type enumeration in the entity ToDoTask as a set of pre-defined values, namely, Active, Closed and New.
Do you recall how this member is displayed in a create/edit layout ?
In a comboComboBox! Yes!
Here is a reminder on what the member status of type enumeration looks like in create/edit layouts ?
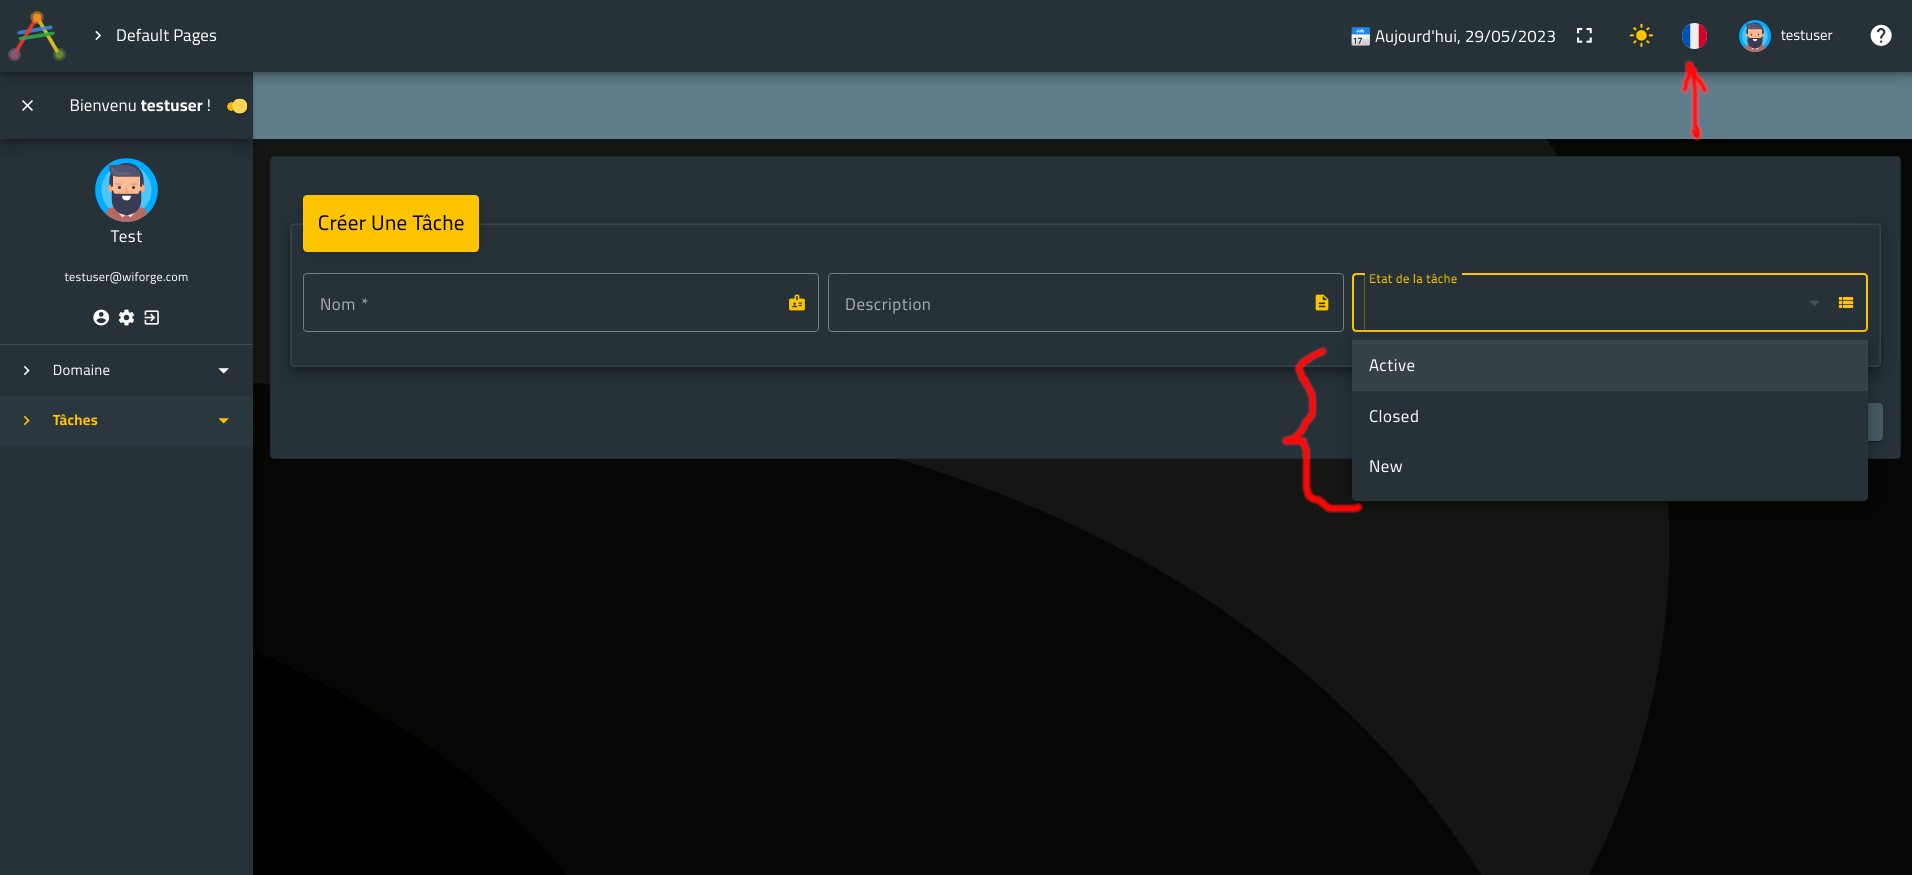
ℹ️ Note that the defined values of the
statusmember are displayed as is increateandeditlayouts.
Since status has a meaning, it is worth displaying it in the users’ language.
Naturally, users tend to spend much time with applications they understand but do not return to applications they do not understand.
Bringing a comprehensible application content to users, has the potential to considerably improve the user experience.
So, how about we change that member content into something French users would understand better ?
Sound good ? Let’s doi it then!
we are aiming to display a meaningful content for each status value instead of displaying the member values as they are defined.
Fortunately, averos framework comes handy for such a requirement.
ℹ️ Note that when you create a member of type
enumerationwith a default set of values usingaveros command workflow, averos frameworks creates translation keys for each value in the default set.
Translation keys forenumerationvalues are created according to the following pattern:[entityname].lowercase().[memberName].lowercase().[enum_Value].uppercase()This means that if we want to create translations for the the three
statusvalues (Active,ClosedandNew) we will need to address the following translation keys:
todotask.status.ACTIVEtodotask.status.CLOSEDtodotask.status.NEW
In light of the preceding, let’s create meaningful French translation values for the following translation keys:
todotask.status.ACTIVEtodotask.status.CLOSEDtodotask.status.NEW
Go ahead and execute the following three commands:
ng g @wiforge/averos:add-translation-entry --key=todotask.status.ACTIVE --value='Tâche Activée' --lang=fr
ng g @wiforge/averos:add-translation-entry --key=todotask.status.CLOSED --value='Tâche Finalisée' --lang=fr
ng g @wiforge/averos:add-translation-entry --key=todotask.status.NEW --value='Tâche Initiée' --lang=fr
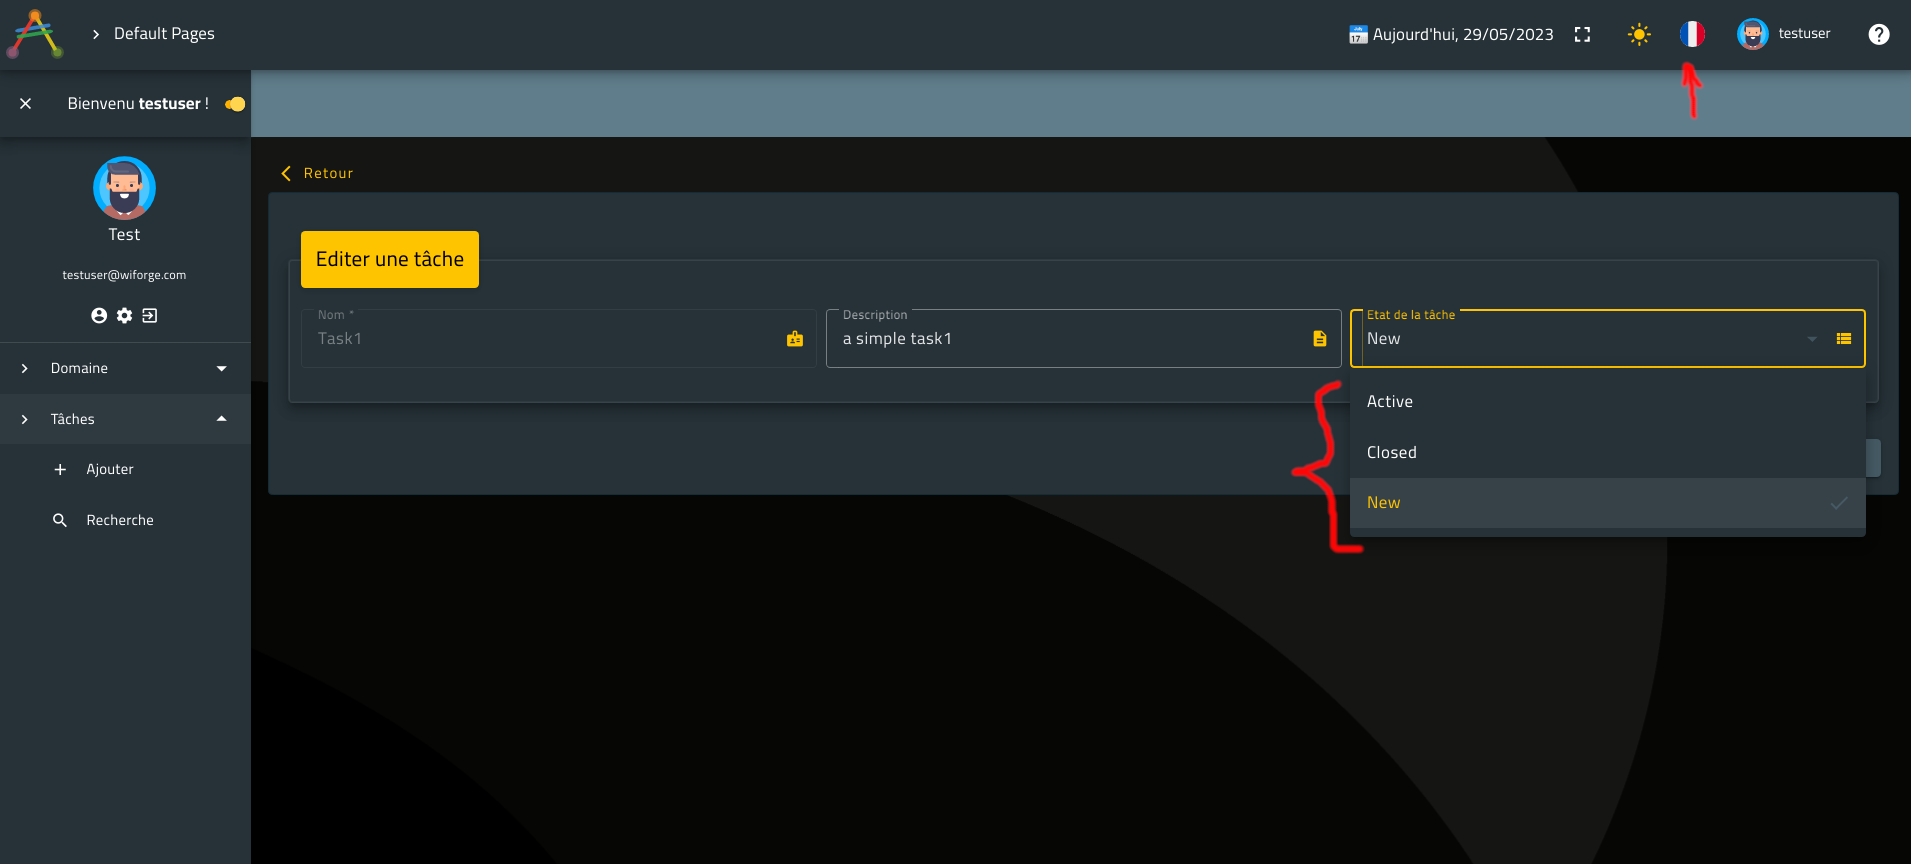
Let’s rebuild and redeploy our application, and see how the member status is displayed now:
1. shutdown the running server
http-server
2. build and deployToDoApplicationby running the following command:ng build ToDoApplication && http-server -p 8081 -c-1 dist/to-do-application
Here is what the member status looks like in create/edit layouts ?
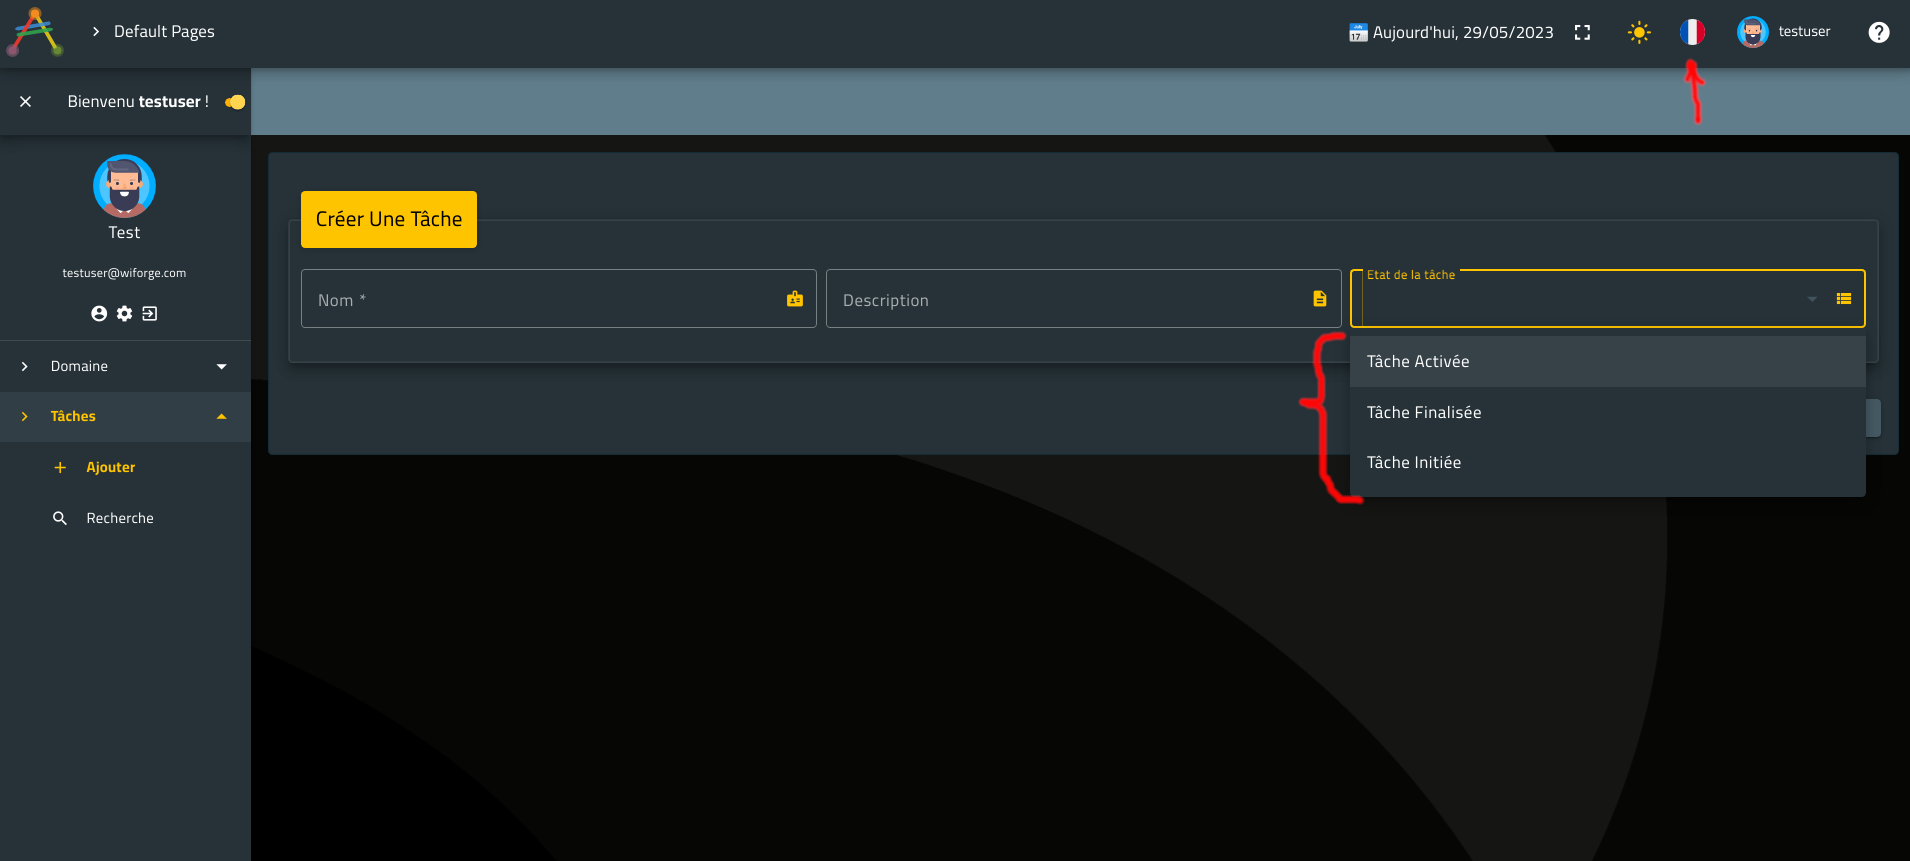
🚩 So far, we have only translated fixed values related to
enumerations.
In some cases,enumerationvalues are translated and displayed dynamically, depending on specific criteria.
This could be done usingaveros domain controllerswhich we won’t go into in this tutorial.
Please refer to the documentation for further details about Averos Domain Controllers.
Nice work! Your new application is humain friendly, supports multilanguage and cares about user experience.
You will find that, switching the application language to English, will modify the whole application language context and display almost instantly.
Averos Framework supports up to 11 languages out of the box, so you might want to experience with the framework by adding more languages and exposing your application to even wider audience.
🎉🎉🎉 Congratulations and thank you for finishing this tutorial! 🎉🎉🎉
Your ToDoApplication is now fully functional and ready to use!
In this step-by-step tutorial you have first designed your ToDoApplication and defined your business requirement.
Then, you have used averos framework to generate your application entities along with relevant use cases according to your business requirements.
Finally, you have added a new language to your application making it available for a wider audience.
In the next optional chapter, we are going to summarize what we have done so far.
Additionally, you will have the opportunity to learn how you can achieve all the things we have done in this tutorial in one shot.
🔖 Please note that, since this tutorial is dedicated to developers, we have not mentioned averos designer for nocode application development.
But if you are willing to know how averos framework addresses nocode topic, then you can check out our tutorial dedicated to citizen developers, into which, a simple user will create the same ToDoApplication you created in this tutorial using averos designer.
Hope to see you there!